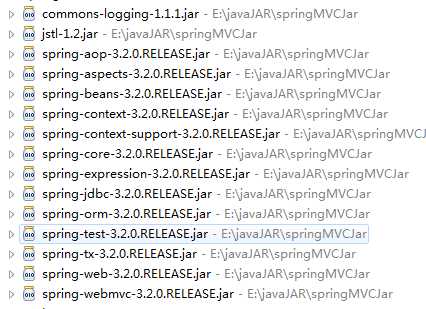
 这些是springMVC3.2所用到的jar包
web.xml配置
<?xml version="1.0" encoding="UTF-8"?>
<web-app xmlns:xsi="http://www.w3.org/2001/XMLSchema-instance" xmlns="http://java.sun.com/xml/ns/javaee" xmlns:web="http://java.sun.com/xml/ns/javaee/web-app_2_5.xsd" xsi:schemaLocation="http://java.sun.com/xml/ns/javaee http://java.sun.com/xml/ns/javaee/web-app_2_5.xsd" id="WebApp_ID" version="2.5">
  <display-name>springmvcfirst1208</display-name>

  <!-- springmvc前端控制器 -->
  <servlet>
  	<servlet-name>springmvc</servlet-name>
  	<servlet-class>org.springframework.web.servlet.DispatcherServlet</servlet-class>
  	<!-- contextConfigLocation配置springmvc加载的配置文件(配置处理器映射器、适配器等等)
  	如果不配置contextConfigLocation,默认加载的是/WEB-INF/servlet名称-serlvet.xml(springmvc-servlet.xml)
  	 -->
  	<init-param>
  		<param-name>contextConfigLocation</param-name>
  		<param-value>classpath:springmvc.xml</param-value>
  	</init-param>
  </servlet>

  <servlet-mapping>
  	<servlet-name>springmvc</servlet-name>
  	<url-pattern>*.action</url-pattern>
  </servlet-mapping>


  <welcome-file-list>
    <welcome-file>index.html</welcome-file>
    <welcome-file>index.htm</welcome-file>
    <welcome-file>index.jsp</welcome-file>
    <welcome-file>default.html</welcome-file>
    <welcome-file>default.htm</welcome-file>
    <welcome-file>default.jsp</welcome-file>
  </welcome-file-list>
</web-app>
上面我讲配置文件放在classpath下面,在项目件文件夹的时候要注意要选择新建source folder;如果新建文件夹的时候选择的是folder在调用url的时候就会提示找不到配置文件(找不到springmvc.xml)
springmvc.xml
<beans xmlns="http://www.springframework.org/schema/beans"
	xmlns:xsi="http://www.w3.org/2001/XMLSchema-instance" xmlns:mvc="http://www.springframework.org/schema/mvc"
	xmlns:context="http://www.springframework.org/schema/context"
	xmlns:aop="http://www.springframework.org/schema/aop" xmlns:tx="http://www.springframework.org/schema/tx"
	xsi:schemaLocation="http://www.springframework.org/schema/beans
		http://www.springframework.org/schema/beans/spring-beans-3.2.xsd
		http://www.springframework.org/schema/mvc
		http://www.springframework.org/schema/mvc/spring-mvc-3.2.xsd
		http://www.springframework.org/schema/context
		http://www.springframework.org/schema/context/spring-context-3.2.xsd
		http://www.springframework.org/schema/aop
		http://www.springframework.org/schema/aop/spring-aop-3.2.xsd
		http://www.springframework.org/schema/tx
		http://www.springframework.org/schema/tx/spring-tx-3.2.xsd ">

	<!-- 注解方式 适配器、解析器加载 -->
	<mvc:annotation-driven></mvc:annotation-driven>

	<!-- 注解扫描制定的包路径    默认扫描com.mvc.controllter下的所有包含注解的类-->
	<context:component-scan base-package="com.mvc.controller"></context:component-scan>

	<!-- 视图解析器 -->
	<bean class="org.springframework.web.servlet.view.InternalResourceViewResolver">
		<!-- 配置jsp路径的前缀 -->
		<property name="prefix" value="/WEB-INF/jsp/"/>
		<!-- 配置jsp路径的后缀 -->
		<property name="suffix" value=".jsp"/>
	</bean>
</beans>
controllter代码,没有查数据
package com.mvc.controller;

import java.util.ArrayList;
import java.util.Date;
import java.util.List;

import org.springframework.stereotype.Controller;
import org.springframework.web.bind.annotation.RequestMapping;
import org.springframework.web.servlet.ModelAndView;

import com.mvc.model.Items;

/***商品控制器*/
@Controller
@RequestMapping("/itemsController")
public class ItemsController {

	@RequestMapping("/queryItems")
	public ModelAndView queryItems(){

		List<Items> items=new ArrayList<Items>();

		Items items_1 = new Items();
		items_1.setName("小米note");
		items_1.setPrice(6000f);
		items_1.setDetail("ThinkPad");
		items_1.setCreatetime(new Date());

		Items items_2 = new Items();
		items_2.setName("荣耀华为plus");
		items_2.setPrice(5000f);
		items_2.setDetail("荣耀华为plus");
		items_2.setCreatetime(new Date());

		items.add(items_1);
		items.add(items_2);

		ModelAndView modelAndView=new ModelAndView();
		modelAndView.addObject("items", items);
		modelAndView.setViewName("items/itemsList");

		return modelAndView;
	}
}
前面springmvc.xml中将视图解析器的路径配置在/WEB-INF/jsp/下,文件名后缀为.jsp,所以对应的jsp路径就是/WEB-INF/jsp/items/itemsList.jsp
原文:http://www.cnblogs.com/ph123/p/4619971.html