目前android流行的包含多个功能的网络应用的布局中,有一个类似于windws属性页的布局得到广泛应用,其效果大致类似于多窗口浏览器的标签页,多个activity通过不同的标签页在同一屏幕中显示和切换。这一效果大致是通过Tabhost和一些其他控件结合实现,当然也可以不通过Tabhost,使用ViewPager加一些button也可以实现大致的效果。
1.使用TabHost+ActivityGroup实现,ActivityGroup已经不再使用,这里使用别人写好的例子。参考:http://wazai.net/2114
承上篇文章Android TabHost Without TabActivity,在MainActivity中的TabHost加入頁籤。
1 2 3 | mHost.addTab(mHost.newTabSpec(getString(R.string.tab_two_name)) .setIndicator(getString(R.string.tab_two_name)) .setContent(new Intent(this, ActivityGroup1.class))); |
小蛙在測試了上面兩篇文章的方法後發現,必須要在ActivityGroup1中直接先載入Activity1(也就是ActivityGroup僅用來"操作"這些Activity,並沒有實質的內容呈現,如果讓ActivityGroup在這邊有自己的內容呈現,會造成Back Stack運作錯誤,也有可能是小蛙實作上出了問題,如果照著上面兩篇文章試不出來的網友,不妨參照小蛙的做法),以下是ActivityGroup1的程式碼:
1 2 3 4 5 6 7 8 9 10 11 12 13 14 15 16 17 18 19 20 21 22 23 24 25 26 27 28 29 30 31 32 33 34 35 36 37 38 39 40 41 42 43 44 45 46 47 48 49 50 51 52 53 54 55 56 57 58 59 60 61 | public class ActivityGroup1 extends ActivityGroup{ /** 設定成 static 讓其他的子 Activity 可以存取 */ public static ActivityGroup1 group; /** Back Stack */ private ArrayList<View> history; @Override public void onCreate(Bundle savedInstanceState) { super.onCreate(savedInstanceState); this.history = new ArrayList<View>(); group = this; // ActivityGroup1 只是一個外框,在這個外框中載入其他要用的 Activity // 如果沒有這個外框會發生錯誤 View view = getLocalActivityManager() .startActivity("Activity1", new Intent(ActivityGroup1.this, Activity1.class).addFlags(Intent.FLAG_ACTIVITY_CLEAR_TOP)) .getDecorView(); // 馬上載入真正要執行的 Activity replaceView(view); } /** * 在 ActivityGroup 中切換 Activity * @param v */ public void replaceView(View v) { // 可在這插入換頁動畫 history.add(v); setContentView(v); } /** * 當使用者按下 back 的時候,把之前存起來的 stack 撈回來顯示 */ public void back() { // 原本的範例是寫 > 0,但會發生錯誤 if(history.size() > 1) { history.remove(history.size()-1); View v = history.get(history.size()-1); // 可在這插入換頁動畫 setContentView(v); }else { // back stack 沒有其他頁面可顯示,直接結束 finish(); } } /** * 複寫聆聽按下 back 事件,呼叫 back() */ // 由於我的股票精算師是使用1.6+,因此採用onKeyDown來監聽 @Override public boolean onKeyDown(int keyCode, KeyEvent event) { switch (keyCode) { case KeyEvent.KEYCODE_BACK: back(); break; } return true; }} |
至於在Activity1中的設定如下:
1 2 3 4 5 6 7 8 9 10 11 12 13 14 15 16 | public class Activity1 extends Activity{ @Override protected void onCreate(Bundle savedInstanceState) { super.onCreate(savedInstanceState); setContentView(R.layout.activity1); Button button = (Button) findViewById(R.id.button1); button.setOnClickListener(new View.OnClickListener() { @Override public void onClick(View v) { // 如果沒有這個外框會發生錯誤 View view = ActivityGroup1.group.getLocalActivityManager().startActivity("Activity2", new Intent(Activity1.this, Activity2.class).addFlags(Intent.FLAG_ACTIVITY_CLEAR_TOP)).getDecorView(); // 載入真正要執行的 Activity ActivityGroup1.group.replaceView(view); } });} |
基本上到這邊就已經可以正常運作囉!有什麼問題可以留言在這邊,小蛙會盡可能的協助解決。
2.使用LocalActivityManager+TabHost,LocalActivityManager也是一个新版本已经不再使用,可见这一经典布局渊源流长,这里借用别人的代码说明,摘自:http://www.cnblogs.com/mybkn/articles/2507857.html
2012-05-07 更新)接續Android TabHost中切換Activity記錄了使用ActivityGroup達到在TabHost中切換Activity的方法,也在Android Screen Orientation Event螢幕方向處理+Acitivity Liftcycle記錄了當螢幕方向改變時的處理,這篇小蛙繼續記錄用FragmentActivity取代ActivityGroup,透過FragmentActivity內建的BackStack來管理倒退歷程。
MainTabActivity.java : 主要的Tabhost Activity。

public class MainTabActivity extends Activity {
    private TabHost mHost;
    // 在Activity中使用Tabhost必須要有LocalActivityManager物件來設定
    LocalActivityManager lam;
    @Override
    public void onCreate(Bundle savedInstanceState) {
        super.onCreate(savedInstanceState);
        setContentView(R.layout.main);
        // main layout採用預設的Tabhost
        mHost = (TabHost) findViewById(android.R.id.tabhost);

        lam = new LocalActivityManager(MainTabActivity.this, false);
        lam.dispatchCreate(savedInstanceState);

        mHost.setup(lam);
        mHost.addTab(mHost.newTabSpec("Tab1").setIndicator("Tab1").setContent(new Intent(MainTabActivity.this, FragmentActivity1.class)));
        mHost.addTab(mHost.newTabSpec("Tab2").setIndicator("Tab2").setContent(new Intent(MainTabActivity.this, FragmentActivity2.class)));
    }
    @Override
    protected void onPause() {
        // 漏掉這行一定出錯
        lam.dispatchPause(isFinishing());
        super.onPause();
    }
    @Override
    protected void onResume() {
        // 漏掉這行一定出錯
        lam.dispatchResume();
        super.onResume();
    }
}
FragmentActivity1.java : 第一個Tab中用來管理Fragment的FragmentActivity。(2012-05-07更新)經由Jay留言後,小蛙詳細測了一下,發現FragmentActivity主畫面中的Button是沒辦法消失的(因為FragmentActivity的目的關係),因此改成這樣,讓FragmentActivity純粹當成容器,主要的內容還是以Fragment為主。(這個方法不是唯一,但是一個可行的方法,應該也有更好的做法!)
public class FragmentActivity1 extends FragmentActivity {
    public static FragmentManager fm;
    @Override
    public void onCreate(Bundle savedInstanceState) {
        super.onCreate(savedInstanceState);
        setContentView(R.layout.fragment_activity_1);
        fm = getSupportFragmentManager();
        // 只當容器,主要內容已Fragment呈現
        initFragment(new Fragment1());
    }
    // 切換Fragment
    public static void changeFragment(Fragment f){
        changeFragment(f, false);
    }
    // 初始化Fragment(FragmentActivity中呼叫)
    public static void initFragment(Fragment f){
        changeFragment(f, true);
    }
    private static void changeFragment(Fragment f, boolean init){
        FragmentTransaction ft = fm.beginTransaction();
        ft.replace(R.id.simple_fragment, f);
        if(!init)
            ft.addToBackStack(null);
        ft.commit();
    }
}
Fragment1.java : 真正使用到的Fragment。
public class Fragment1 extends Fragment {
    @Override
    public View onCreateView(LayoutInflater inflater, ViewGroup container, Bundle savedInstanceState) {
        View v = inflater.inflate(R.layout.fragment_1, container, false);
        Button tv = (Button)v.findViewById(R.id.button2);
        tv.setOnClickListener(new View.OnClickListener() {
            @Override
            public void onClick(View v) {
                // 直接呼叫FragmentActivity1的靜態方法來做切換
                FragmentActivity1.changeFragment(new Fragment2());
            }
        });
        return v;
    }
}
fragment_acitivity_1.xml : FragmentActivity layout。(2012-05-07修改) FragmentActivity只用來當容器,而不真正呈現內容(僅把Fragment內容載入)。
<?xml version="1.0" encoding="utf-8"?>
<LinearLayout xmlns:android="http://schemas.android.com/apk/res/android"
    android:layout_width="fill_parent"
    android:layout_height="fill_parent"
    android:orientation="vertical"
    android:id="@+id/simple_fragment">
</LinearLayout>
fragment1.xml:Fragment layout,FragmentActivity載入的真正內容。
<?xml version="1.0" encoding="utf-8"?>
<LinearLayout xmlns:android="http://schemas.android.com/apk/res/android"
    android:layout_width="fill_parent"
    android:layout_height="fill_parent"
    android:orientation="vertical">
    <Button
        android:id="@+id/button2"
        android:layout_width="wrap_content"
        android:layout_height="wrap_content"
        android:text="Button" />
</LinearLayout>
最後別忘了在AndroidManifest.xml中加入android:configChanges="orientation"設定。這樣就成功的使用在Activity中使用Tabhost並且透過FragmentActivity來管理Fragment囉!
3.TabHost+TabActivity实现,同样在新版本中不再支持。自己写了个实例研究。
public class addall extends TabActivity {

	@Override
	protected void onCreate(Bundle savedInstanceState) {
		super.onCreate(savedInstanceState);
		setContentView(R.layout.add_tool);
		Resources res = getResources(); // Resource object to get Drawables
		TabHost tabHost = getTabHost(); // The activity TabHost
		TabHost.TabSpec spec; // Resusable TabSpec for each tab
		Intent intent; // Reusable Intent for each tab

		// Create an Intent to launch an Activity for the tab (to be reused)
		intent = new Intent().setClass(this, AppAppActivity.class);
		// Initialize a TabSpec for each tab and add it to the TabHost
		View good = (View) LayoutInflater.from(this).inflate(R.layout.tabmini, null);
		TextView text1 = (TextView) good.findViewById(R.id.tab_label);
        text1.setText(R.string.total);
		spec = tabHost.newTabSpec("good");
		//spec.setIndicator(null,res.getDrawable(R.drawable.ic_tab_artists));
		spec.setIndicator(good);
		spec.setContent(intent);
		tabHost.addTab(spec);

		// Do the same for the other tabs

		intent = new Intent().setClass(this, AppToolActivity.class);
		View tool = (View) LayoutInflater.from(this).inflate(R.layout.tabmini, null);
		TextView text2 = (TextView) tool.findViewById(R.id.tab_label);
        text2.setText(R.string.tools);
		spec = tabHost.newTabSpec("tools");
		//spec.setIndicator(null,res.getDrawable(R.drawable.ic_tab_artists));
		spec.setIndicator(tool);
		spec.setContent(intent);
		tabHost.addTab(spec);

		tabHost.setCurrentTab(0);
	}

	@Override
	public boolean onCreateOptionsMenu(Menu menu) {
		// Inflate the menu; this adds items to the action bar if it is present.
		getMenuInflater().inflate(R.menu.main, menu);
		return true;
	}

}
<?xml version="1.0" encoding="utf-8"?>
<TabHost xmlns:android="http://schemas.android.com/apk/res/android"
    android:id="@android:id/tabhost"
    android:layout_width="fill_parent"
    android:layout_height="fill_parent" >

    <LinearLayout
        android:layout_width="fill_parent"
        android:layout_height="fill_parent"
        android:orientation="vertical"
        android:padding="5dp" >

        <TabWidget
            android:id="@android:id/tabs"
            android:layout_width="fill_parent"
            android:layout_height="wrap_content"
            android:baselineAligned="true"
            android:divider="@null"
            android:dividerPadding="0dp"
            android:tabStripEnabled="false"
            android:showDividers="none|none"

            />

        <FrameLayout
            android:id="@android:id/tabcontent"
            android:layout_width="fill_parent"
            android:layout_height="fill_parent"
            android:padding="0dp"
            />
    </LinearLayout>

</TabHost>
<LinearLayout xmlns:android="http://schemas.android.com/apk/res/android"
android:layout_width="fill_parent"
android:layout_height="wrap_content"
android:layout_marginBottom="0dp"
android:background="@drawable/topbar_red"
android:gravity="bottom"
android:orientation="vertical"
android:paddingLeft="5dip"
android:paddingRight="5dip" >
<TextView
android:id="@+id/tab_label"
android:layout_width="fill_parent"
android:layout_height="wrap_content"
android:layout_gravity="center_horizontal|top"
android:background="#00000000"
android:gravity="center_horizontal|top"
android:textSize="@dimen/Medium_text_size"
android:textColor="#ffffffff"
android:textStyle="bold" />
<ImageView
android:id="@+id/imageView1"
android:layout_width="wrap_content"
android:layout_height="wrap_content"
android:layout_gravity="bottom|center_horizontal"
android:src="@drawable/tab_arrow" />
</LinearLayout>4。TabHost+FragmentActivity,这个是目前官方建议的方式
public class MainActivity extends FragmentActivity {
	TabHost tHost;

	@Override
	public void onCreate(Bundle savedInstanceState) {
		super.onCreate(savedInstanceState);
		setContentView(R.layout.activity_main);

		tHost = (TabHost) findViewById(android.R.id.tabhost);
		tHost.setup();

		/** Setting tabchangelistener for the tab */
		tHost.setOnTabChangedListener(tabChangeListener);

		/** Defining tab builder for Andriod tab */
		TabHost.TabSpec tSpecAndroid = tHost.newTabSpec("Autognosis");
		tSpecAndroid.setIndicator("快速自诊",
				getResources().getDrawable(R.drawable.android));
		tSpecAndroid.setContent(new DummyTabContent(getBaseContext()));
		tHost.addTab(tSpecAndroid);

		/** Defining tab builder for Apple tab */
		TabHost.TabSpec tSpecApple = tHost.newTabSpec("Doctor");
		tSpecApple.setIndicator("求医问药",
				getResources().getDrawable(R.drawable.apple));
		tSpecApple.setContent(new DummyTabContent(getBaseContext()));
		tHost.addTab(tSpecApple);

		TabHost.TabSpec tSpecAndroid1 = tHost.newTabSpec("News");
		tSpecAndroid1.setIndicator("论坛新闻",
				getResources().getDrawable(R.drawable.android));
		tSpecAndroid1.setContent(new DummyTabContent(getBaseContext()));
		tHost.addTab(tSpecAndroid1);

		TabHost.TabSpec tSpecApple1 = tHost.newTabSpec("Center");
		tSpecApple1.setIndicator("我的中心",
				getResources().getDrawable(R.drawable.apple));
		tSpecApple1.setContent(new DummyTabContent(getBaseContext()));
		tHost.addTab(tSpecApple1);

	}
	@Override
	public void onAttachedToWindow() {
		// TODO Auto-generated method stub
		super.onAttachedToWindow();
	}
	/**
	 * Defining Tab Change Listener event. This is invoked when tab is
	 * changed
	 */
	private TabHost.OnTabChangeListener tabChangeListener = new TabHost.OnTabChangeListener() {
		@Override
		public void onTabChanged(String tabId) {
			android.support.v4.app.FragmentManager fm = getSupportFragmentManager();

			AutognosisFragment autognosisFragment = (AutognosisFragment) fm
					.findFragmentByTag("Autognosis");
			DoctorFragment doctorFragment = (DoctorFragment) fm
					.findFragmentByTag("Doctor");
			NewsFragment newsFragment = (NewsFragment) fm
					.findFragmentByTag("News");
			CenterFragment centerFragment = (CenterFragment) fm
					.findFragmentByTag("Center");
			FragmentTransaction ft = fm.beginTransaction();

			/** Detaches the applefragment if exists */
			if (autognosisFragment != null)
				ft.detach(autognosisFragment);

			/** Detaches the androidfragment if exists */
			if (doctorFragment != null)
				ft.detach(doctorFragment);

			/** Detaches the applefragment if exists */
			if (newsFragment != null)
				ft.detach(newsFragment);

			/** Detaches the applefragment if exists */
			if (centerFragment != null)
				ft.detach(centerFragment);

			/** If current tab is android */
		   if (tabId.equalsIgnoreCase("Autognosis")) {

				if (autognosisFragment == null) {
					/**
					 * Create AndroidFragment and adding to fragmenttransaction
					 */
					ft.add(R.id.realtabcontent, new AutognosisFragment(),
							"Autognosis");
				} else {
					/**
					 * Bring to the front, if already exists in the
					 * fragmenttransaction
					 */
					ft.attach(autognosisFragment);
				}

			} else if (tabId.equalsIgnoreCase("Doctor")) {

				if (doctorFragment == null) {
					/**
					 * Create AndroidFragment and adding to fragmenttransaction
					 */
					ft.add(R.id.realtabcontent, new DoctorFragment(),
							"Doctor");
				} else {
					/**
					 * Bring to the front, if already exists in the
					 * fragmenttransaction
					 */
					ft.attach(doctorFragment);
				}

			}
			else if (tabId.equalsIgnoreCase("News")) {

				if (newsFragment == null) {
					/**
					 * Create AndroidFragment and adding to fragmenttransaction
					 */
					ft.add(R.id.realtabcontent, new NewsFragment(),
							"News");
				} else {
					/**
					 * Bring to the front, if already exists in the
					 * fragmenttransaction
					 */
					ft.attach(newsFragment);
				}

			}else if (tabId.equalsIgnoreCase("Center")) {

				if (centerFragment == null) {
					/**
					 * Create AndroidFragment and adding to fragmenttransaction
					 */
					ft.add(R.id.realtabcontent, new CenterFragment(),
							"Center");
				} else {
					/**
					 * Bring to the front, if already exists in the
					 * fragmenttransaction
					 */
					ft.attach(centerFragment);
				}

			}
			else {

			}
			ft.commit();
		}
	};

	//@SuppressLint("ShowToast")
	public void BtnOnClick(View view) {
		// TODO Auto-generated method stub
		switch (view.getId()) {
		case R.id.button1:
		case R.id.button2:
        default:
        	Toast.makeText(MainActivity.this, "等待网络数据", Toast.LENGTH_LONG);
			break;
		}
	}
public class AutognosisFragment extends Fragment {
private static final String TAG = "Activity";
@Override
public View onCreateView(LayoutInflater inflater, ViewGroup container,
Bundle savedInstanceState) {
// TODO Auto-generated method stub
return inflater.inflate(R.layout.autognosis, container, false);
}
@Override
public void onActivityCreated(Bundle savedInstanceState) {
super.onActivityCreated(savedInstanceState);
}
public interface onToast{
public void onToast();
}
@SuppressLint("ShowToast")
public void BtnOnClick(View view) {
// TODO Auto-generated method stub
onToast ot;
switch (view.getId()) {
case R.id.button1:
case R.id.button2:
default:
Toast.makeText(getActivity(), "等待网络数据", Toast.LENGTH_LONG);
break;
}
}
}
public class DummyTabContent implements TabContentFactory{
    private Context mContext;

    public DummyTabContent(Context context){
            mContext = context;
    }

    @Override
    public View createTabContent(String tag) {
            View v = new View(mContext);
            return v;
    }
    public void BtnOnClick(View view) {
		// TODO Auto-generated method stub
		switch (view.getId()) {
		case R.id.button1:
		case R.id.button2:
        default:
        	Toast.makeText(mContext, "等待网络数据", Toast.LENGTH_LONG);
			break;
		}
	}

}
<TabHost xmlns:android="http://schemas.android.com/apk/res/android"
    android:id="@android:id/tabhost"
    android:layout_width="match_parent"
    android:layout_height="match_parent" >

    <LinearLayout
        android:layout_width="match_parent"
        android:layout_height="match_parent"
        android:orientation="vertical" >

        <FrameLayout
            android:id="@android:id/tabcontent"
            android:layout_width="0dp"
            android:layout_height="0dp"
            android:layout_weight="0" />

        <FrameLayout
            android:id="@+id/realtabcontent"
            android:layout_width="match_parent"
            android:layout_height="0dp"
            android:layout_weight="1" />

        <TabWidget
            android:id="@android:id/tabs"
            android:layout_width="match_parent"
            android:layout_height="wrap_content"
            android:layout_weight="0" />
    </LinearLayout>

</TabHost>
<LinearLayout xmlns:android="http://schemas.android.com/apk/res/android"
android:layout_width="fill_parent"
android:layout_height="fill_parent"
android:orientation="vertical" >
<TextView
android:id="@+id/textView1"
android:layout_width="match_parent"
android:layout_height="wrap_content"
android:text="快速自诊" />
<Button
android:id="@+id/button1"
android:layout_width="match_parent"
android:layout_height="wrap_content"
android:onClick="BtnOnClick"
android:text="小儿感冒" />
<Button
android:id="@+id/button2"
android:layout_width="match_parent"
android:layout_height="wrap_content"
android:onClick="BtnOnClick"
android:text="颈椎不适" />
<Button
android:id="@+id/button3"
android:layout_width="match_parent"
android:layout_height="wrap_content"
android:onClick="BtnOnClick"
android:text="失眠" />
<Button
android:id="@+id/button4"
android:layout_width="match_parent"
android:layout_height="wrap_content"
android:onClick="BtnOnClick"
android:text="便秘" />
<Button
android:id="@+id/button5"
android:layout_width="match_parent"
android:layout_height="wrap_content"
android:onClick="BtnOnClick"
android:text="效果评价" />
</LinearLayout>开始实现
创建FragmentActivity,总的代码如下:
setupTab*展示了如何获取ActionBar,如何创建和添加Tab组件到ActionBar中。
注意setTabListener这个接口,我们是必须设的,否则要报错,在看一下TabListener的实现,我们只在onTabSelected中写了一句代码,就是要求ViewPager显示出对应位置的Fragment。
oncreate 中的NAVIGATION_MODE_TABS定义了ActionBar的模式,后面两名是隐藏Tilte bar。
ViewPager是一个容器,用来放Fragment,我们需要在FragmentActivity中添加它,我加在layout文件中的:
TestViewPager是ViewPager的一个子类,实现代码如下:
再看一下getFragmentManager()和getSupportFragmentManager()这两个接口,它们的区别是,前者调用Android框架的FragmentManger,后者是获取Android扩展库中的V4的Support FragmentManager,着为独立的APP只能用后者,原因android.jar包中没有前者的实现。
我们再看看TestViewPagerAdapter的代码:
其实这个类就是关联ViewPager和Fragment,注意这些Index。
可能有的同学还是想看一下Fragment的实现:
android的界面技术还是很丰富的,一个重要的证明就是同一显示效果如果你愿意的话,常常能找到几十种实现的方法,即使是相同的类,相同的逻辑算法,不同的人使用,有时也会出现不同的实现方法。研究这些不同的实现方法,有时可以提升我们界面设计的素养,毕竟从可用,健壮,维护,优美的角度来看,同时考虑到andorid屏幕众多,版本升级频繁,硬件配置的差异,选择最好的界面实现方法也不算是孔已已!
大家好,今天我为大家分享TabHost中怎样修改TabWidget样式。在很多界面美观的应用中很多都用到了TabHost,但他们要比系统默认的要漂亮得多。先看几张图:
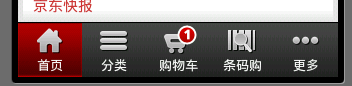
京东商城底部菜单栏
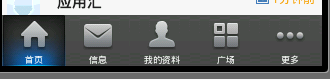
新浪微博底部菜单栏
好了,看到这些漂亮的菜单栏是不是很惊讶,你可能会说用Button就可以实现啊 ,可是用Button的话控制显示的内容很麻烦,不如用TabHost控制效率更高。很想知道用TabHost是怎么实现的吧,下面就来研究如何实现这种漂亮的TabHost。先看一下效果图:
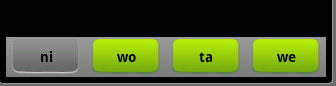
界面比较简单,要想做得漂亮换几张图片就可以了。
第一步:先在布局(这里用了main.xml创建时自动生成的)里面放上TabHost ,只要将TabHost控件托至屏幕中就可:
这里我们已经把LinearLayout和TextView去掉了,并将“xmlns:android="……" ”添加大TabHost里了,这里要注意我们将TabHost的id定义为自己定义的id比不用android规定的id="@android:id/tabhost"。
第二步:创建显示此TabWidget的布局tabmini.xml:
第三步:创建一个selector在drawable里面 命名tabmini.xml,用来点击TabHost的一个tab时TextView的变化:
第四步:在Activity里实现TabHost:
这里我们用findViewById创建了TabHost,这样的话我们就需要在添加tab时调用TabHost的setup()方法;这里我们添加内容时添加的是布局,我们完全可以换成自己创建的Activity。
好了,让我们来看看运行效果吧:
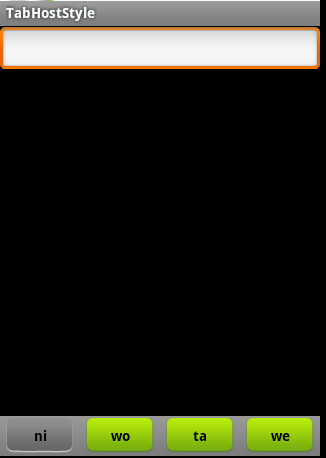
好了,我们自定义的TabHost算是结束了。不过看到Activity里的代码很多都是重复的我们可以这样把他们简化:
android的Tabhost使用,布布扣,bubuko.com
原文:http://blog.csdn.net/cnbloger/article/details/21383139