开发带jsp、PluginServlet的插件
有些插件是单纯的继承Plugin或Handler什么的,但有些是需要jsp页面和Servlet的。下面我们就来开发带jsp和servlet的插件。
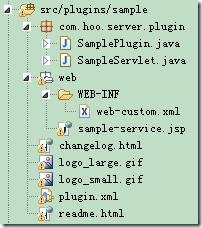
在之前的目录下添加文件,目录结构如下:
1、 首先建立一个SampleServlet的文件,内容如下
- package com.hoo.server.plugin;
-
- import java.io.IOException;
- import java.io.PrintWriter;
- import javax.servlet.ServletException;
- import javax.servlet.http.HttpServlet;
- import javax.servlet.http.HttpServletRequest;
- import javax.servlet.http.HttpServletResponse;
-
- public class SampleServlet extends HttpServlet {
-
- private static final long serialVersionUID = -5404916983906926869L;
-
- @Override
- public void init() throws ServletException {
- super.init();
- }
-
- @Override
- protected void doGet(HttpServletRequest request, HttpServletResponse response) throws ServletException, IOException {
- super.doGet(request, response);
-
- response.setContentType("text/plain");
- PrintWriter out = response.getWriter();
- System.out.println("请求SampleServlet GET Method");
- out.print("请求SampleServlet GET Method");
- out.flush();
- }
-
- @Override
- protected void doPost(HttpServletRequest request, HttpServletResponse response) throws ServletException, IOException {
- super.doPost(request, response);
-
- response.setContentType("text/plain");
- PrintWriter out = response.getWriter();
- System.out.println("请求SampleServlet GET Method");
- out.print("请求SampleServlet POST Method");
- out.flush();
- }
-
- @Override
- public void destroy() {
- super.destroy();
- }
- }
2、 在当前插件根目录添加web目录,在目录下建立WEB-INF目录,添加web-custom.xml文件(文件名应该是固定的)。在里面配置我们的servlet。
- <?xml version="1.0" encoding="ISO-8859-1"?>
- <!DOCTYPE web-app PUBLIC "-//Sun Microsystems, Inc.//DTD Web Application 2.3//EN" "http://java.sun.com/dtd/web-app_2_3.dtd">
- <web-app>
-
- <servlet>
- <servlet-class>com.hoo.server.plugin.SampleServlet</servlet-class>
- <servlet-name>SampleServlet</servlet-name>
- </servlet>
-
- <servlet-mapping>
- <servlet-name>SampleServlet</servlet-name>
- <url-pattern>/servlet</url-pattern>
- </servlet-mapping>
- </web-app>
当插件发布后你可以通过用:http://127.0.0.1:9090/plugins/sample/servlet 就可以访问到这个servlet了。但我发现我们只需用http://127.0.0.1:9090/plugins/sample也是可以访问到的。好像openfire会自动找到我们插件目录下的servlet配置。
注意:这里的http://127.0.0.1:9090/plugins/是固定的,至少plugins是固定的。所有的插件都在plugins目录下访问的。如果你想知道为什么,你可以看看openfire源码下的web.xml,具体目录路径在/openfire/src/web/WEB-INF/web.xml。里面有一个PluginServlet是过来plugin的配置的。
3、 在web目录下添加jsp文件,文件名是插件名称-自定义名称.jsp(建议规范命名)
- <%@ page language="java" import="java.util.*" pageEncoding="UTF-8"%>
- <!DOCTYPE HTML PUBLIC "-//W3C//DTD HTML 4.01 Transitional//EN">
- <html>
- <head>
- <title>hello world: 你好openfire</title>
- <meta http-equiv="Content-Type" content="text/html; charset=UTF-8">
- <meta name="pageID" content="sample-service"/>
- </head>
-
- <body>
- <h3>hello world jsp!! <a href="/plugins/sample/servlet">SampleServlet</a></h3>
- <div class="jive-contentBoxHeader">jive-contentBoxHeader</div>
- <div class="jive-contentBox">jive-contentBox</div>
-
- <div class="jive-table">
- <table cellpadding="0" cellspacing="0" border="0" width="100%">
- <thead>
- <tr>
- <th> sss</th>
- <th nowrap>a</th>
- <th nowrap>b</th>
- </tr>
- </thead>
- <tbody>
- <tr>
- <td align="center">asdf</td>
- <td align="center">asdf</td>
- <td align="center">asdf</td>
- </tr>
- <tr class="jive-even">
- <td align="center">asdf</td>
- <td align="center">asdf</td>
- <td align="center">asdf</td>
- </tr>
- <tr class="jive-odd">
- <td align="center">asdf</td>
- <td align="center">asdf</td>
- <td align="center">asdf</td>
- </tr>
- </tbody>
- </table>
- </div>
- </body>
- </html>
其中最重要的一点就是:<meta name="pageID" content="sample-service"/>这个pageID。这里的是固定的,后面的content对应我们plugin.xml的内容(等下看看plguin.xml的配置)。然后可以适当的看下里面table的 属性和样式,因为很多时候会在jsp中显示内容,且用table布局的。
4、 改下之前的plugin.xml的配置,配置组件在openfire 管理员控制台的哪个地方显示,以及显示的页面。
- <?xml version="1.0" encoding="UTF-8"?>
- <plugin>
-
- <class>com.hoo.server.plugin.SamplePlugin</class>
-
-
- <name>SimplePlugin</name>
- <description>This is the my sample plugin.</description>
- <author>hoojo</author>
-
- <version>1.0</version>
- <date>28/02/2013</date>
- <url>http://localhost:9090/openfire/plugins.jsp</url>
- <minServerVersion>3.4.1</minServerVersion>
- <licenseType>gpl</licenseType>
-
- <adminconsole>
- <tab id="tab-server">
- <sidebar id="sidebar-server-settings">
- <item id="sample-service" name="Sample Service" url="sample-service.jsp"
- description="Click is trigger sample plugin" />
- </sidebar>
- </tab>
- </adminconsole>
- </plugin>
这里主要就是adminconsole这里面的配置。首先tab-server应该是在管理员控制台页面的服务器菜单中显示;sidebar中的的id配置固定这样写即可;item中的id(sample-service)对应的就是上面的sample-service.jsp的<meta name="pageID" content="sample-service"/>的content内容;item的url对应的是我们写的jsp页面;name是插件的菜单名称。也就是说在管理员控制台页面中的服务器菜单下增加一个sample service的菜单,打开的页面是sample-service.jsp页面。
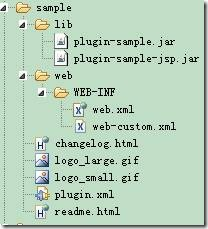
5、 运行ant脚本,打包发布插件。在上一章节有完整ant脚本的,运行build.xml中的这个openfire-plugins命令即可打包。然后将打好包的sample.jar发布到openfire的plugins目录下即可。
打包后的jar插件目录结构如下:
启动openfire后,在openfire管理员控制台页面的服务器->服务器设置中就可以看到Sample Service插件了。
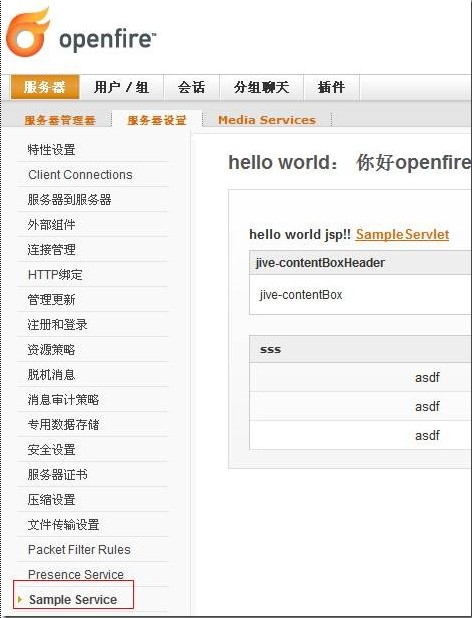
点击Sample Servlet就可以看到openfire控制台打印请求的文字信息。
openfire_01_插件开发
原文:http://www.cnblogs.com/lxfeng/p/4262794.html