自己需要加监控
开发需要加监控
运营需要加监控
zabbix监控服务安装,详情请见:zabbix监控服务安装和网页配置
| 环境 | IP地址 | 主机名 | 需要安装的应用 | 系统版本 |
|---|---|---|---|---|
| 服务端 | 192.168.110.30 | zabbix-server | lamp架构 zabbix_server zabbix_agent | redhat 8.2 |
| 客户端 | 192.168.110.40 | agent | agent服务 | redhat 8.2 |
//关闭selinx和防火墙
#服务端
[root@zabbix-server ~]# systemctl stop firewalld
[root@zabbix-server ~]# systemctl disable firewalld
Removed /etc/systemd/system/multi-user.target.wants/firewalld.service.
Removed /etc/systemd/system/dbus-org.fedoraproject.FirewallD1.service.
[root@zabbix-server ~]# setenforce 0
[root@zabbix-server ~]# vim /etc/selinux/config
# This file controls the state of SELinux on the system.
# SELINUX= can take one of these three values:
# enforcing - SELinux security policy is enforced.
# permissive - SELinux prints warnings instead of enforcing.
# disabled - No SELinux policy is loaded.
SELINUX=disabled
# SELINUXTYPE= can take one of these three values:
# targeted - Targeted processes are protected,
# minimum - Modification of targeted policy. Only selected processes are protected.
# mls - Multi Level Security protection.
SELINUXTYPE=targeted
#客户端
[root@agent ~]# systemctl stop firewalld
[root@agent ~]# systemctl disable firewalld
Removed /etc/systemd/system/multi-user.target.wants/firewalld.service.
Removed /etc/systemd/system/dbus-org.fedoraproject.FirewallD1.service.
[root@agent ~]# setenforce 0
[root@agent ~]# vim /etc/selinux/config
# This file controls the state of SELinux on the system.
# SELINUX= can take one of these three values:
# enforcing - SELinux security policy is enforced.
# permissive - SELinux prints warnings instead of enforcing.
# disabled - No SELinux policy is loaded.
SELINUX=disabled
# SELINUXTYPE= can take one of these three values:
# targeted - Targeted processes are protected,
# minimum - Modification of targeted policy. Only selected processes are protected.
# mls - Multi Level Security protection.
SELINUXTYPE=targeted
//安装zabbix
#服务端
[root@zabbix-server src]# pwd
/usr/src
[root@zabbix-server src]# scp zabbix-5.2.6.tar.gz 192.168.110.40:/root/
The authenticity of host ‘192.168.110.40 (192.168.110.40)‘ can‘t be established.
ECDSA key fingerprint is SHA256:6BH7PNs5Uqc0ytCHwiDIUL6GkDuIA28Jyutg4DX8zhM.
Are you sure you want to continue connecting (yes/no/[fingerprint])? yes
Warning: Permanently added ‘192.168.110.40‘ (ECDSA) to the list of known hosts.
root@192.168.110.40‘s password:
zabbix-5.2.6.tar.gz 100% 20MB 63.9MB/s 00:00
#客户端
[root@agent zabbix-5.2.6]# yum -y install gcc gcc-c++ bzip2 pcre* make
[root@agent ~]# ls
anaconda-ks.cfg zabbix-5.2.6.tar.gz
[root@agent ~]# tar xf zabbix-5.2.6.tar.gz
[root@agent ~]# ls
anaconda-ks.cfg zabbix-5.2.6 zabbix-5.2.6.tar.gz
[root@agent ~]# cd zabbix-5.2.6
[root@agent zabbix-5.2.6]# ls
aclocal.m4 ChangeLog config.sub database install-sh man README
AUTHORS compile configure depcomp m4 misc sass
bin conf configure.ac include Makefile.am missing src
build config.guess COPYING INSTALL Makefile.in NEWS ui
[root@agent zabbix-5.2.6]# ./configure --enable-agent --disable-dependency-tracking
***********************************************************
* Now run ‘make install‘ *
* *
* Thank you for using Zabbix! *
* <http://www.zabbix.com> *
***********************************************************
[root@agent zabbix-5.2.6]# make install
#修改主动模式和被动模式
[root@agent ~]# cd /usr/local/etc/
[root@agent etc]# ls
zabbix_agentd.conf zabbix_agentd.conf.d
[root@agent etc]# vim zabbix_agentd.conf
# Mandatory: yes, if StartAgents is not explicitly set to 0
# Default:
# Server=
Server=192.168.110.30 //修改为服务端ip地址
# Mandatory: no
# Default:
# ServerActive=
ServerActive=192.168.110.30 //修改为服务端ip地址
# Mandatory: no
# Default:
# Hostname=
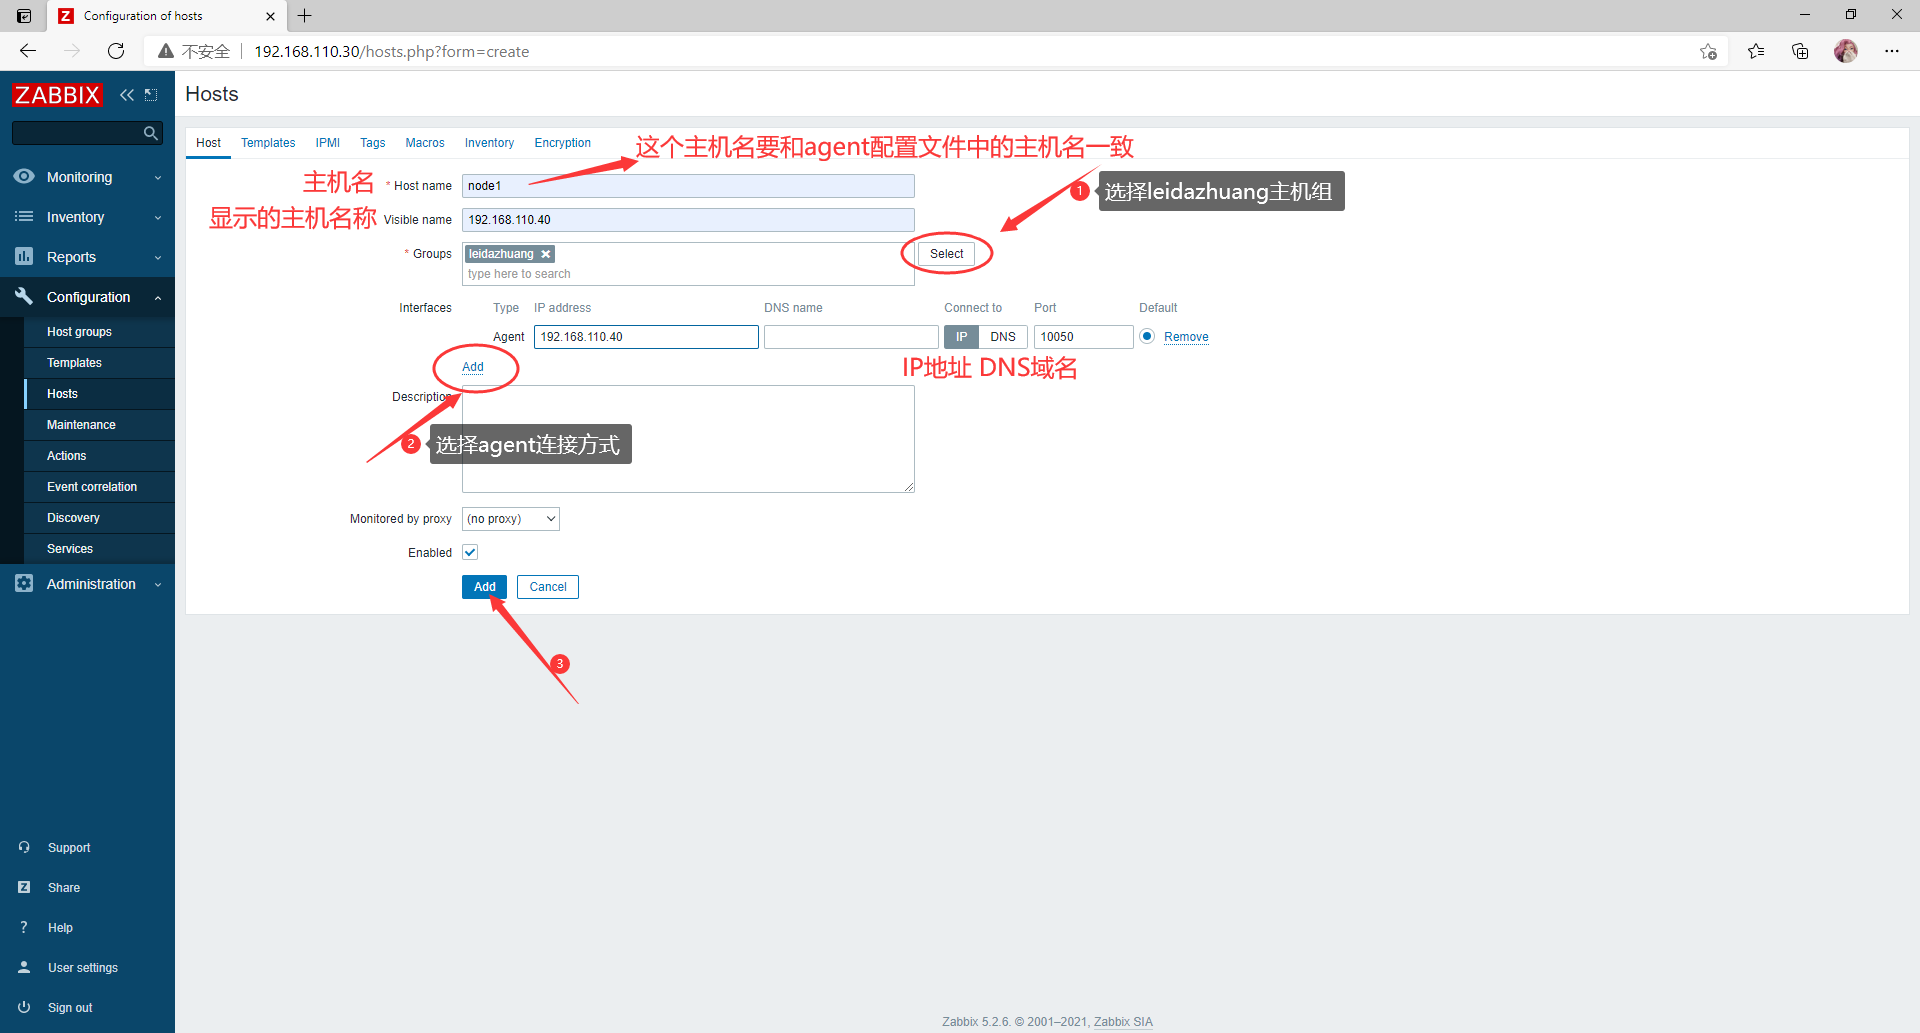
Hostname=node1 //设置唯一主机名,后面在网页中配置需要一致
#启动agent
[root@agent etc]# useradd -r -M -s /sbin/nologin zabbix
[root@agent etc]# zabbix_agentd
[root@agent etc]# ss -antl
State Recv-Q Send-Q Local Address:Port Peer Address:Port
LISTEN 0 128 0.0.0.0:22 0.0.0.0:*
LISTEN 0 128 0.0.0.0:10050 0.0.0.0:*
LISTEN 0 128 [::]:22 [::]:*
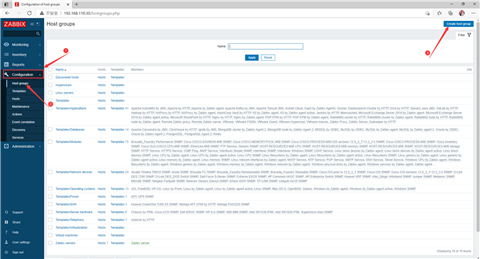
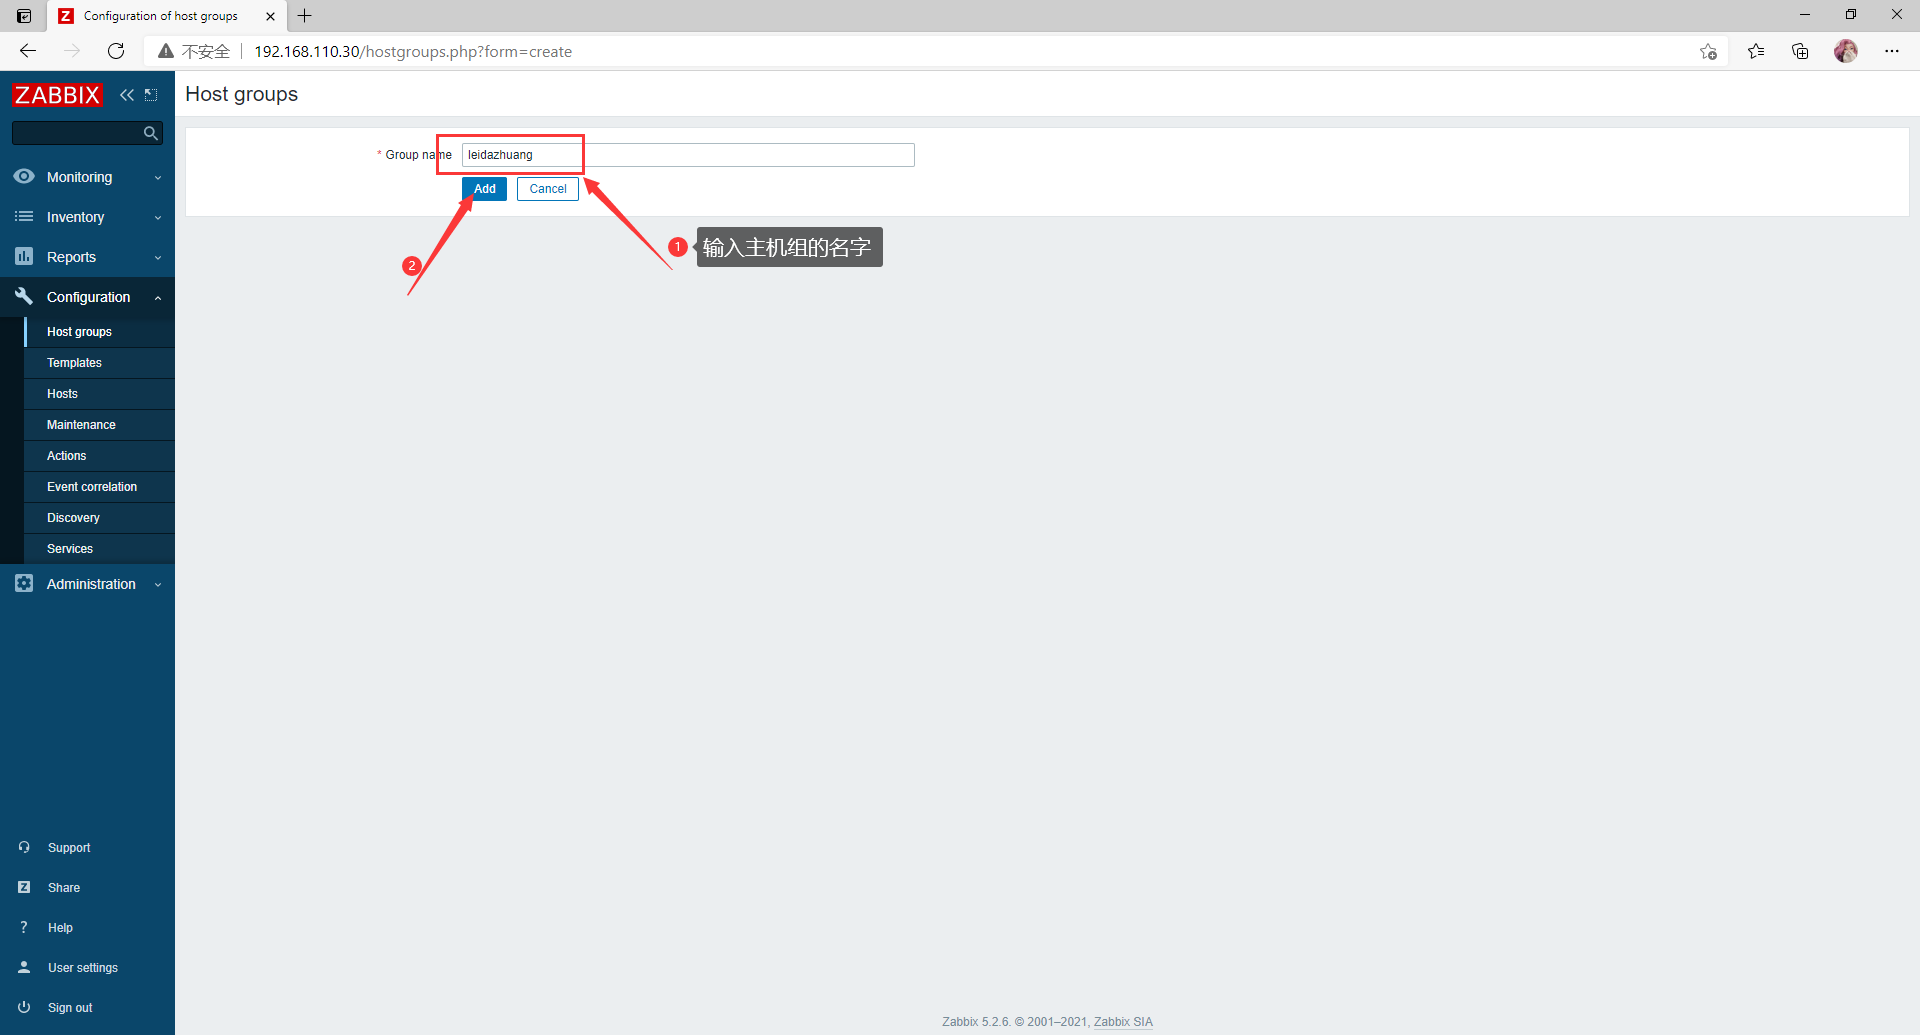
创建主机组
输入主机组名字(leidazhuang)
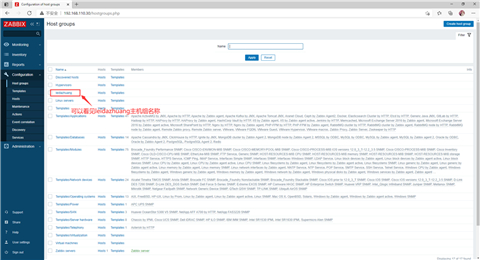
查看主机组(leidazhuang)是否存在
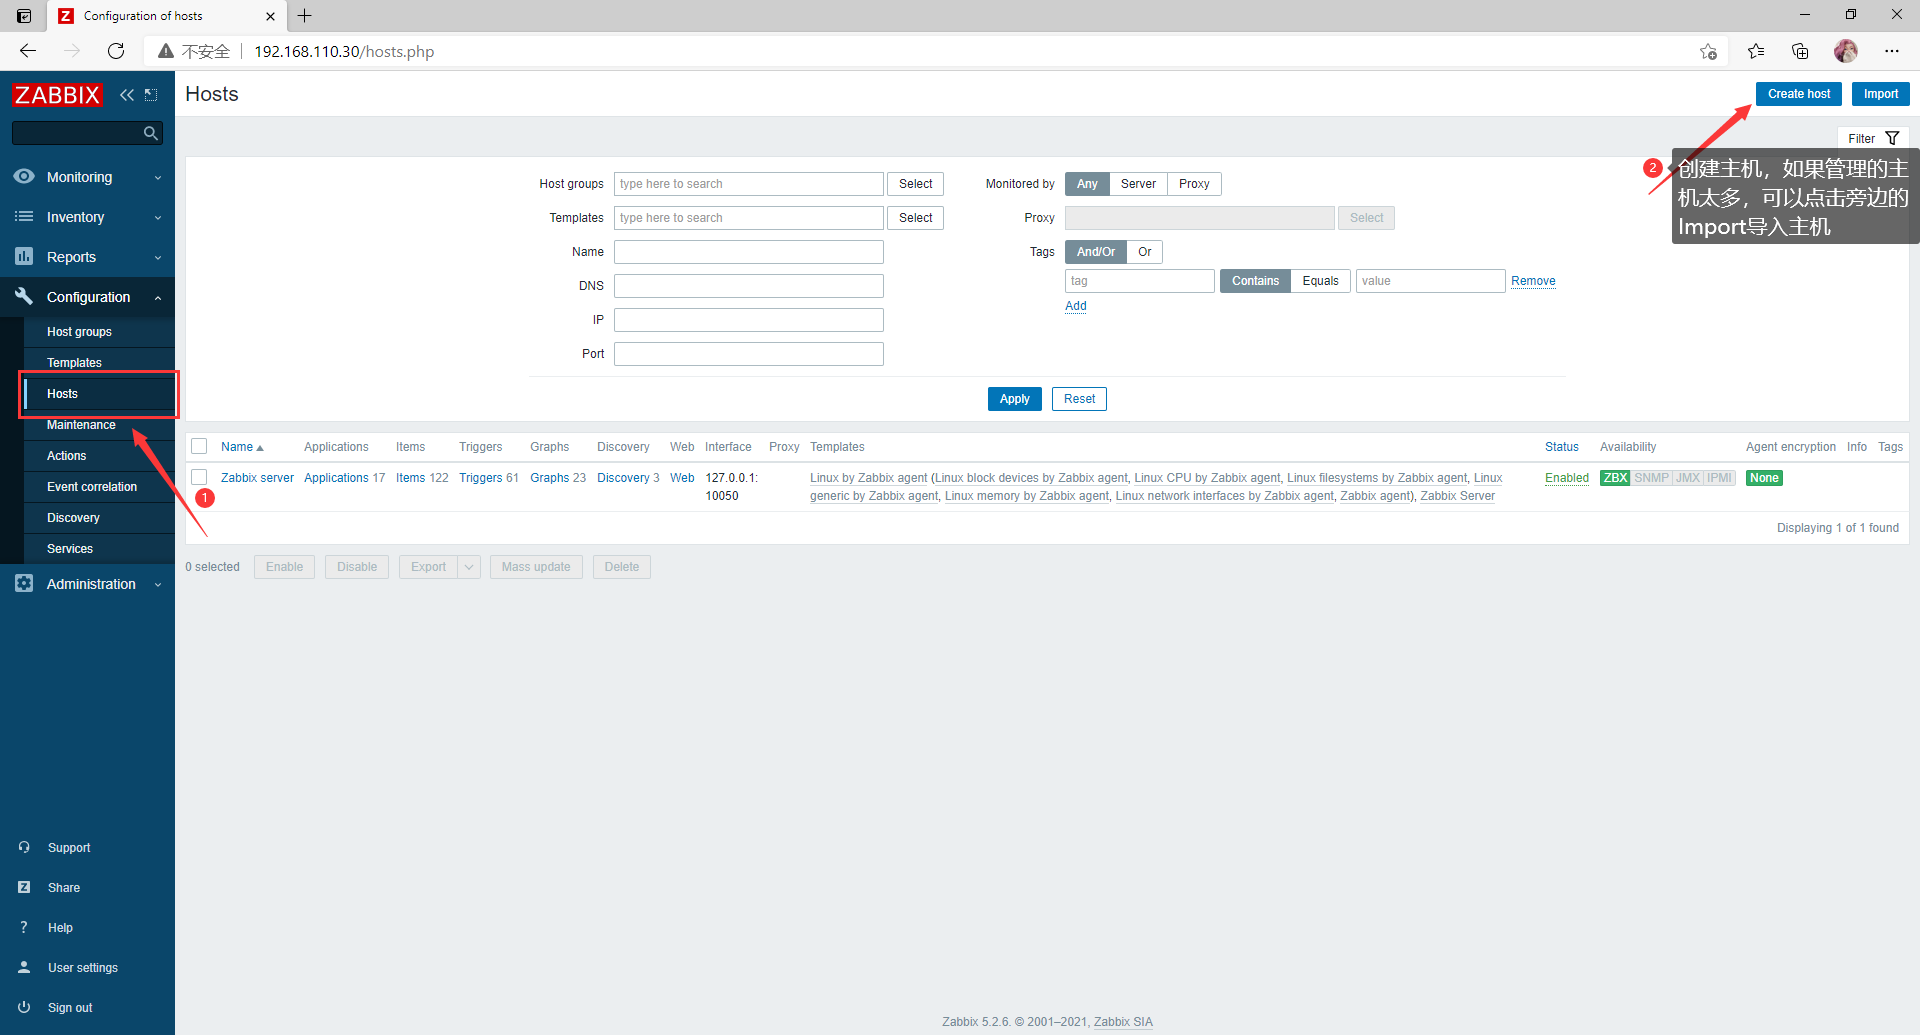
创建主机(Import是导入主机,可以在管理多个主机的时候使用)
输入配置信息(agent配置文件位置:/usr/local/etc/zabbix_agentd.conf)
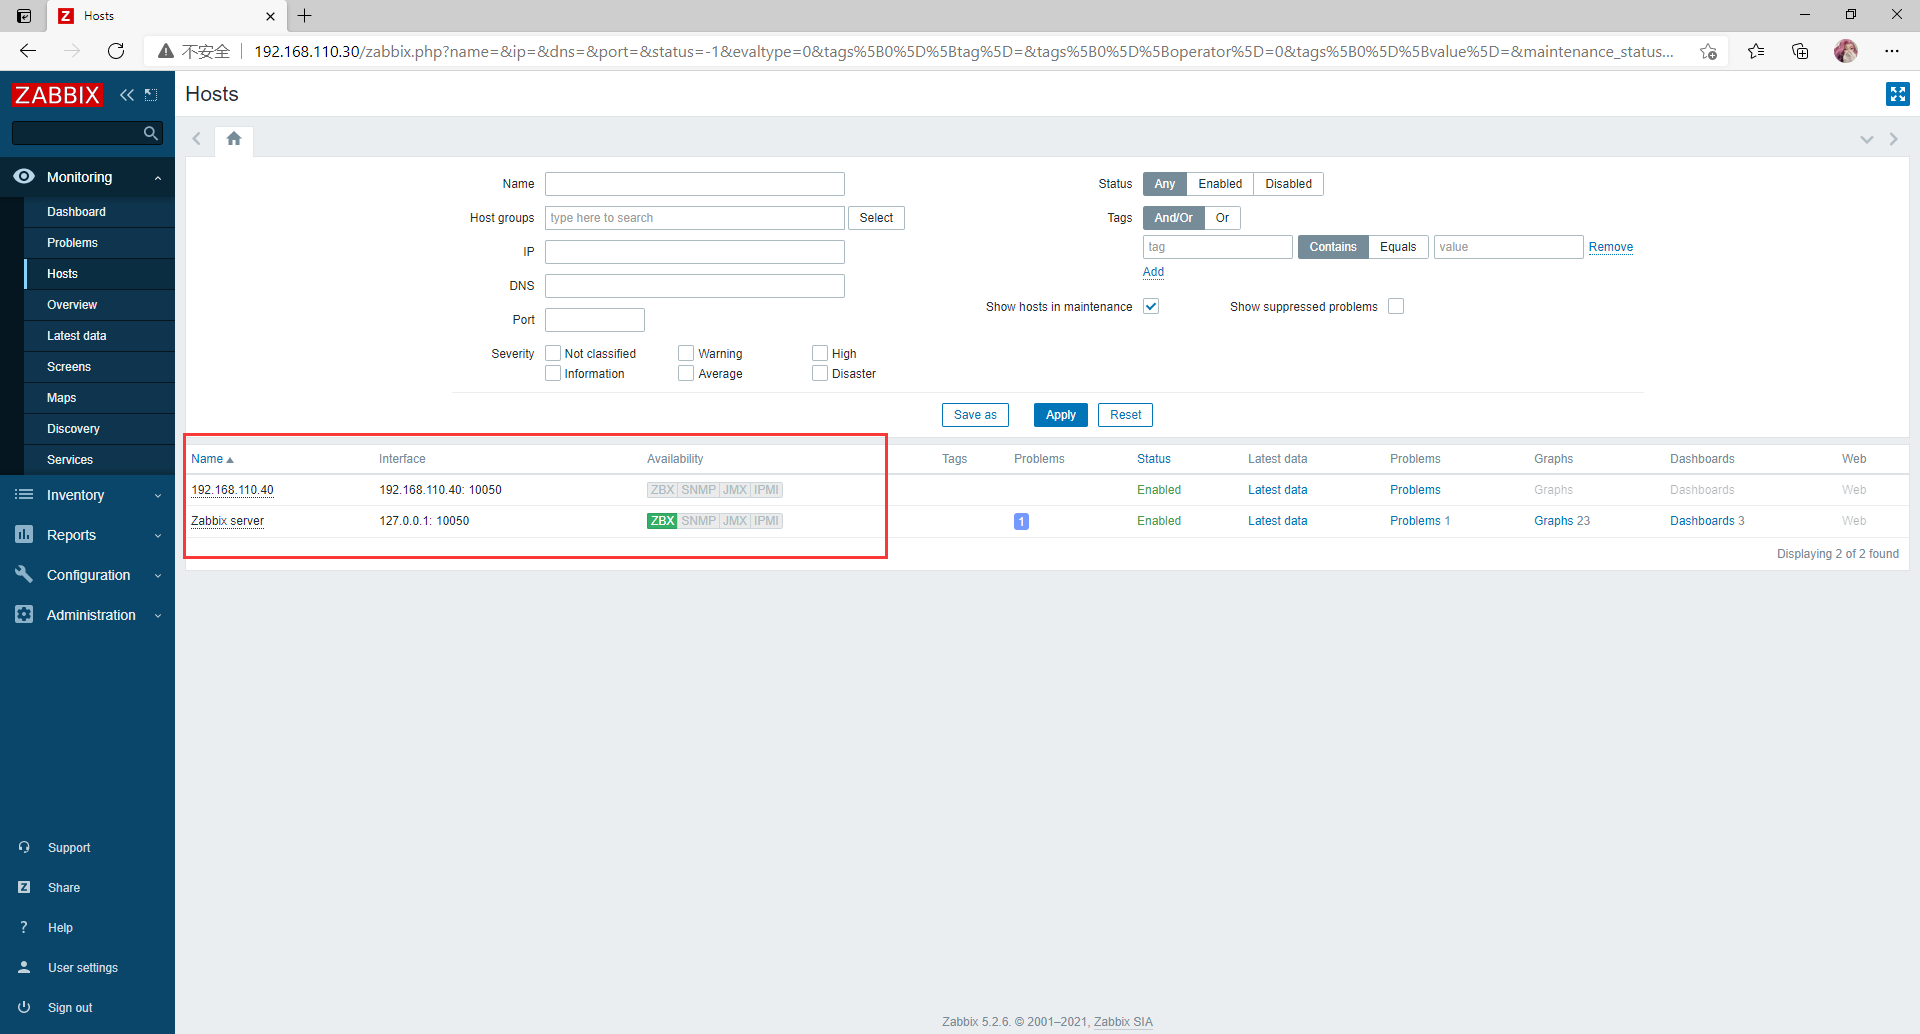
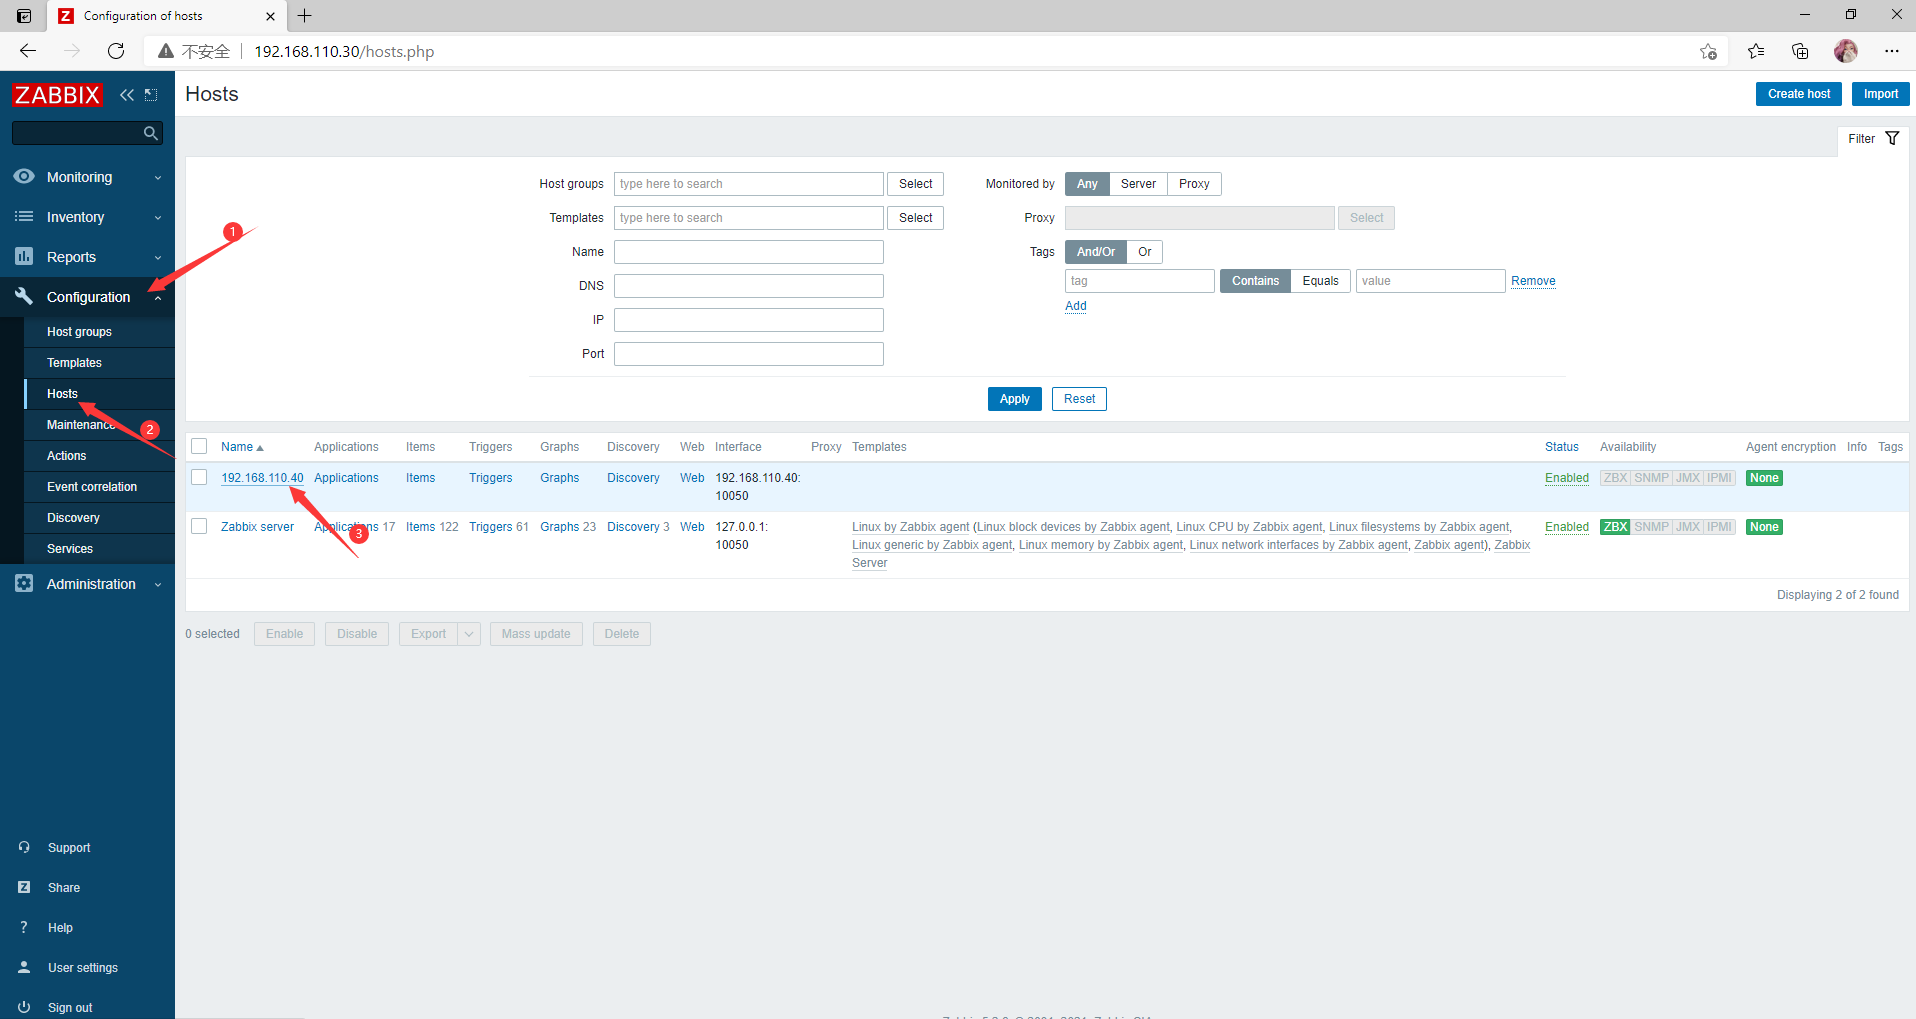
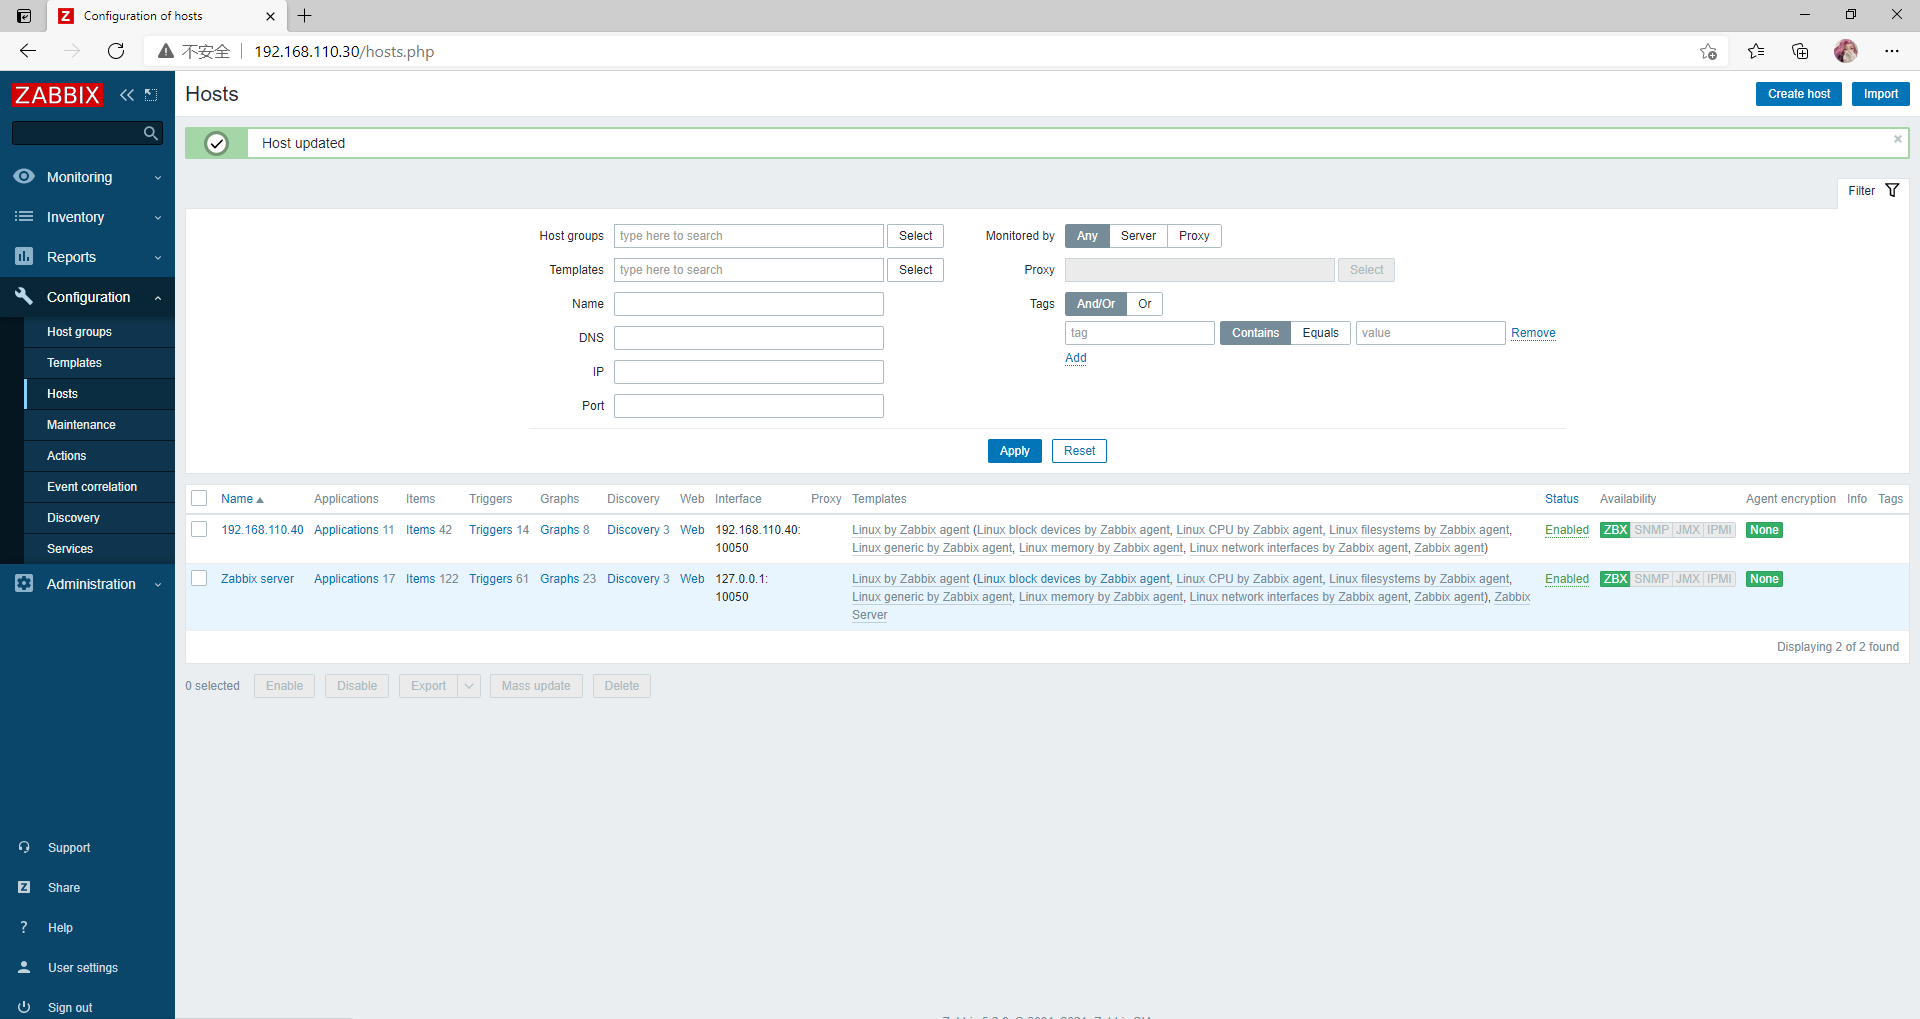
添加成功
添加模板监控项,点击客户端ip
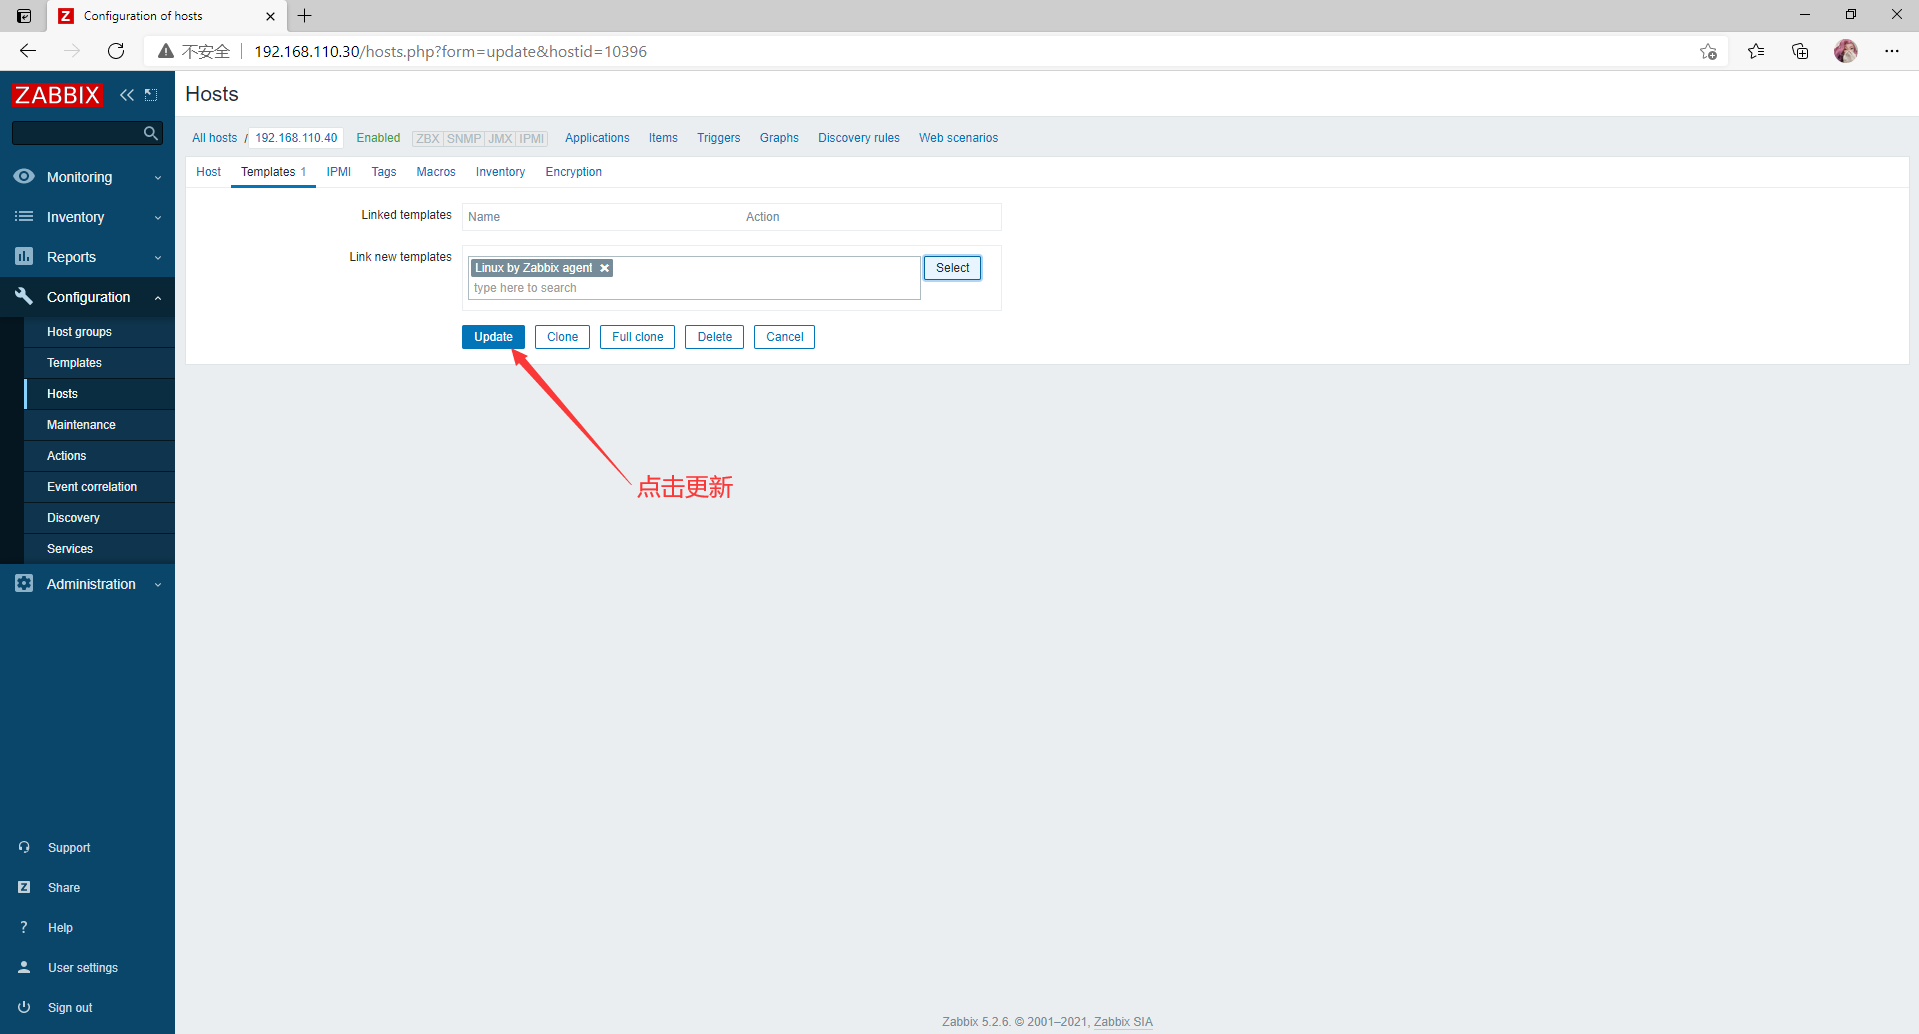
选择模板
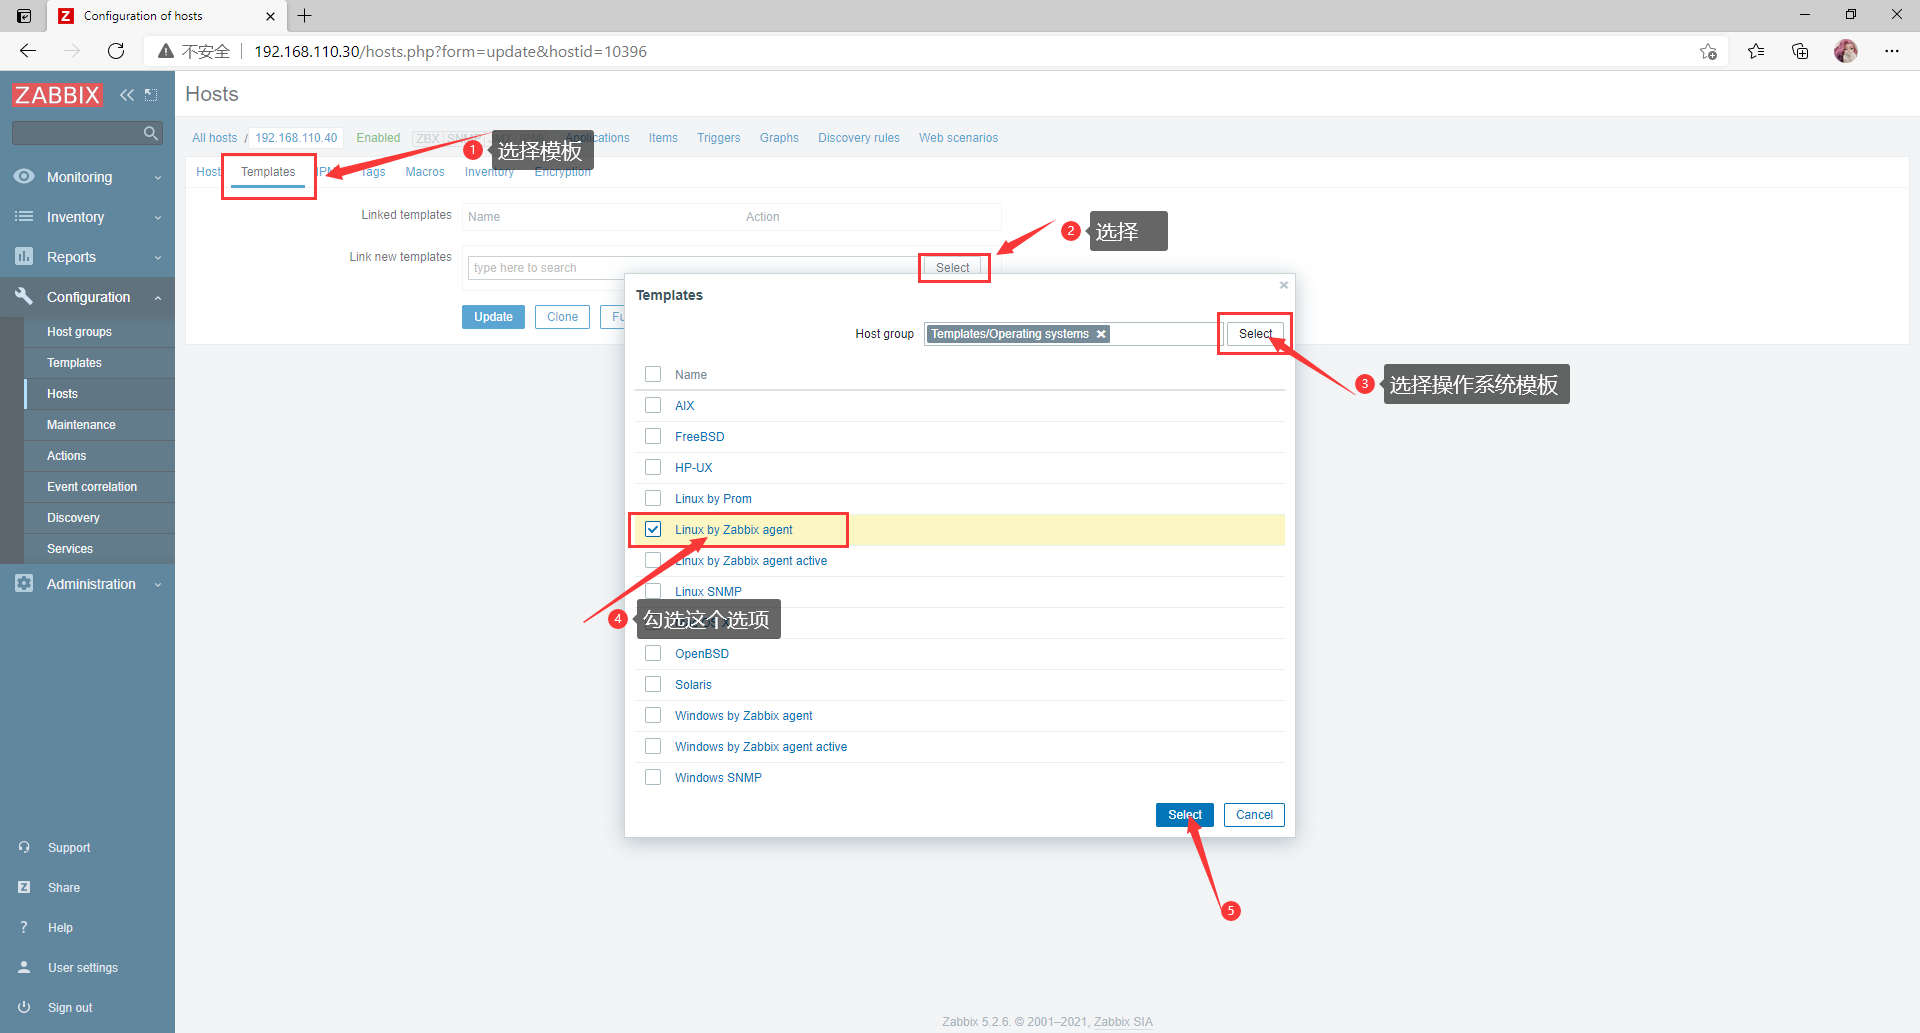
更新
已经启动
//创建abc文件,监控abc文件
[root@agent ~]# touch /tmp/abc
[root@agent ~]# ll /tmp/
total 8
-rw-r--r--. 1 root   root      0 Apr  8 21:16 abc
drwx------. 2 root   root      6 Apr  8 20:50 vmware-root_984-2999526209
-rw-rw-r--. 1 zabbix zabbix 1254 Apr  8 21:07 zabbix_agentd.log
-rw-rw-r--. 1 zabbix zabbix    5 Apr  8 20:59 zabbix_agentd.pid
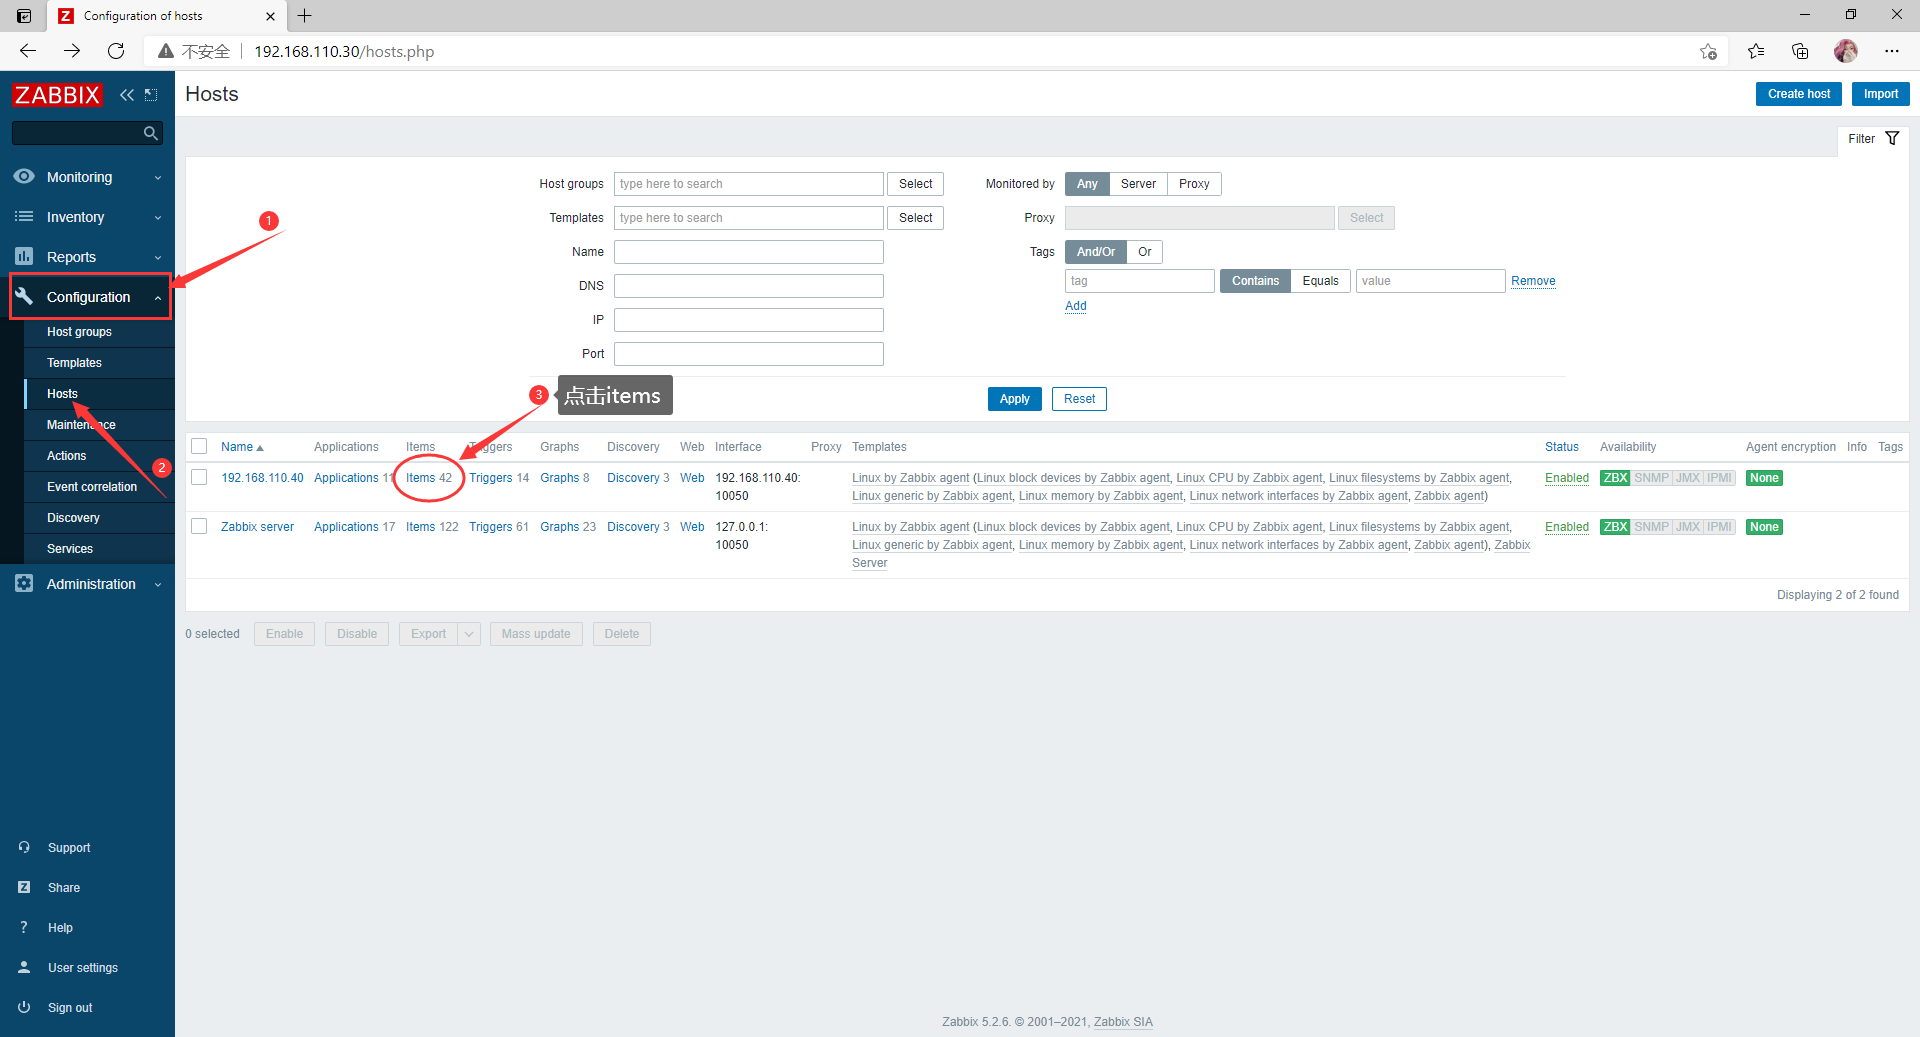
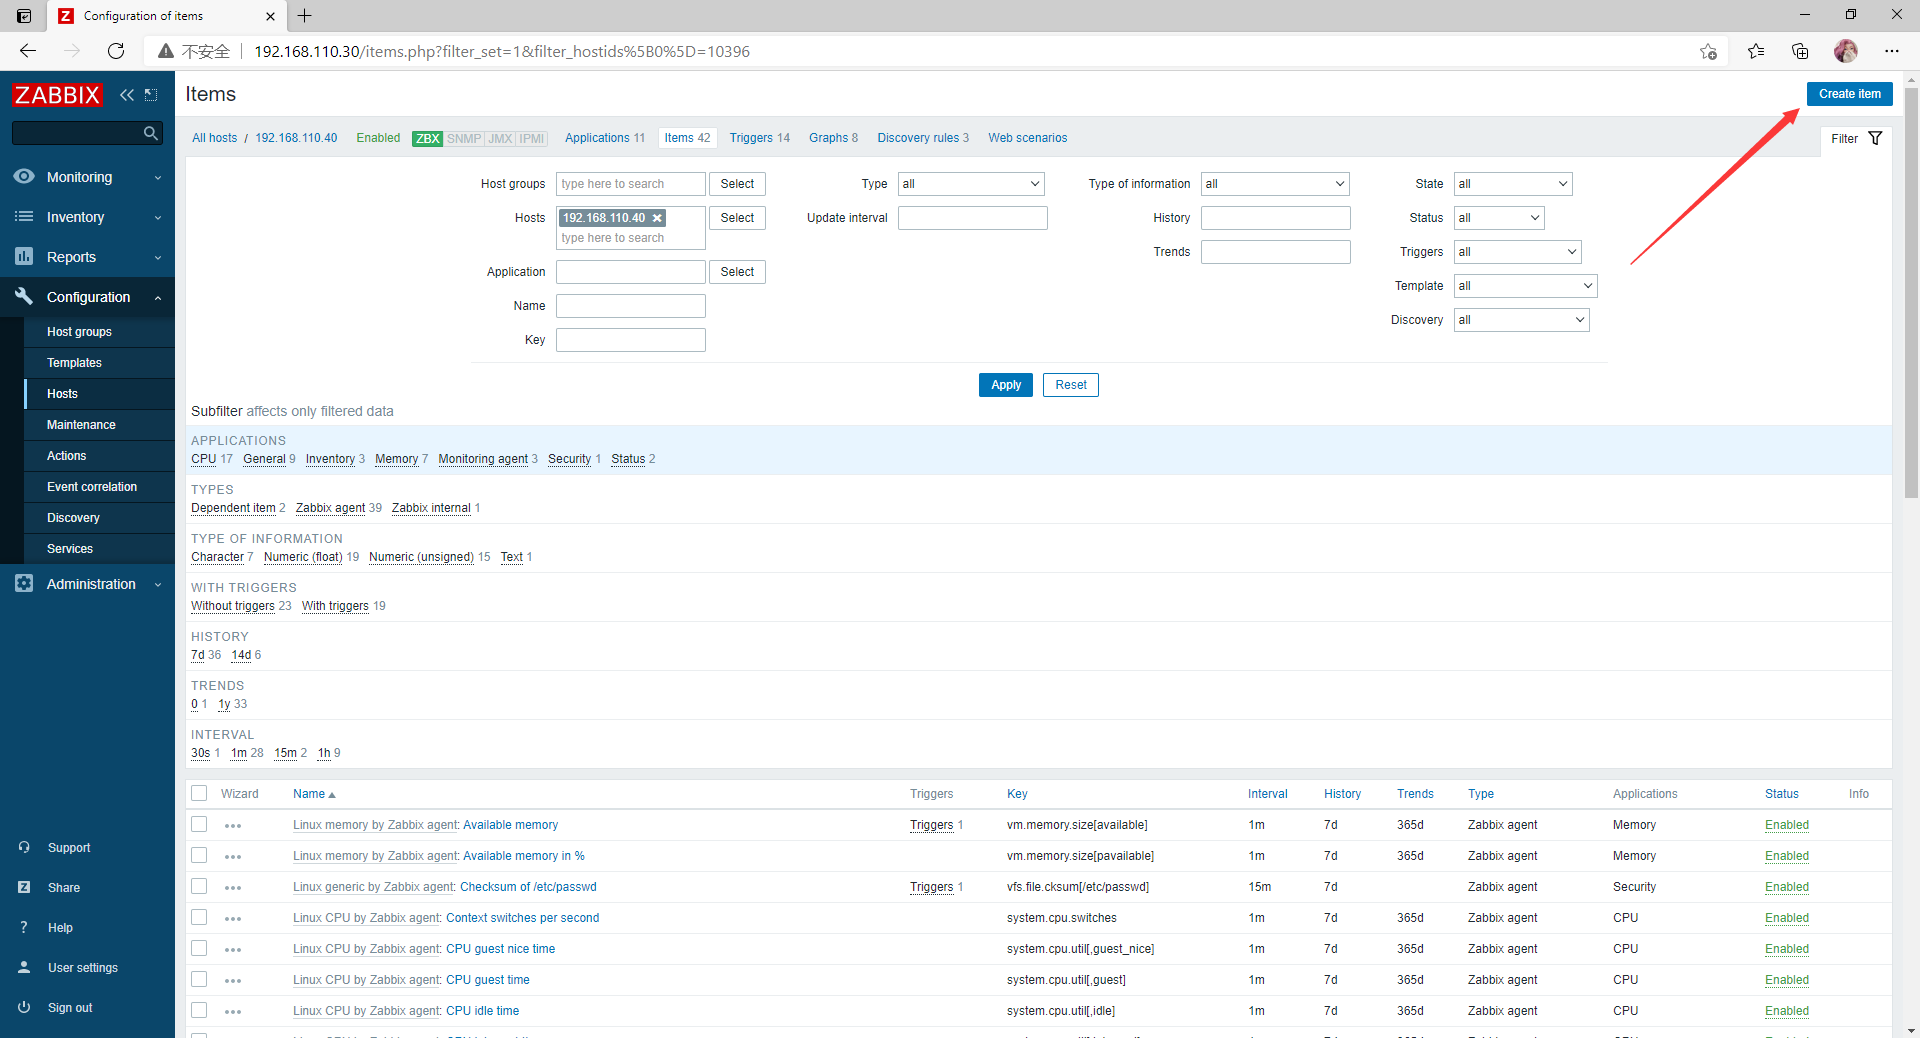
点击192.168.110.40的items
点击右上角Create item
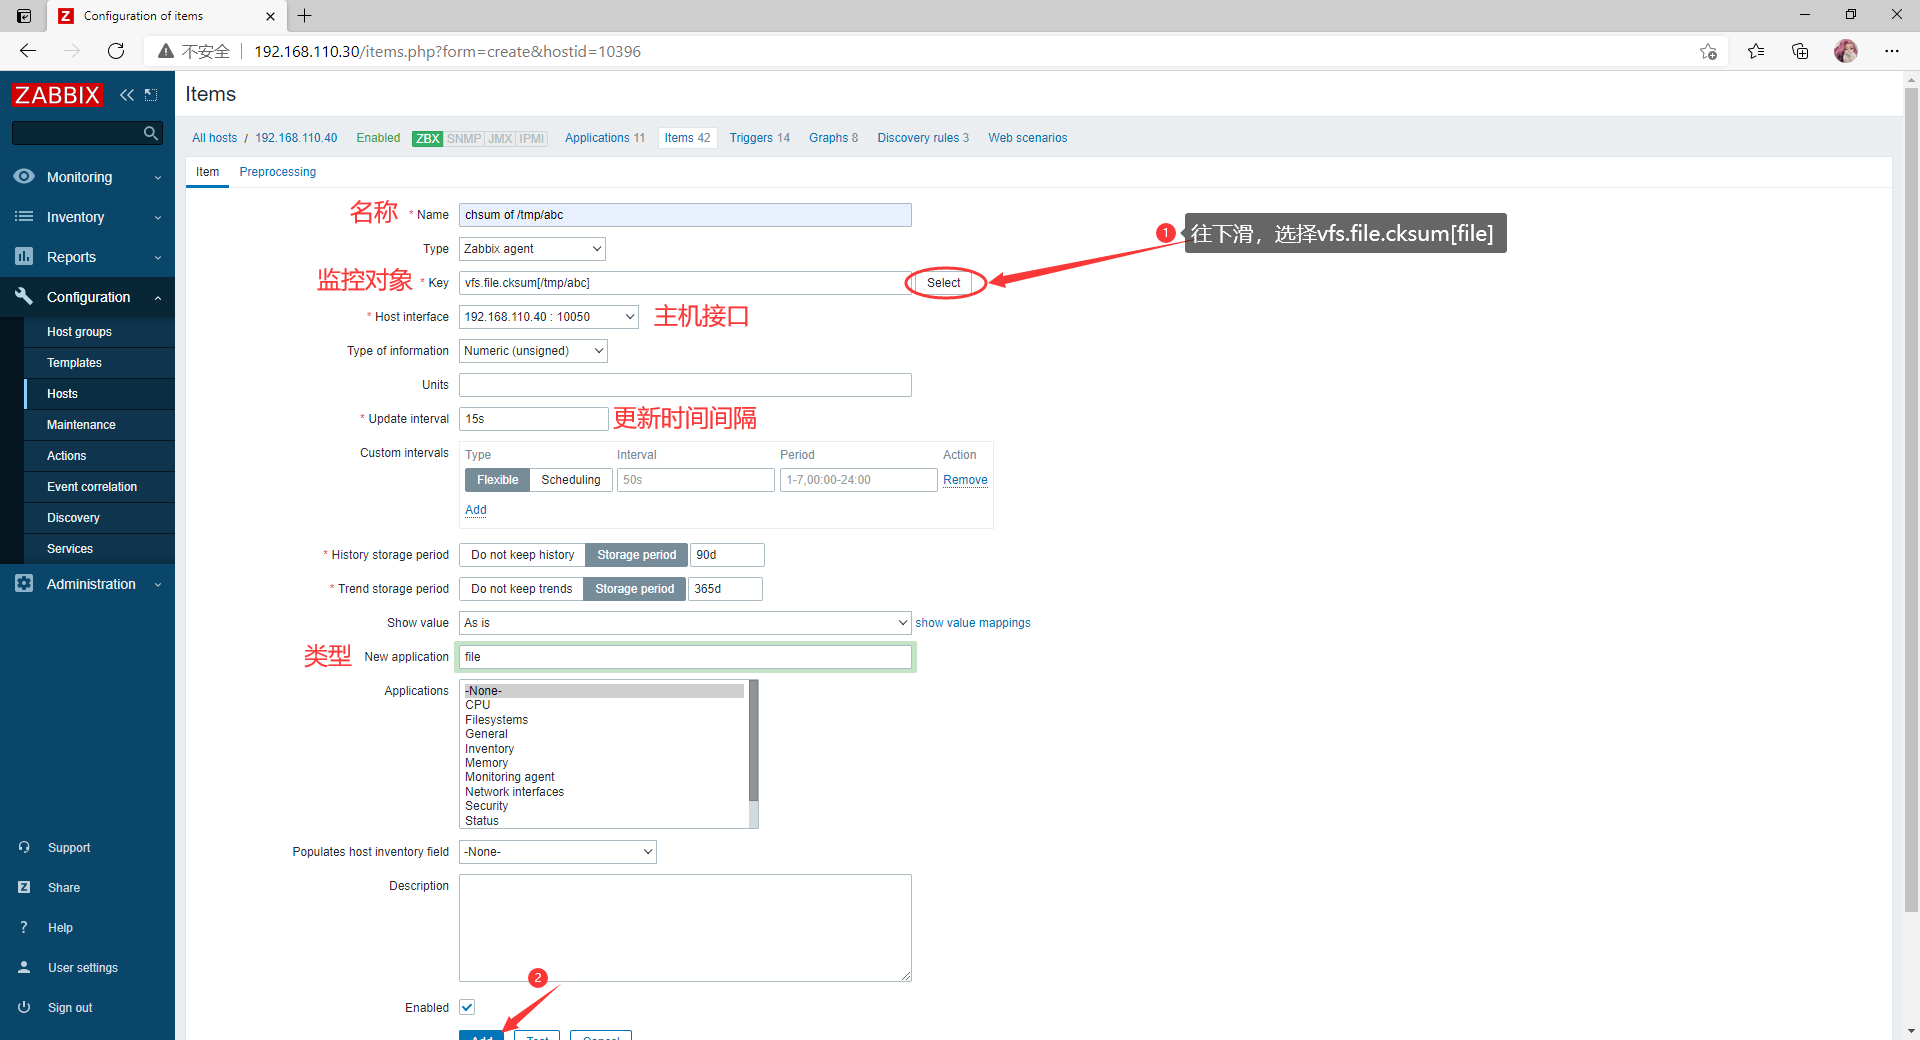
输入配置信息
自定义监控项添加成功
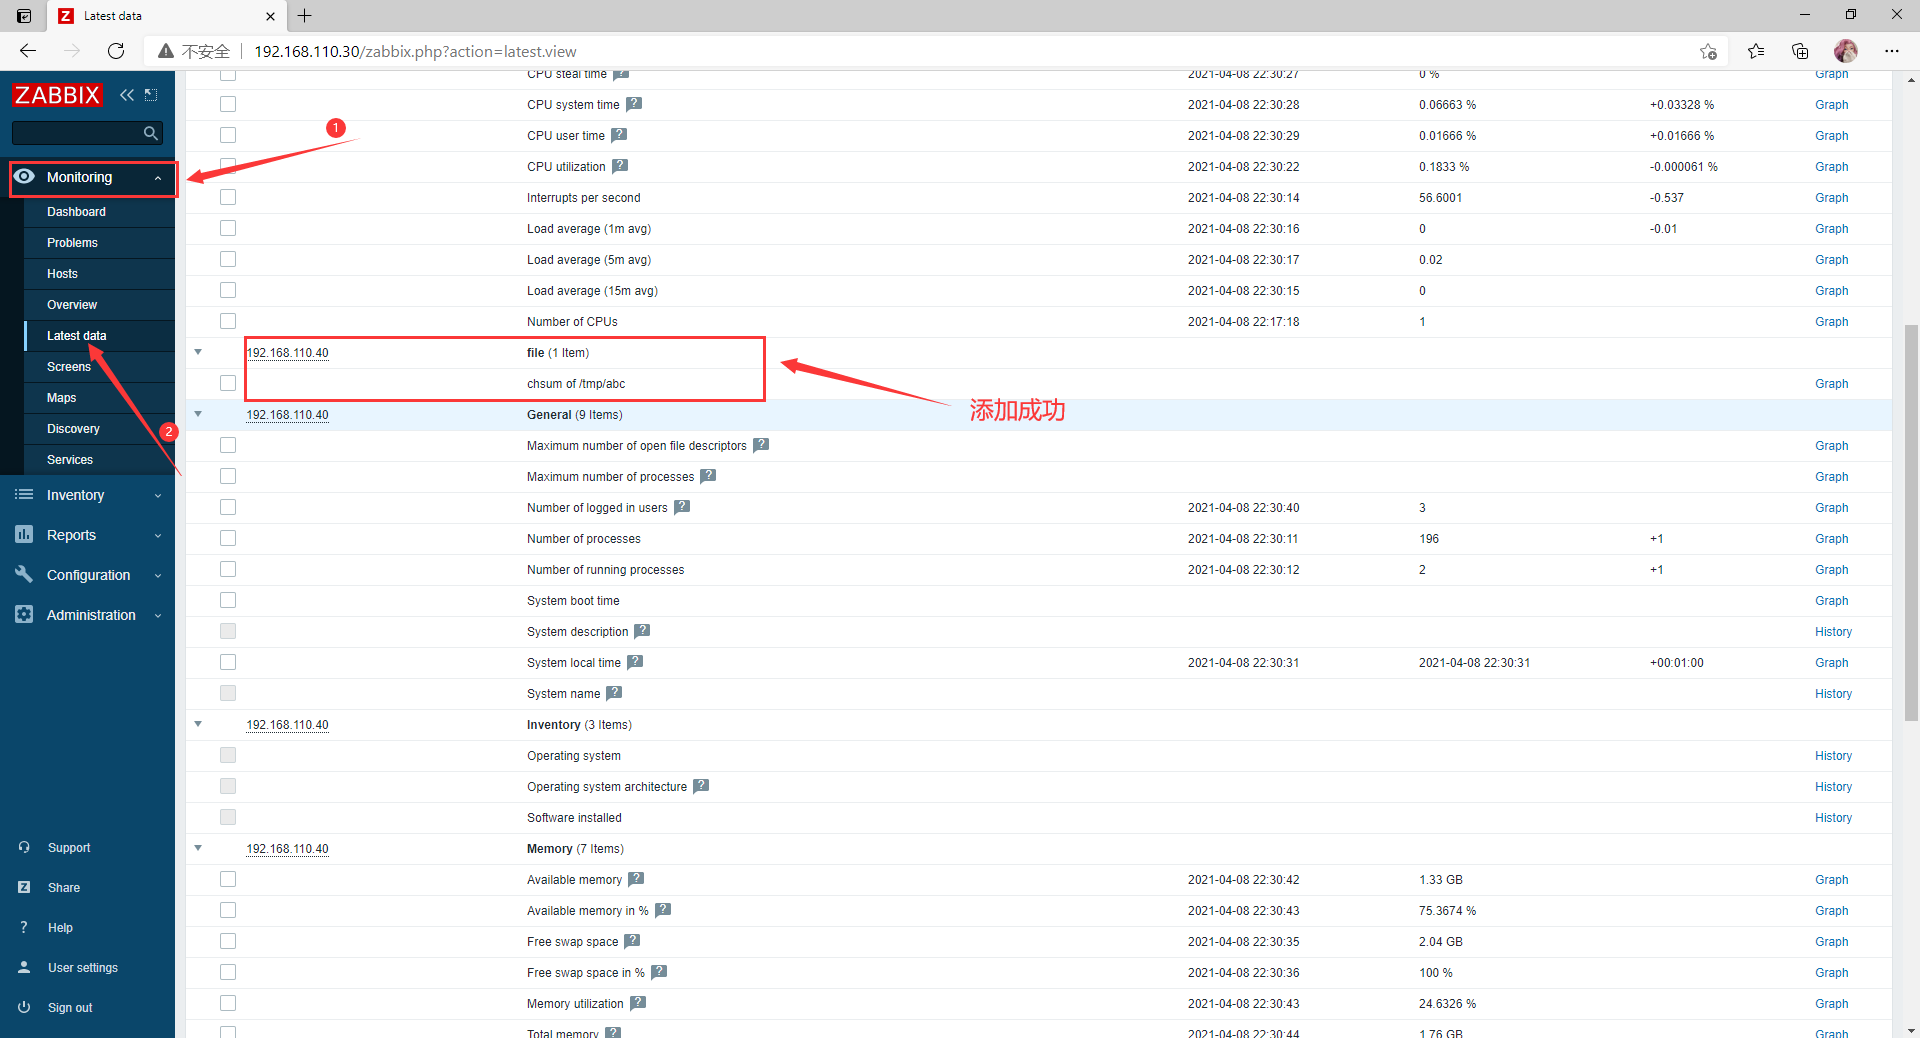
查看监控项
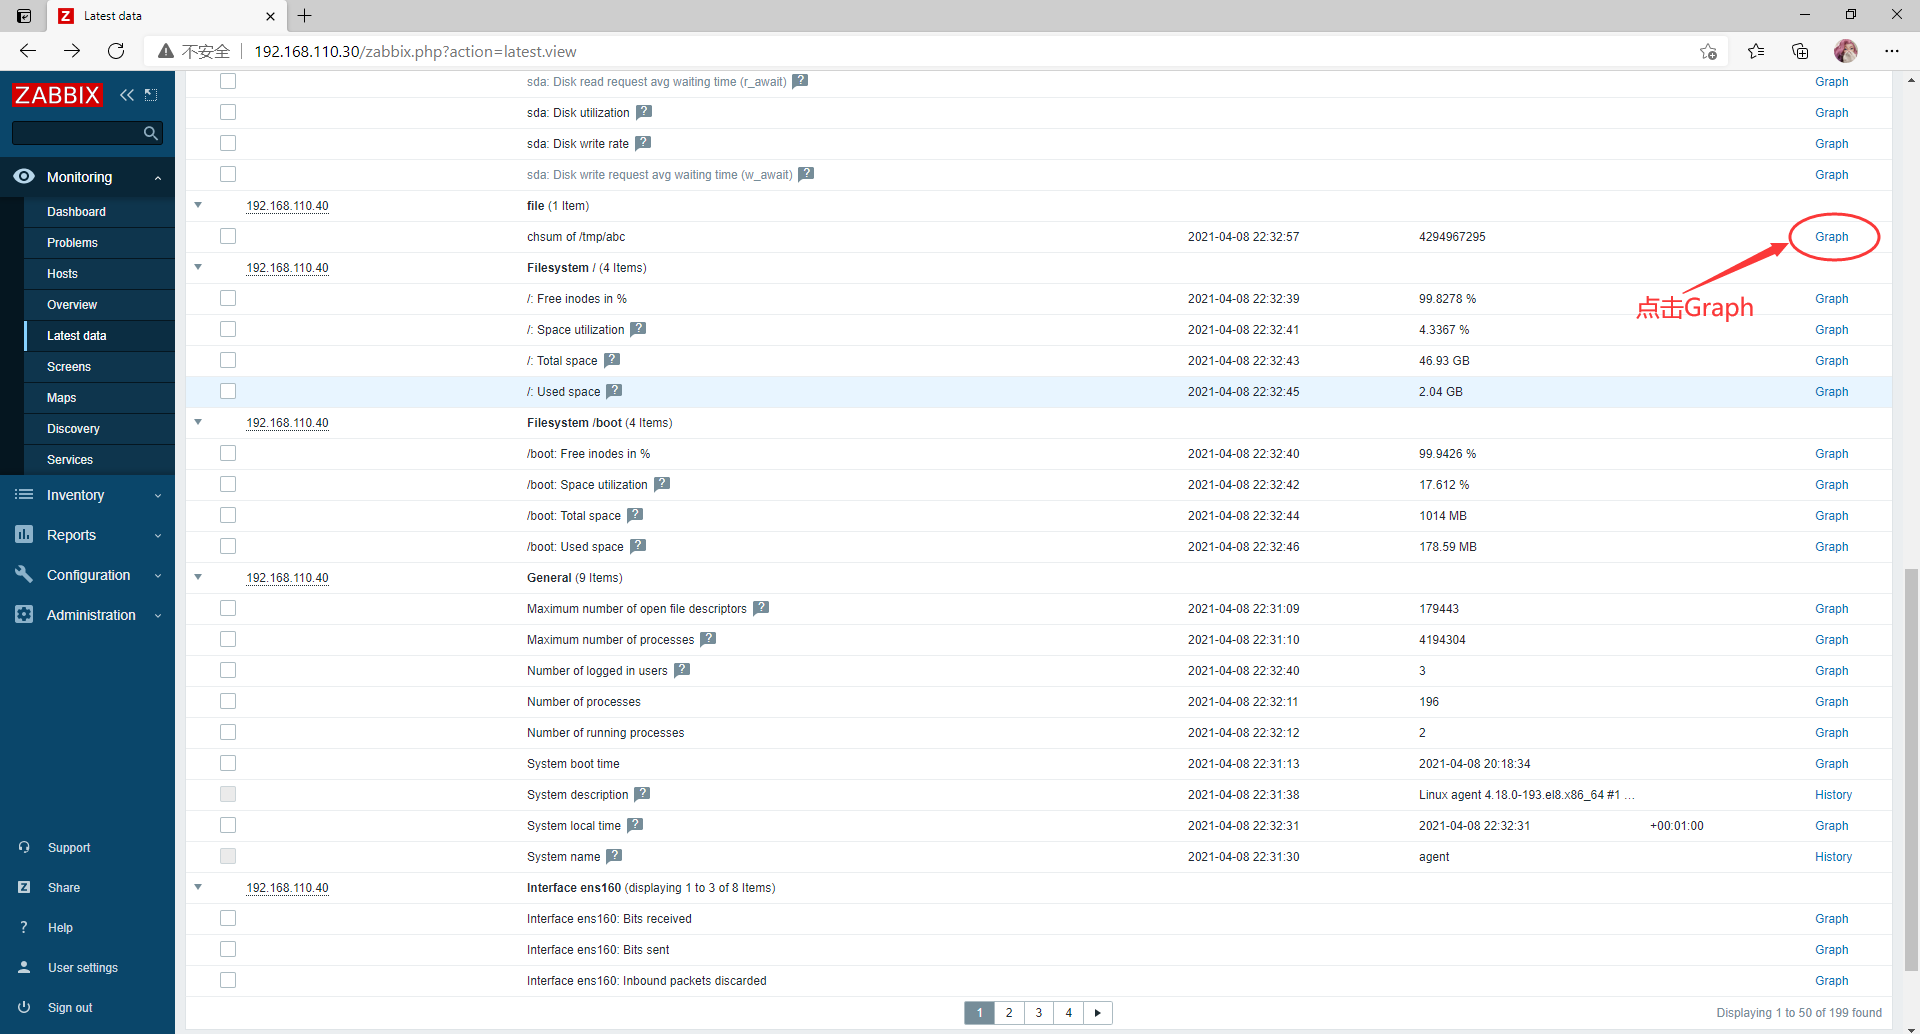
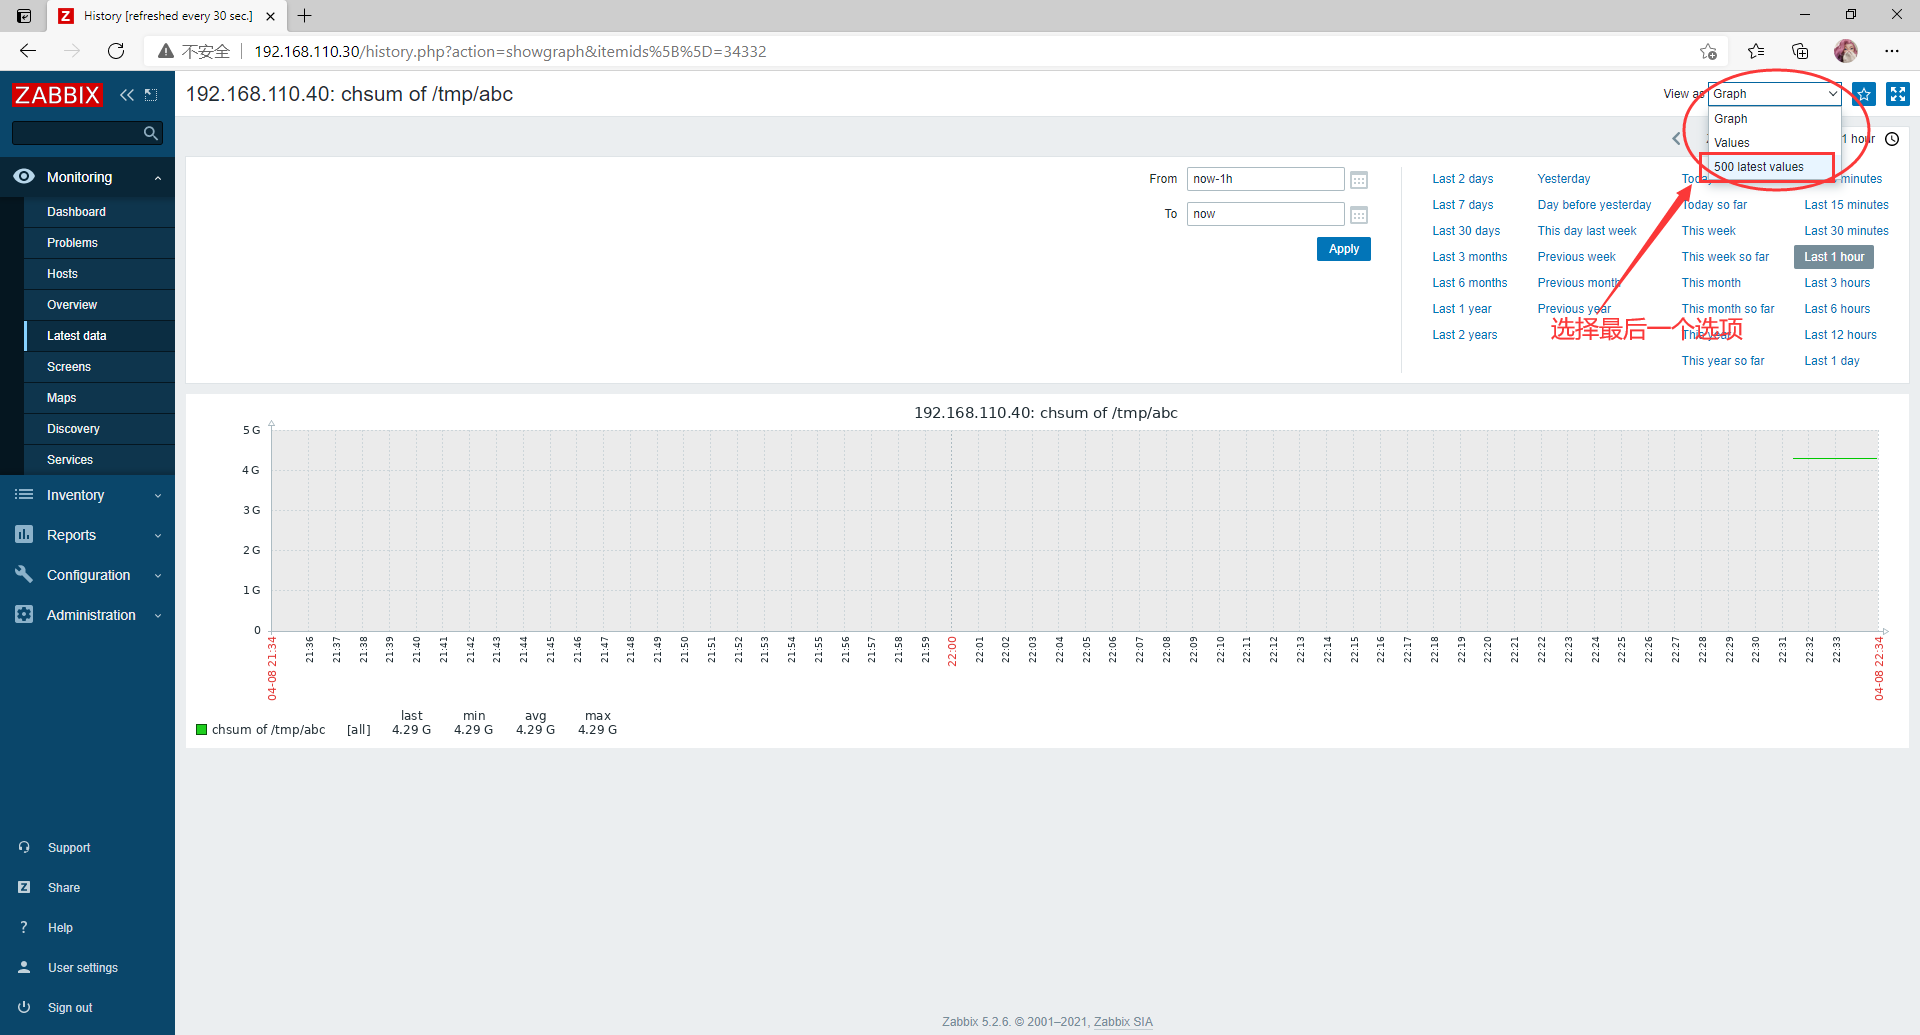
查看最新的500条记录
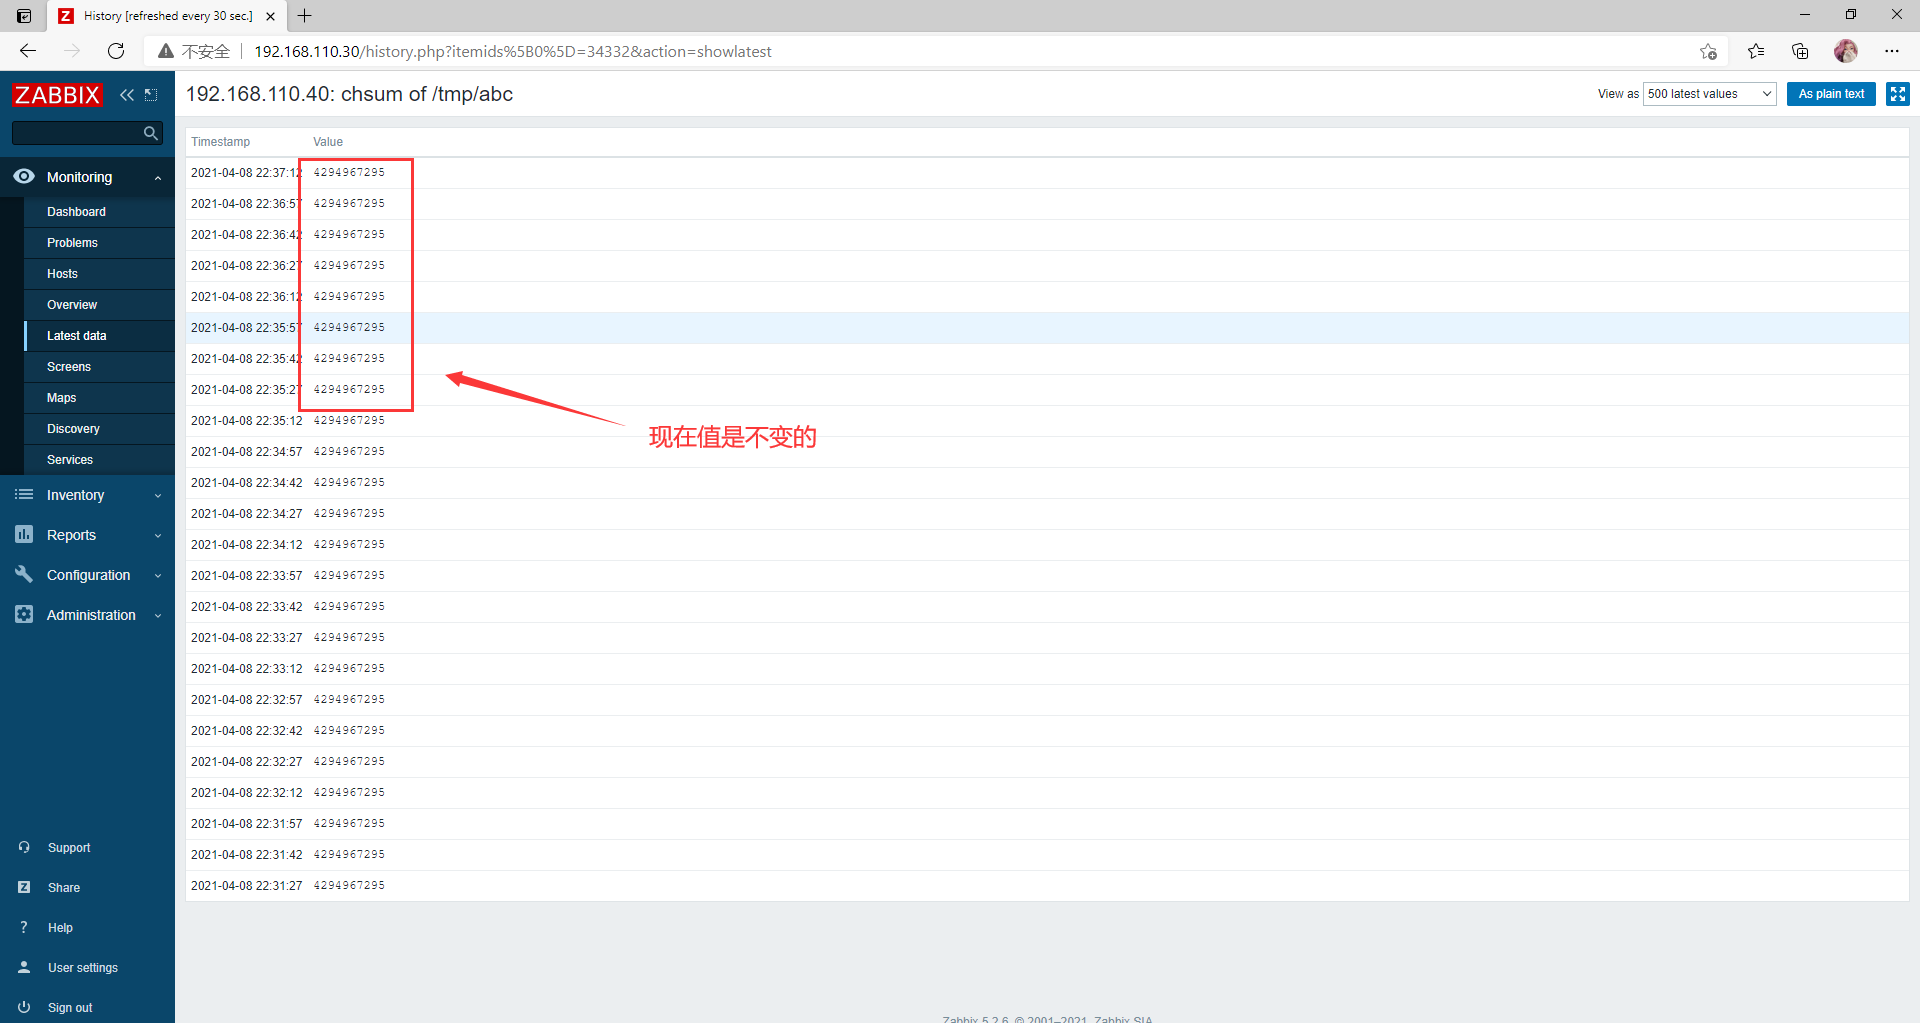
现在的Value值是不变的
手动触发验证
//修改abc文件
[root@agent ~]# echo 123 > /tmp/abc
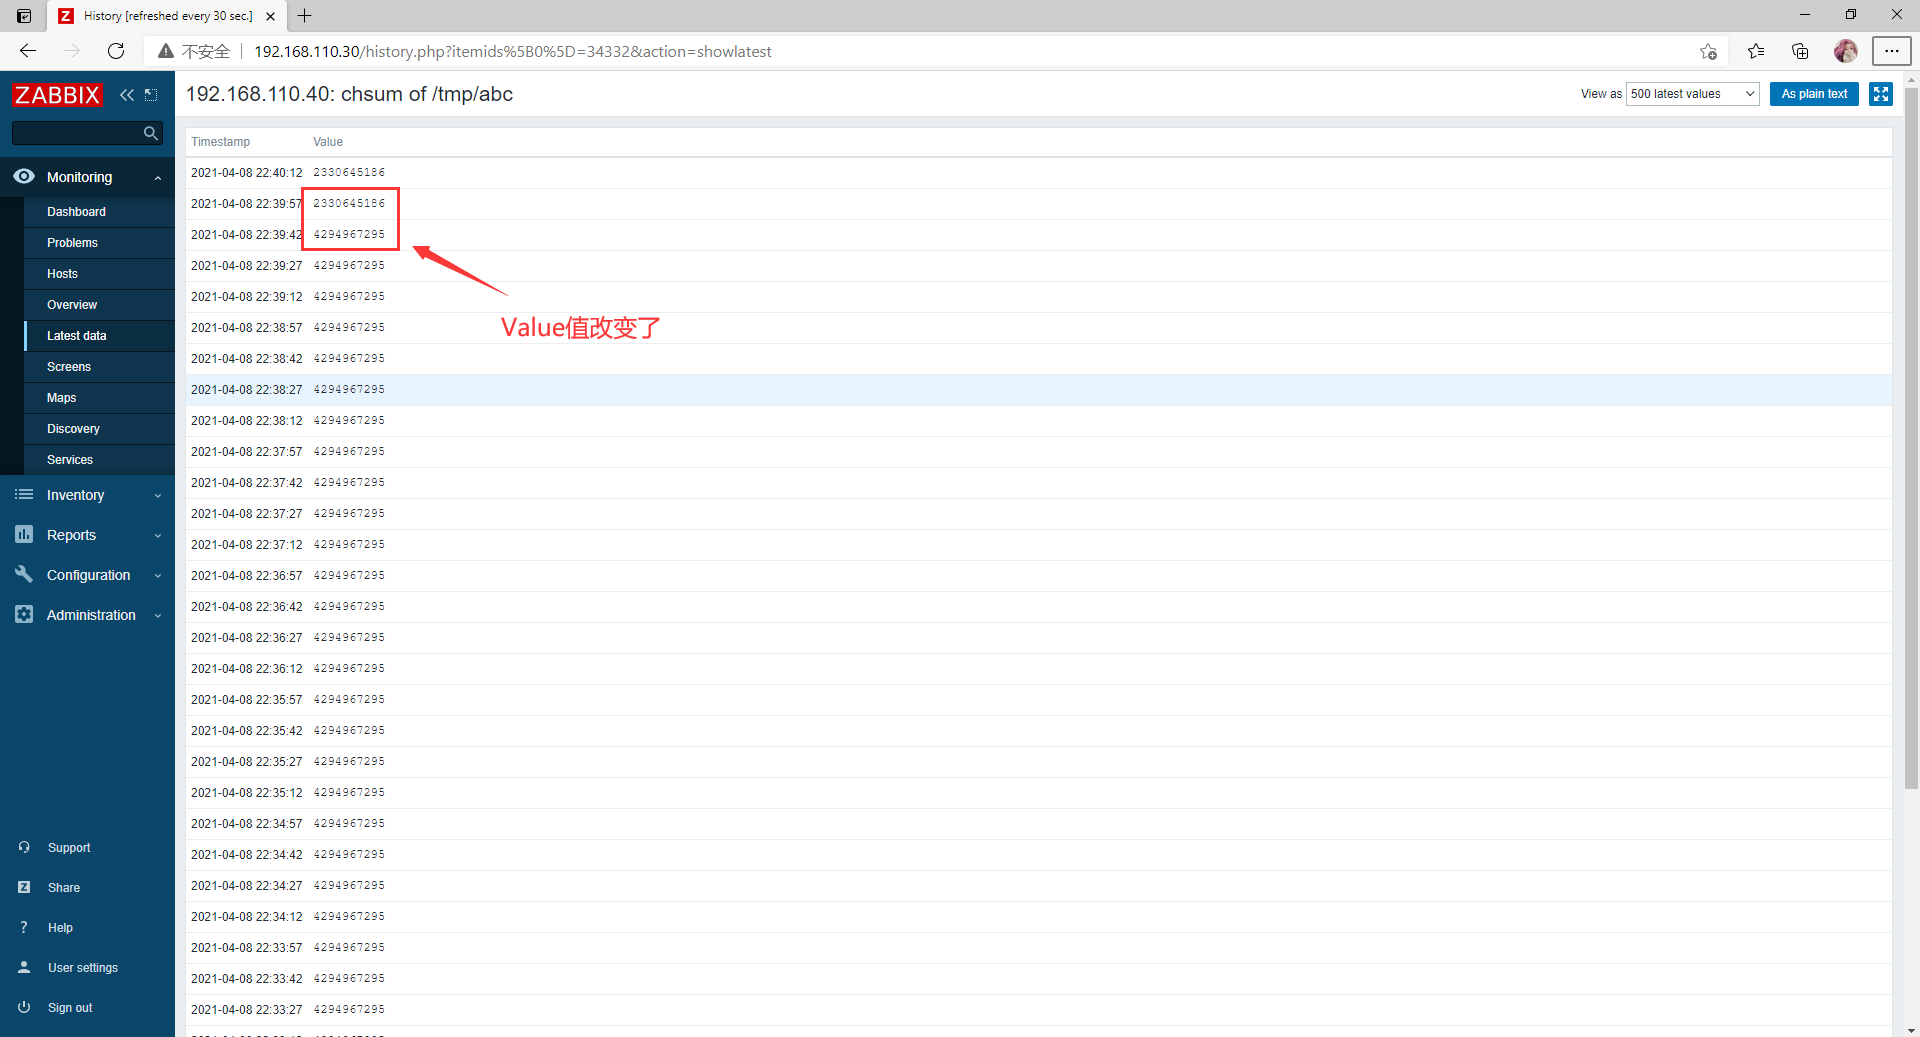
手动触发成功,Value值改变
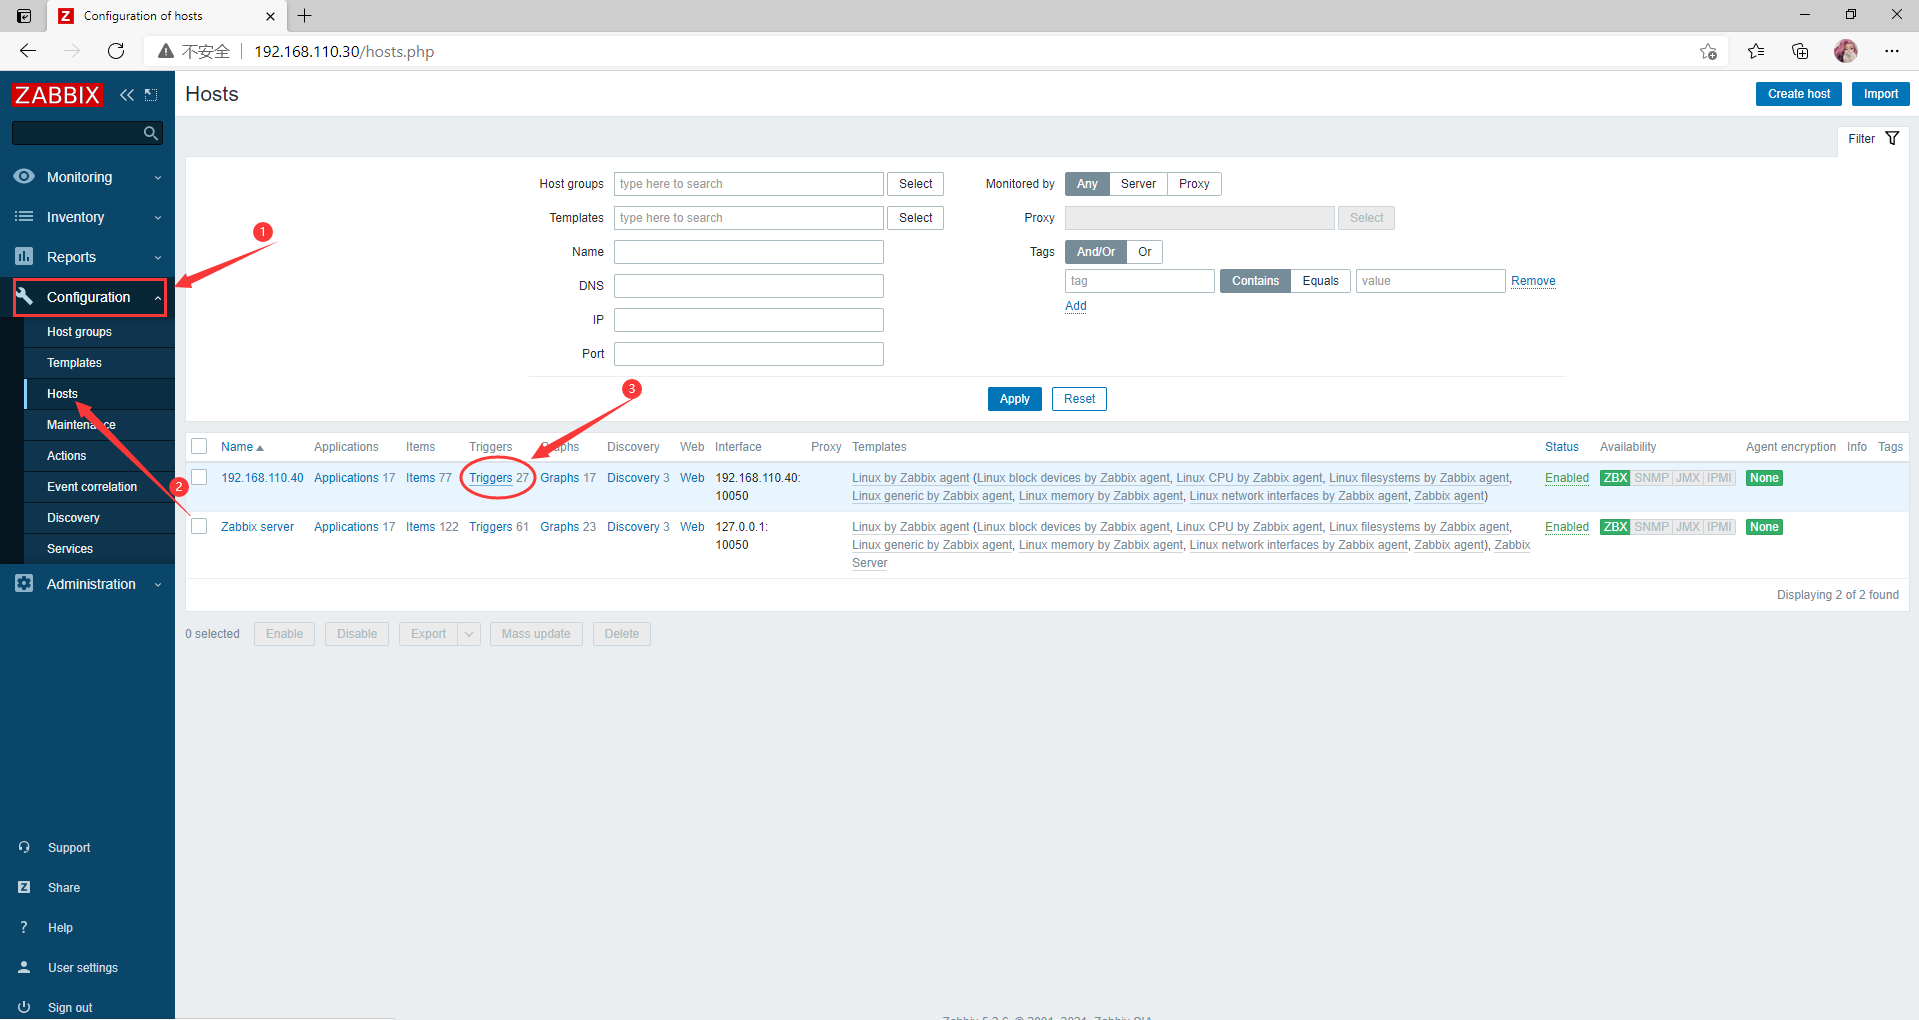
点击Triggers
点击Create Triggers
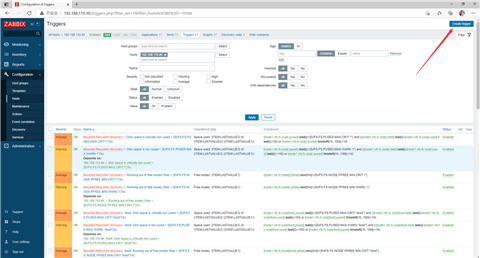
配置Triggers
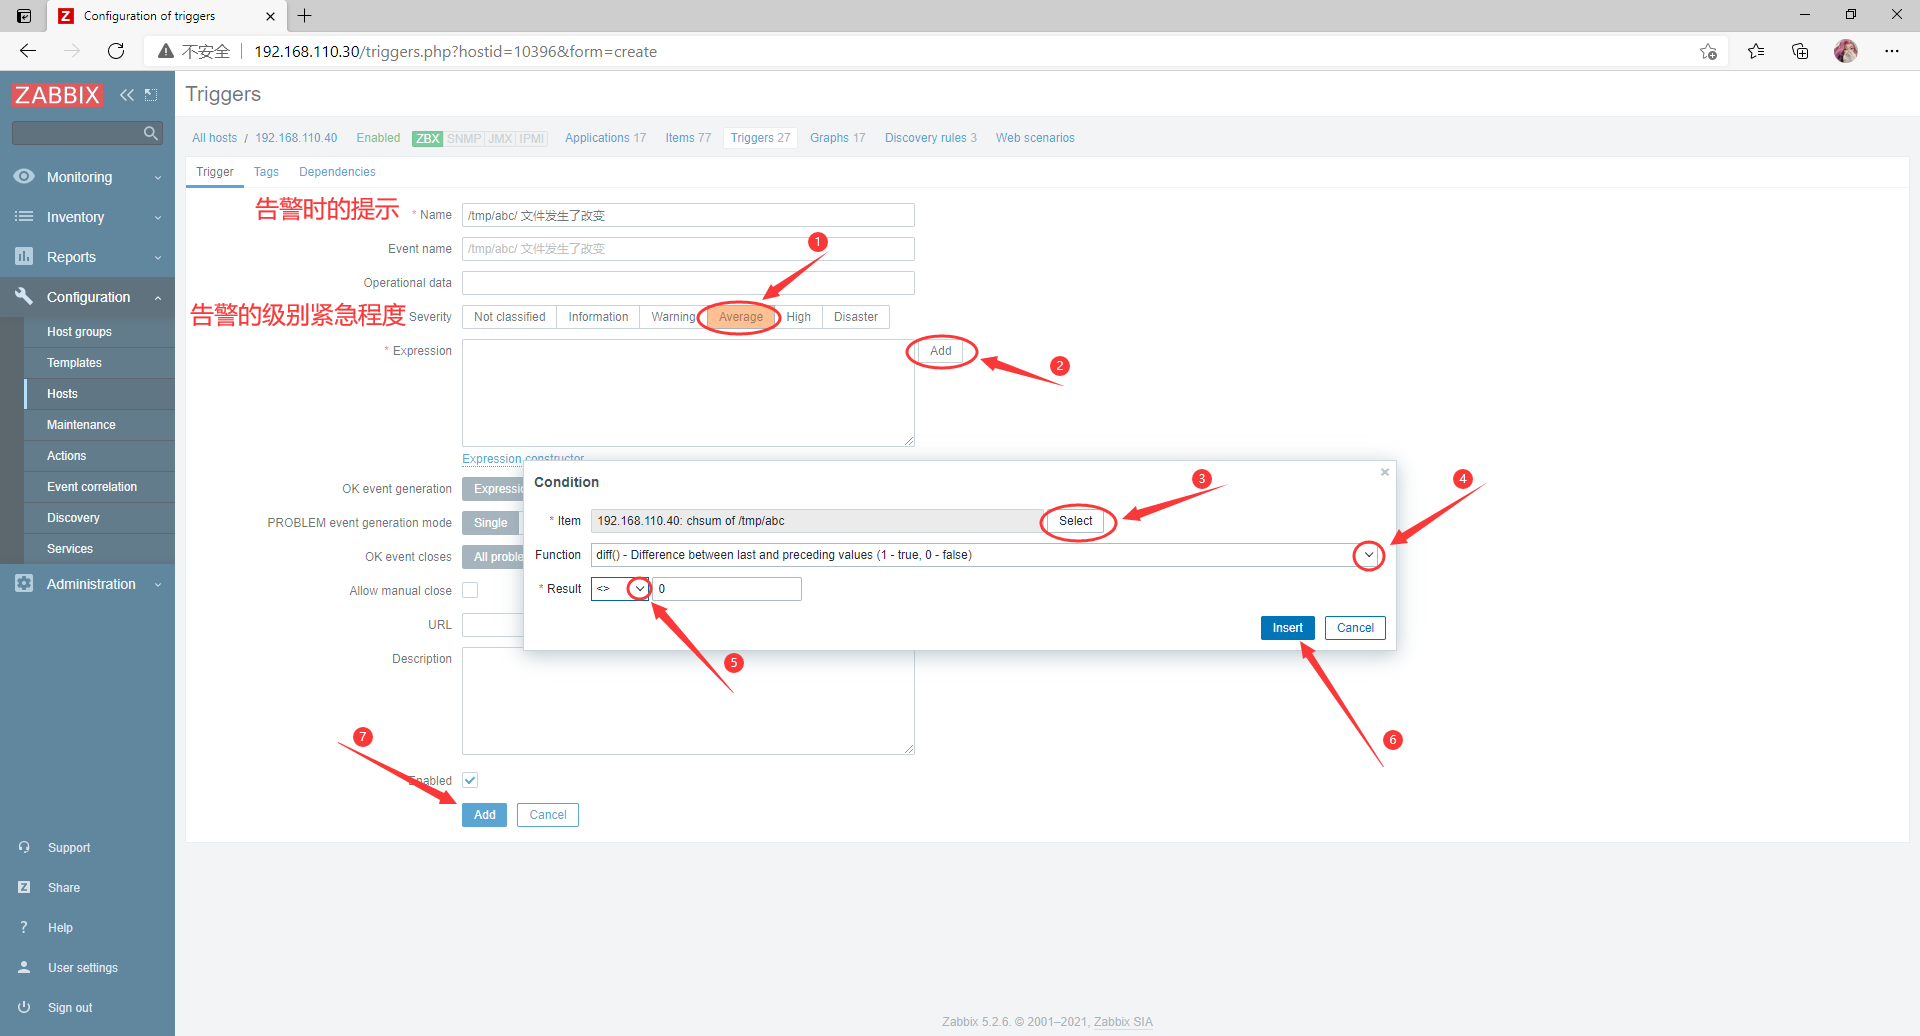
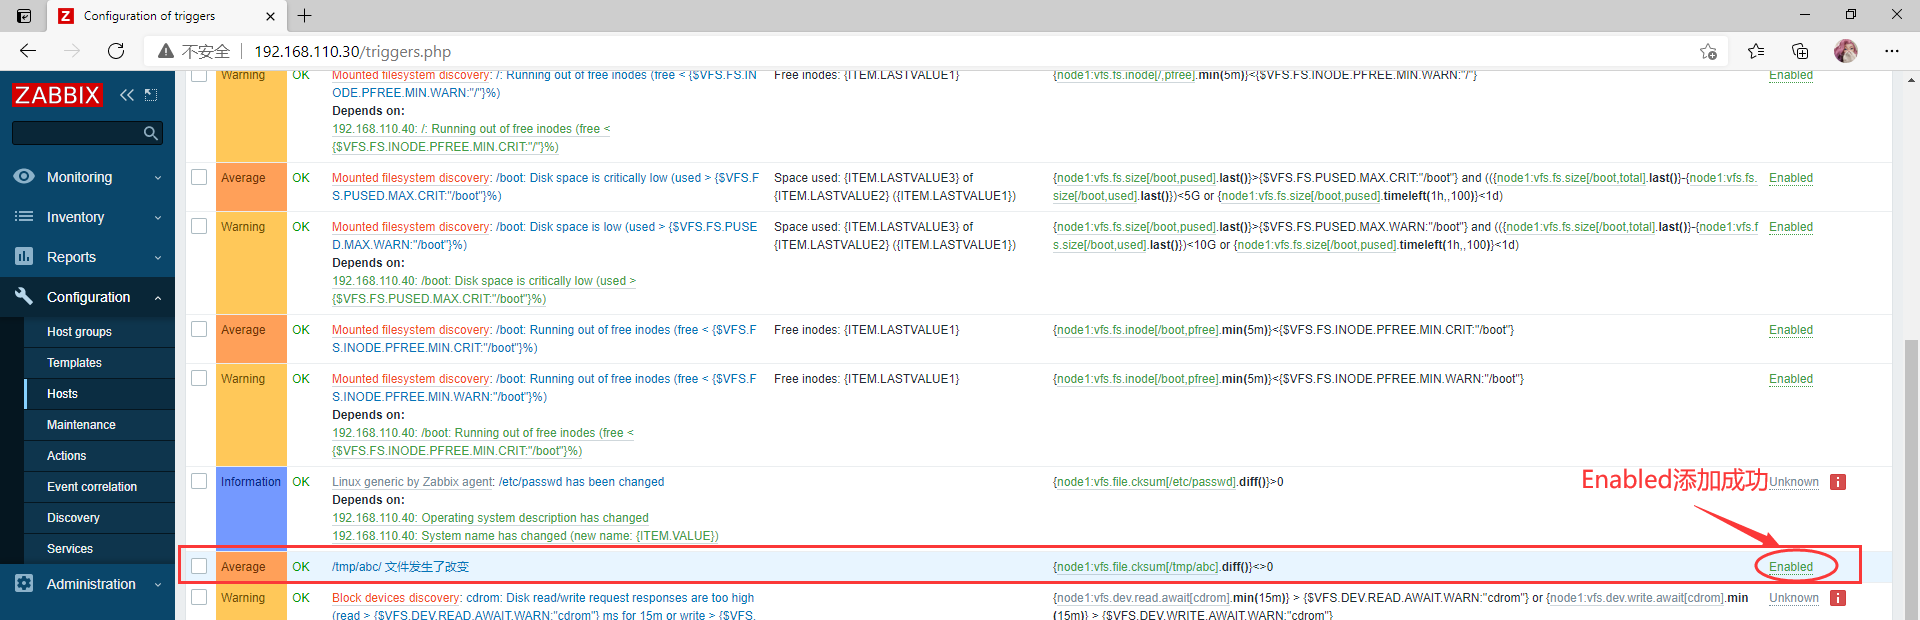
触发器配置成功
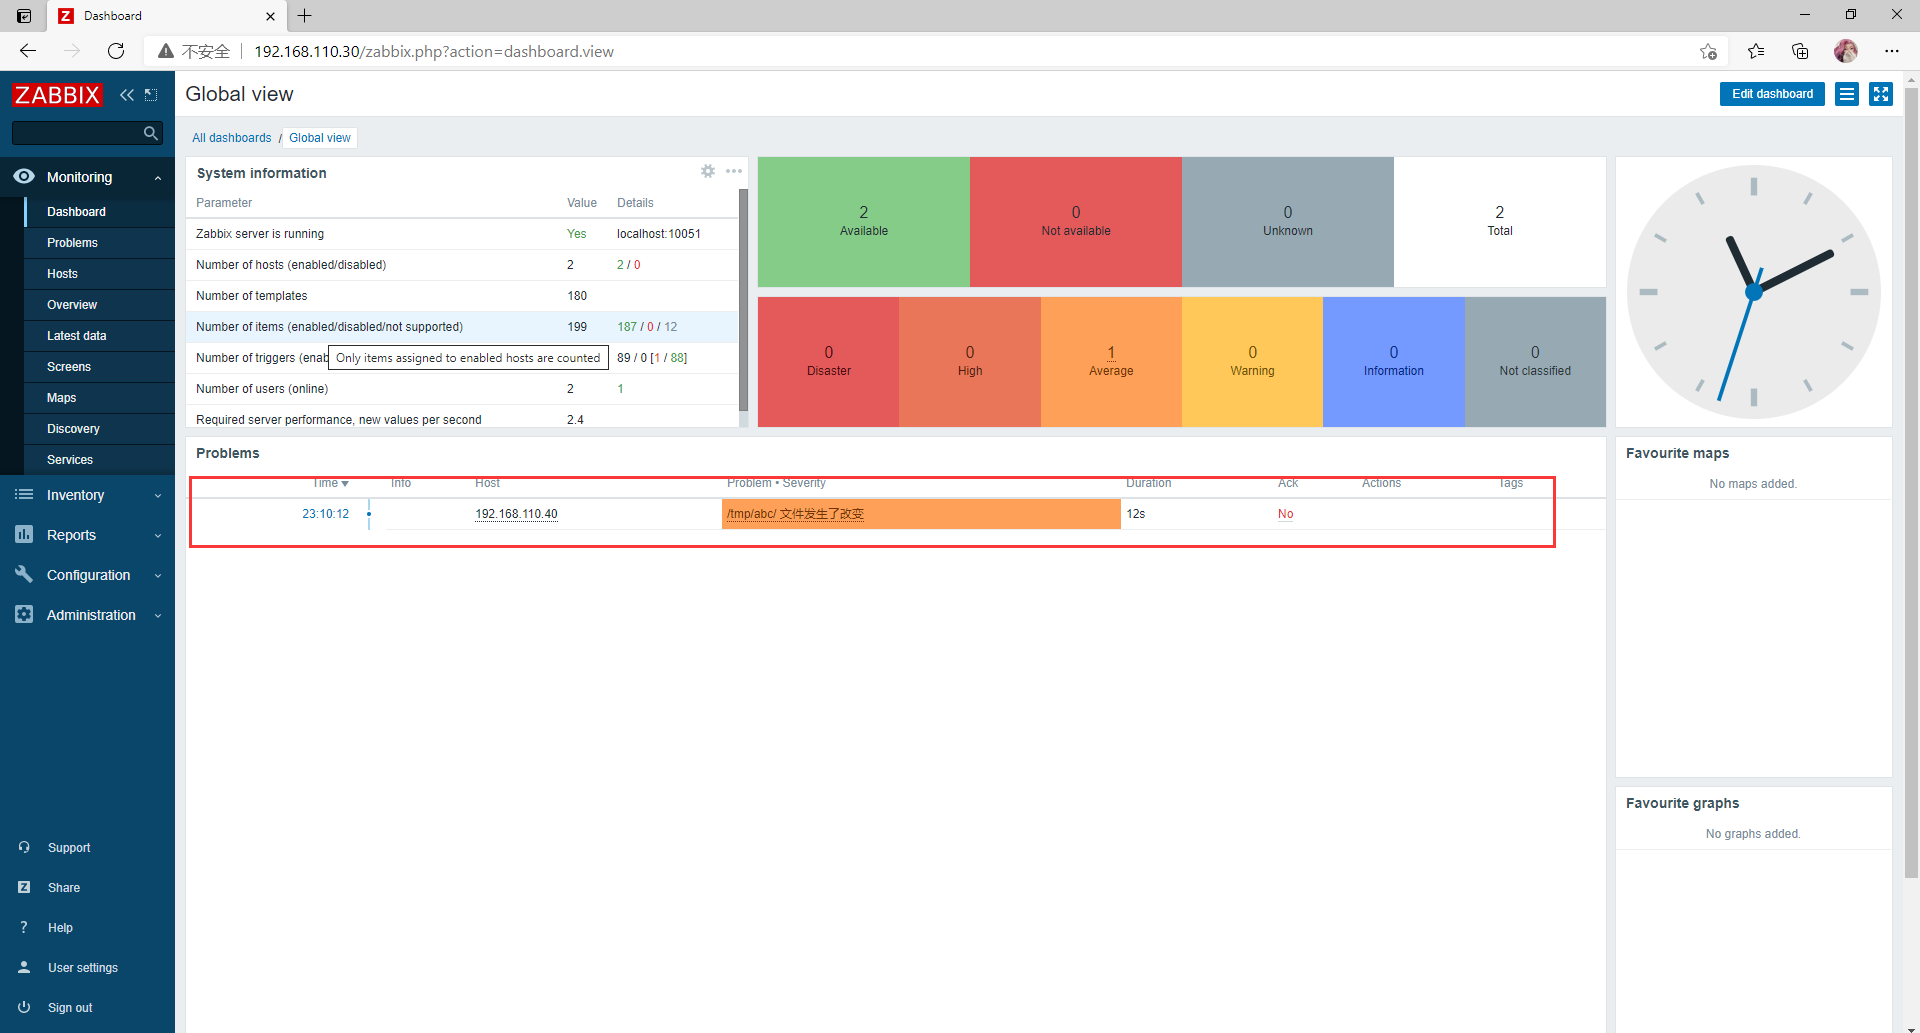
手动触发,测试触发器是否回被触发
//修改abc文件
[root@agent ~]# echo 456 > /tmp/abc
[root@agent ~]# cat /tmp/abc
456
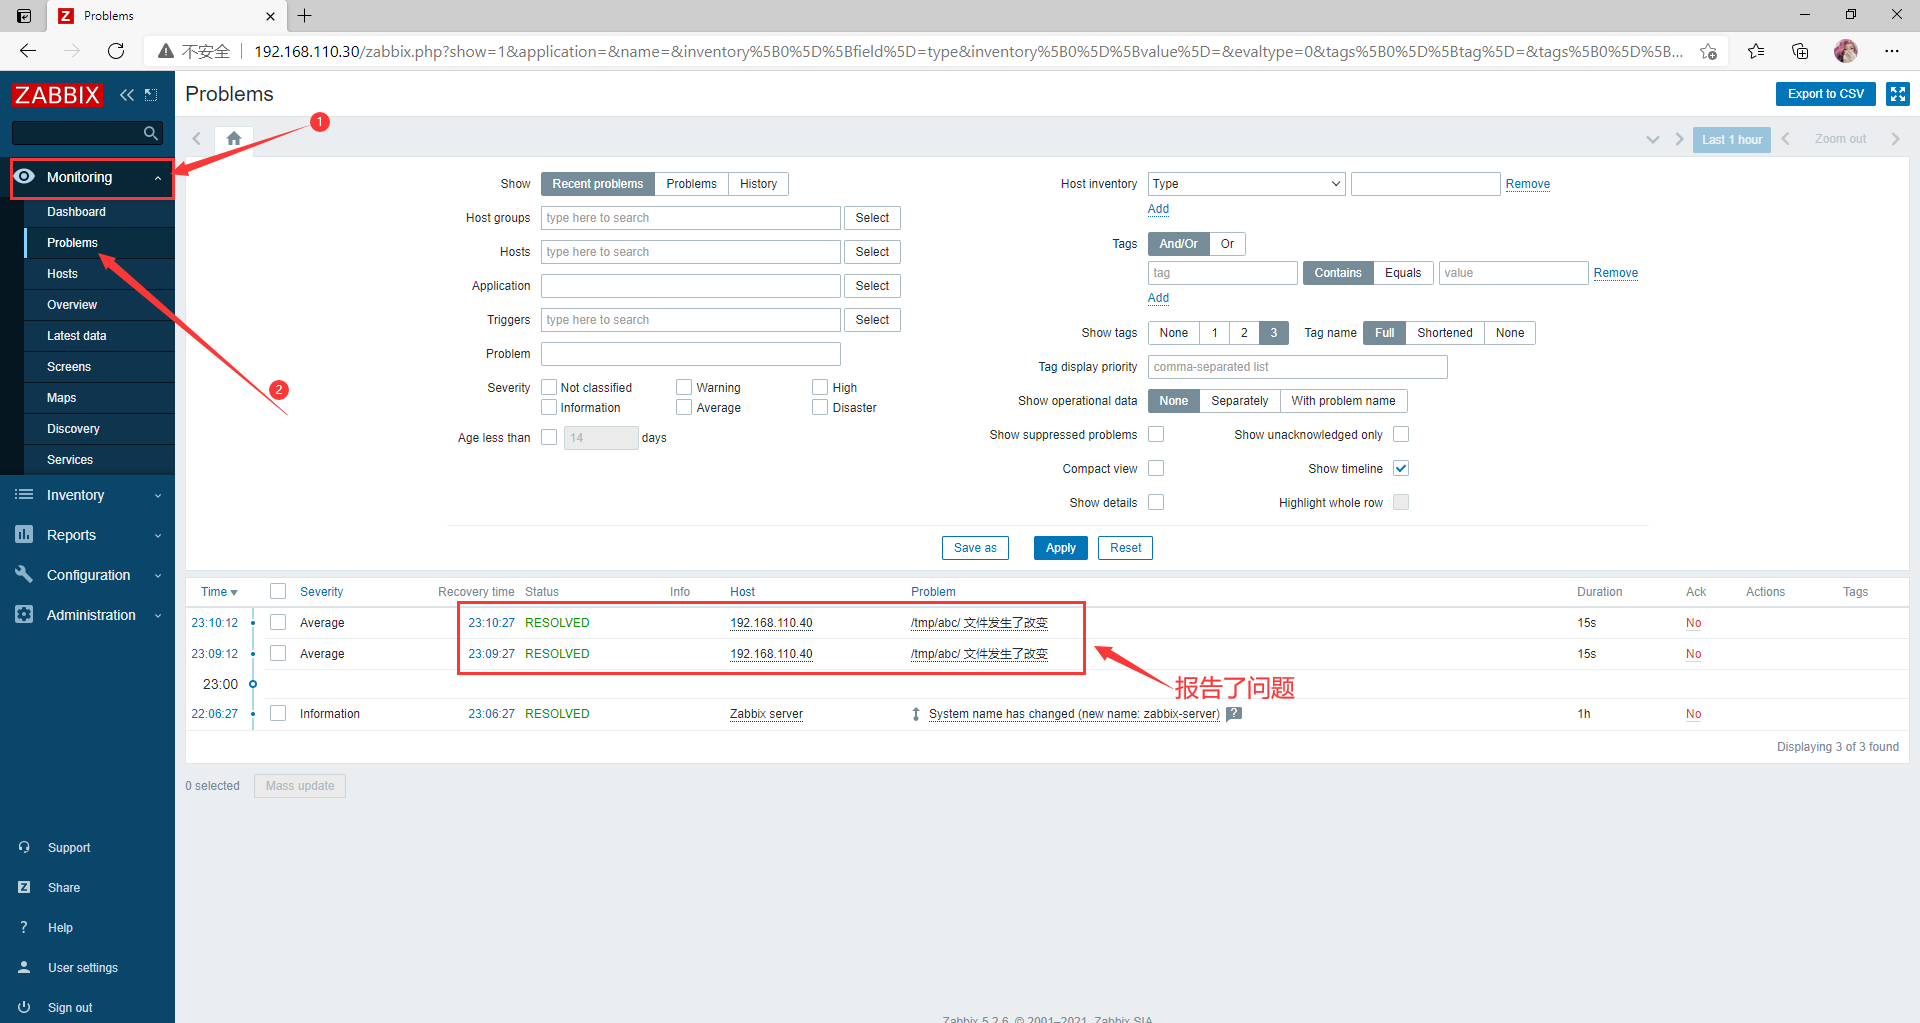
成功触发
本次使用的时通过邮箱的方式
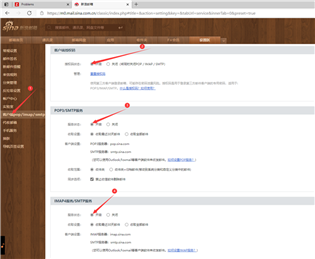
开启POP3/SMTP服务,获取授权码
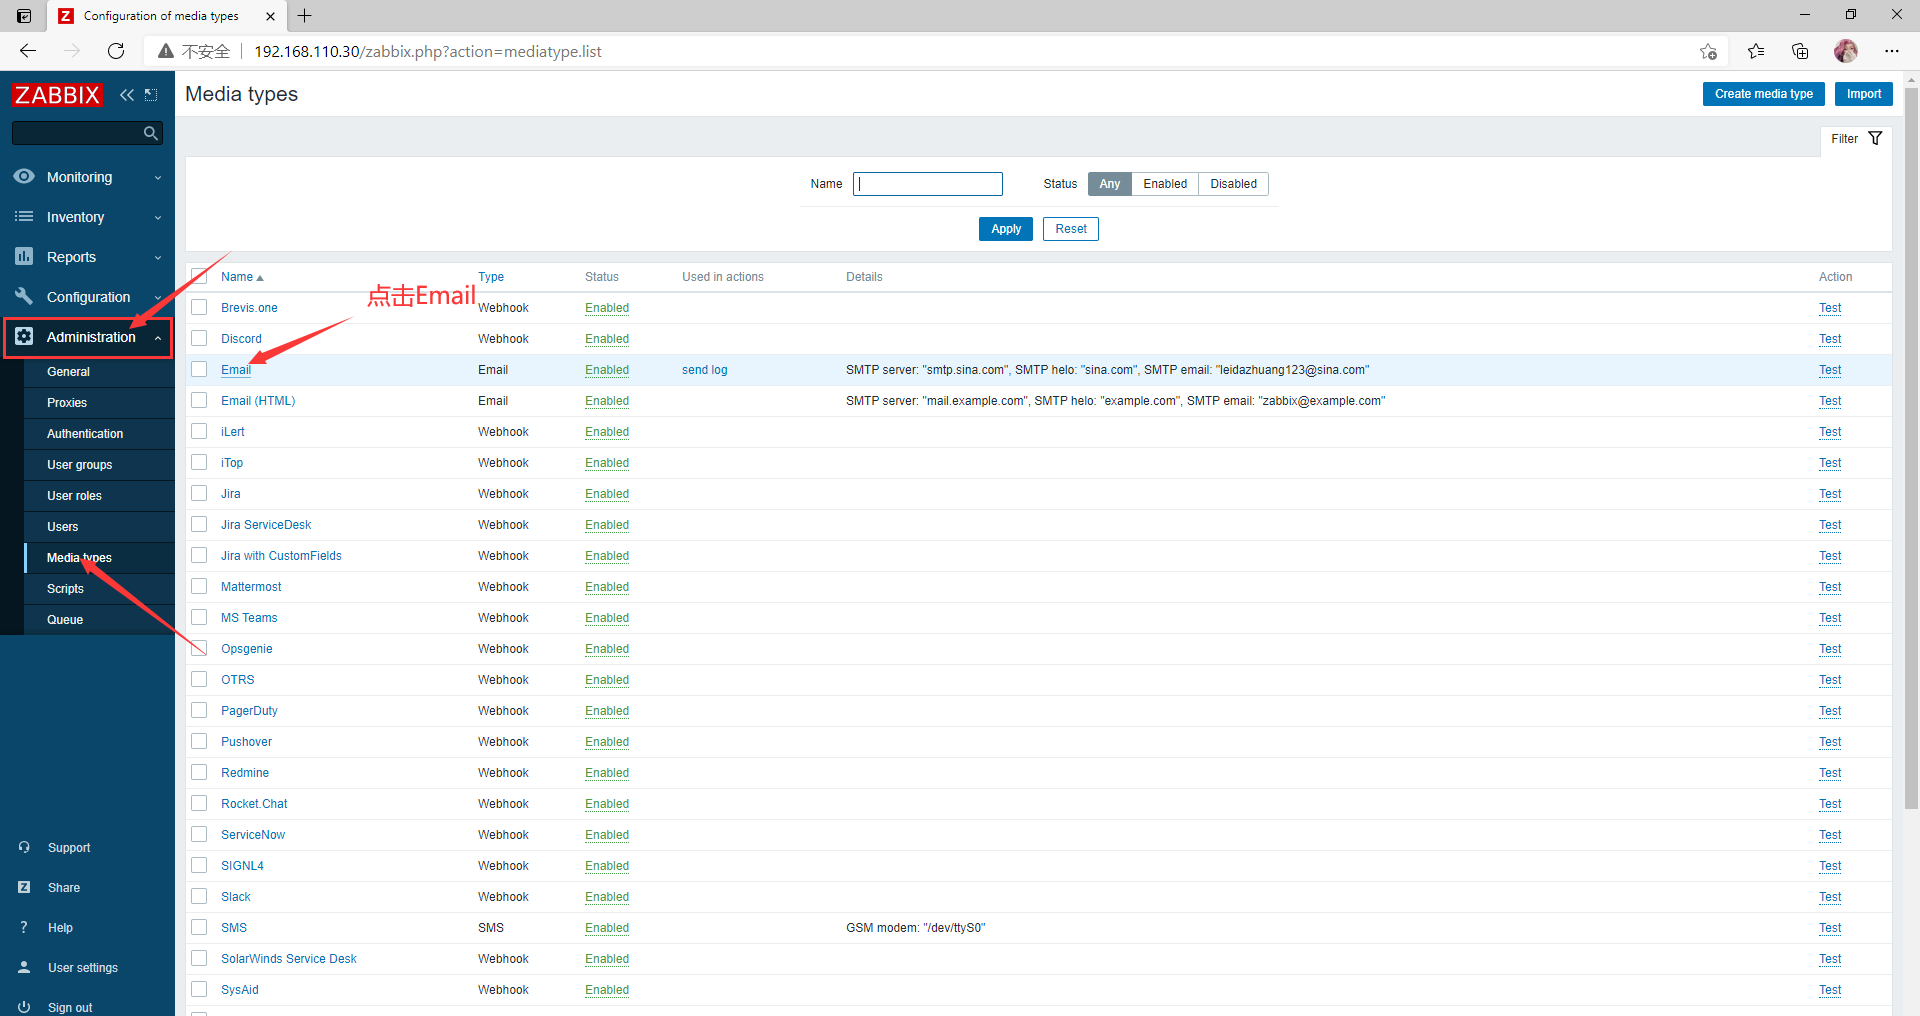
添加邮箱告警,点击Email
配置媒介

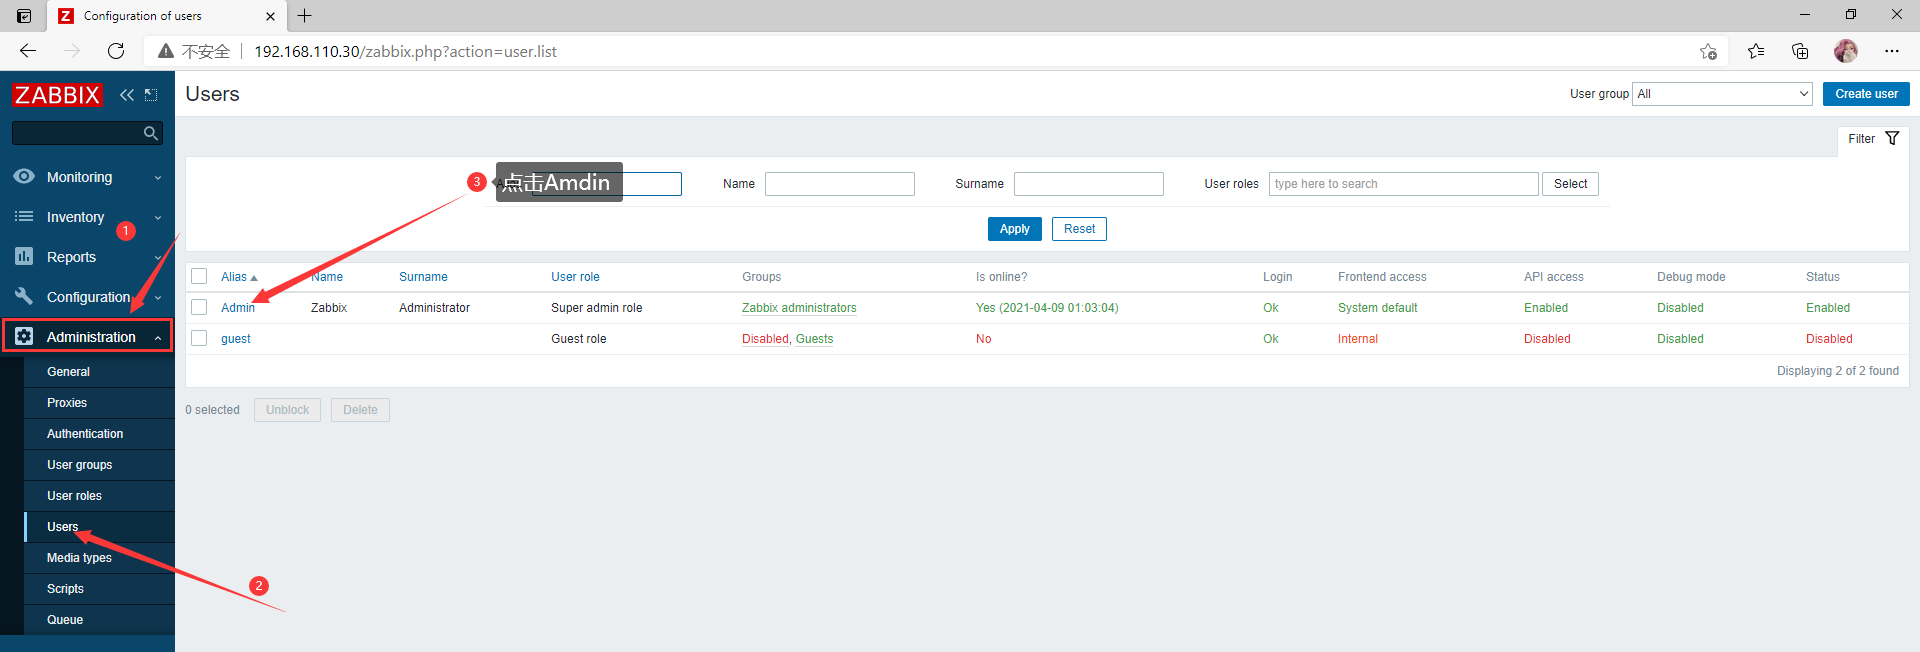
点击Admin
配置收件邮箱
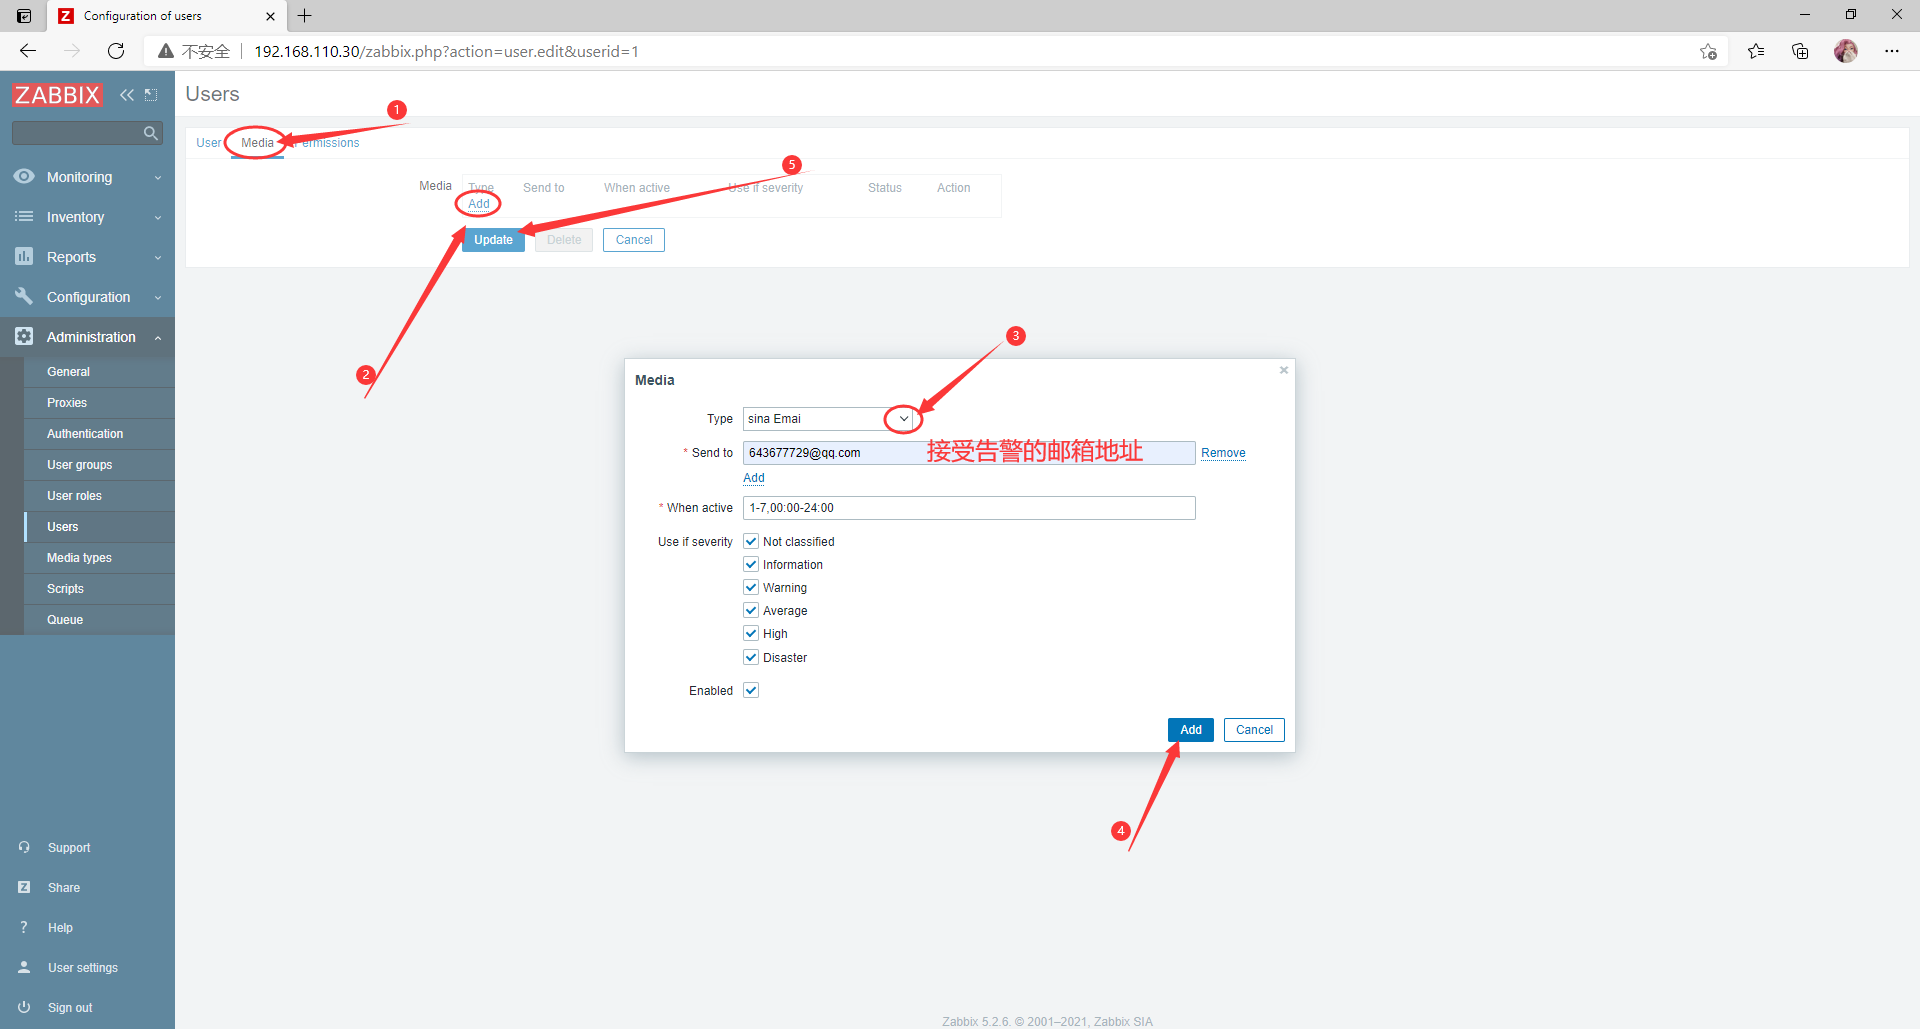
添加成功

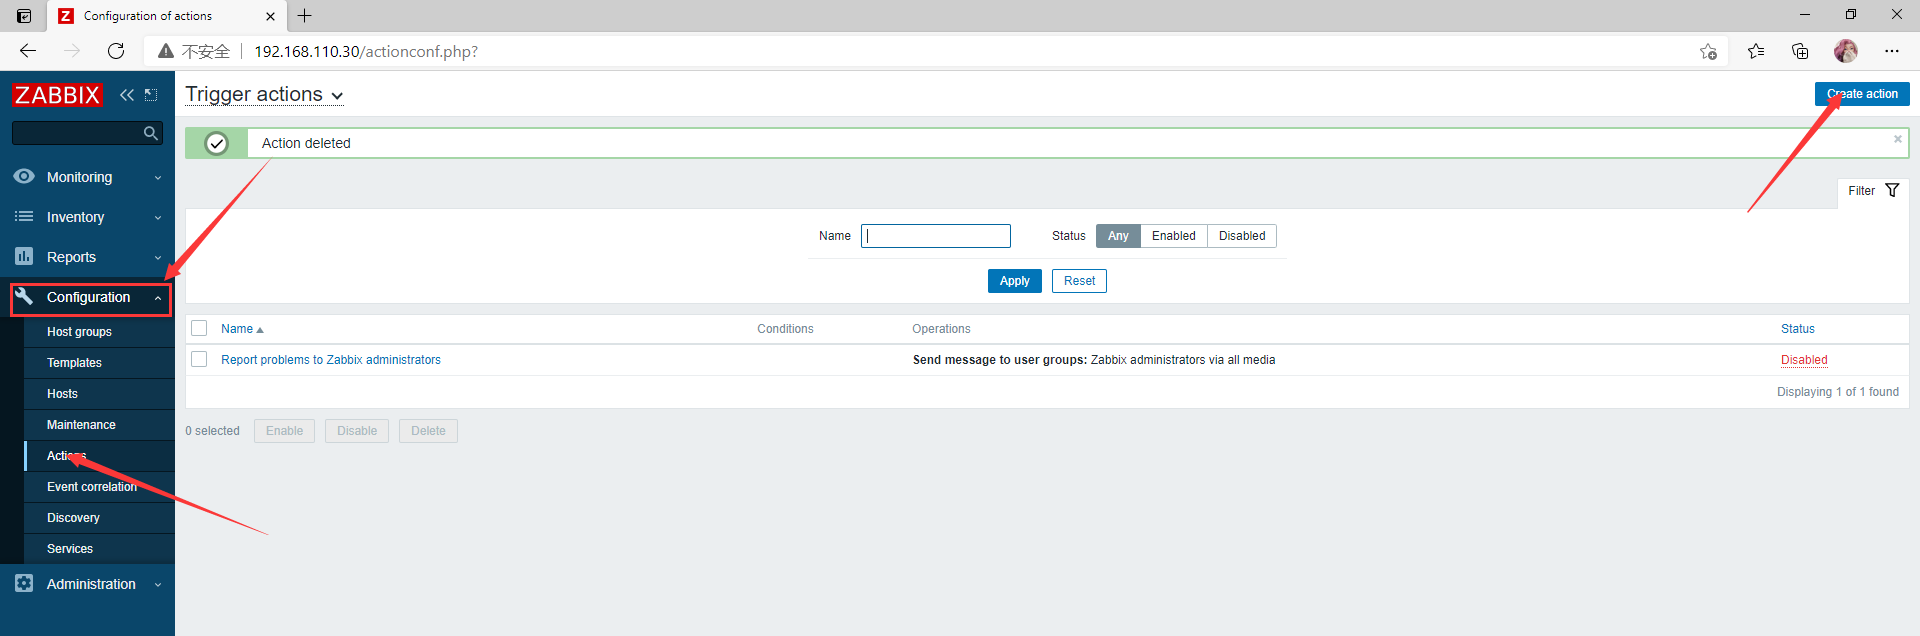
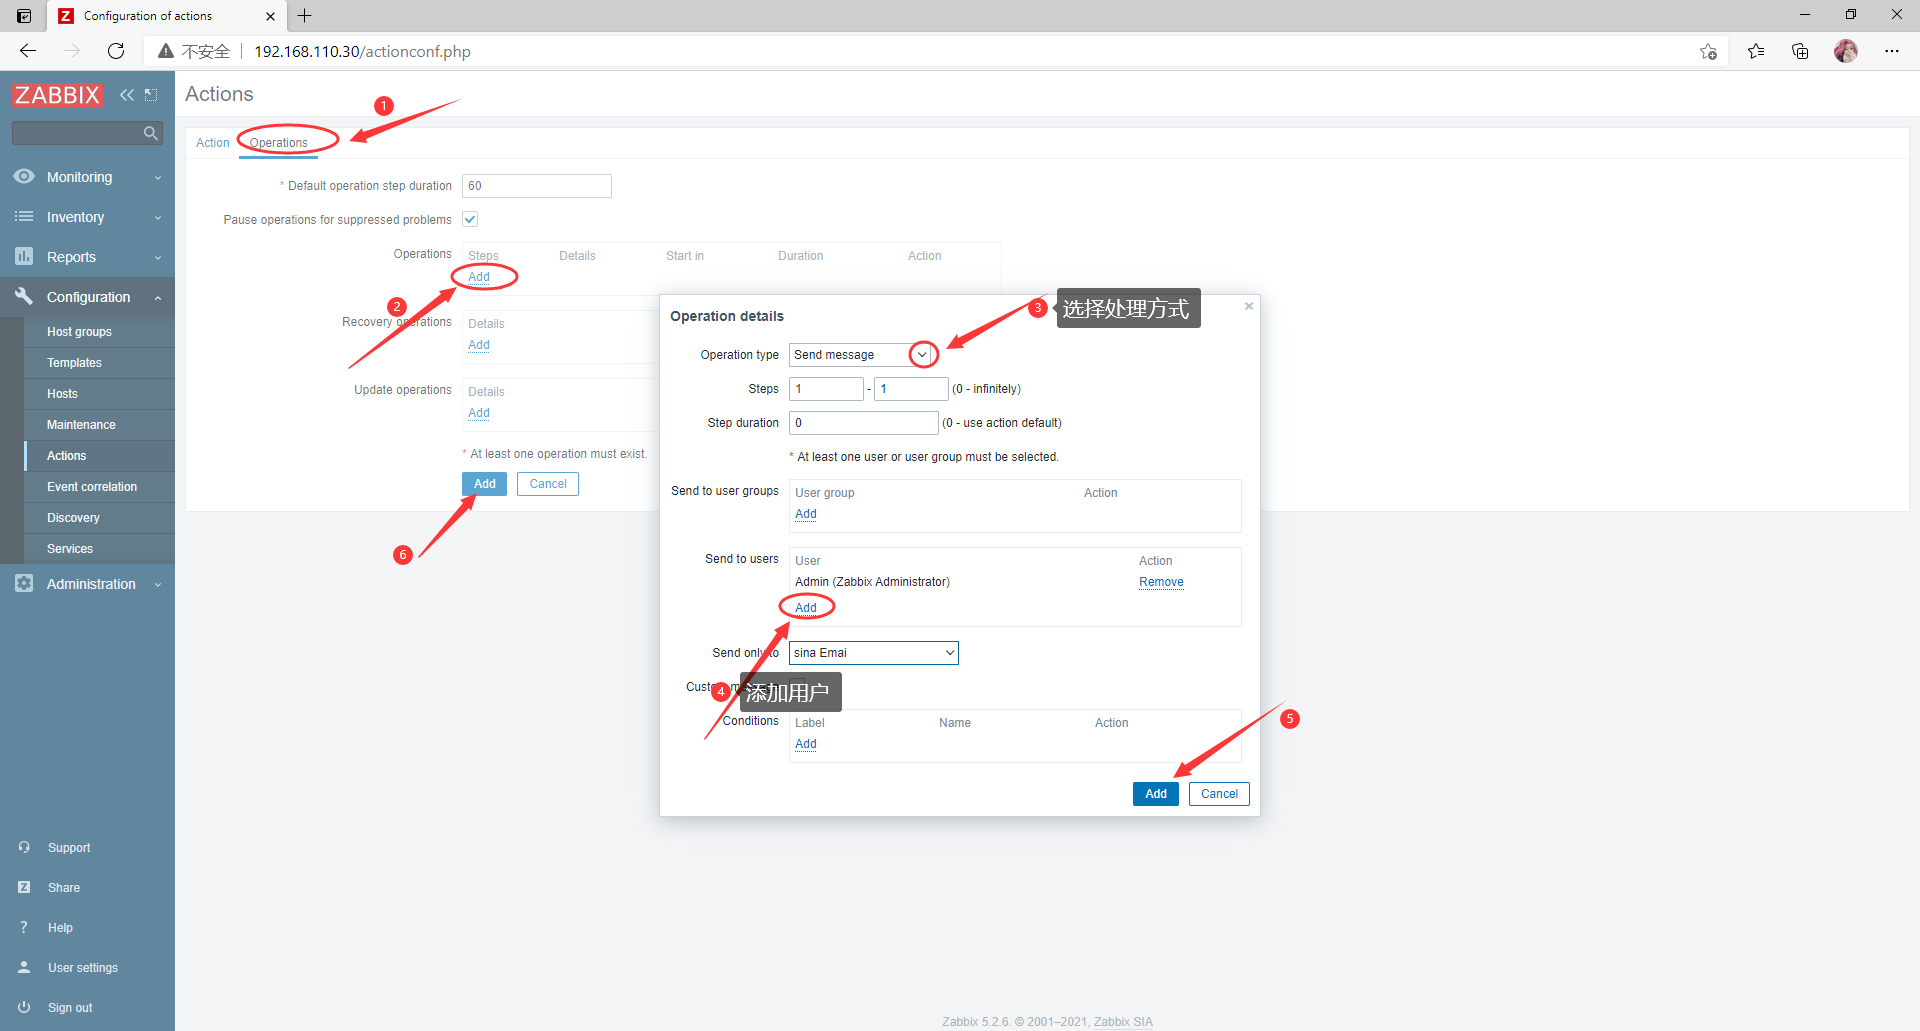
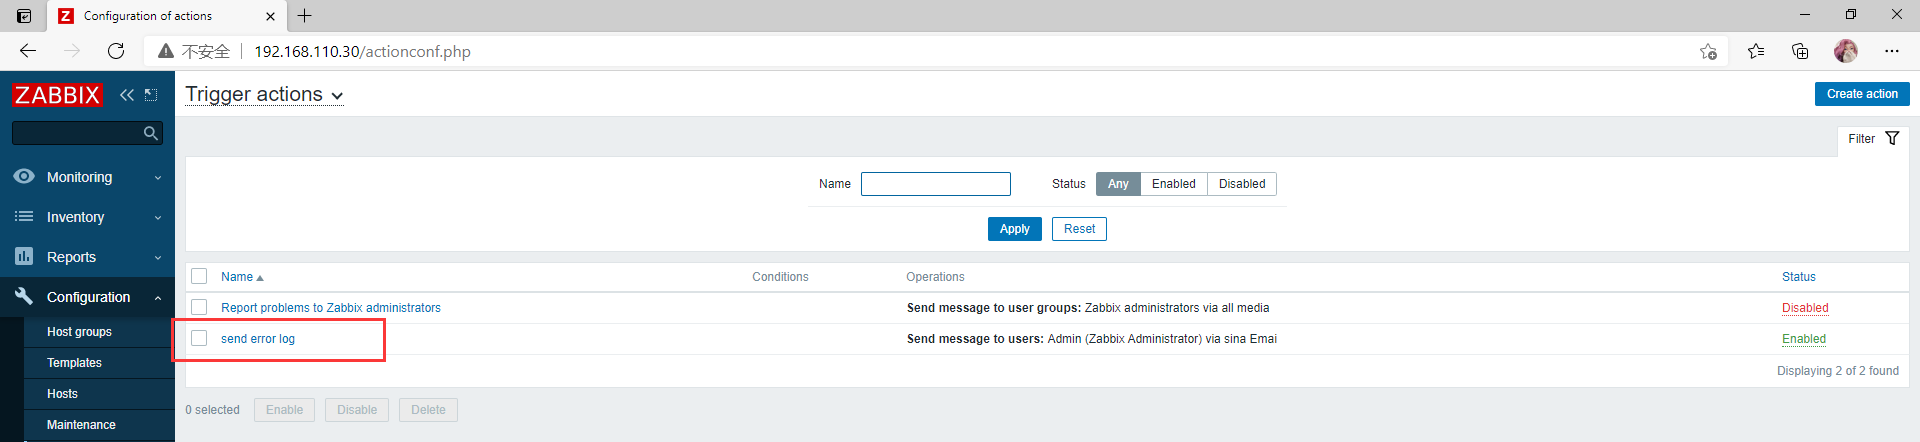
创建动作
配置动作
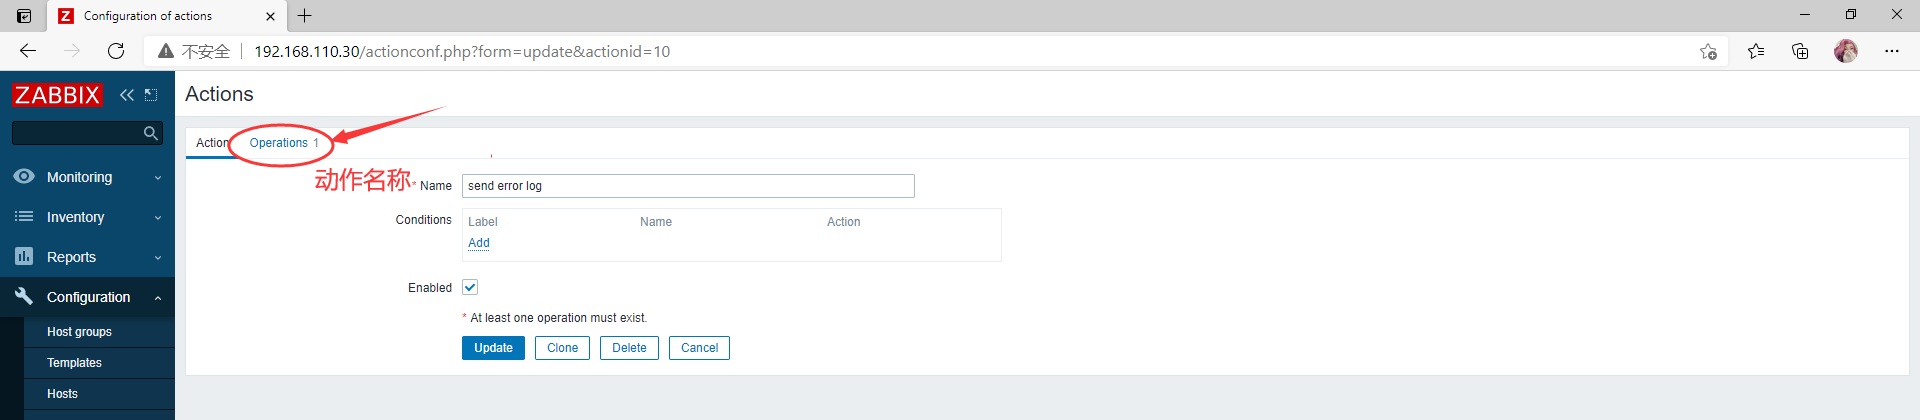
配置完成
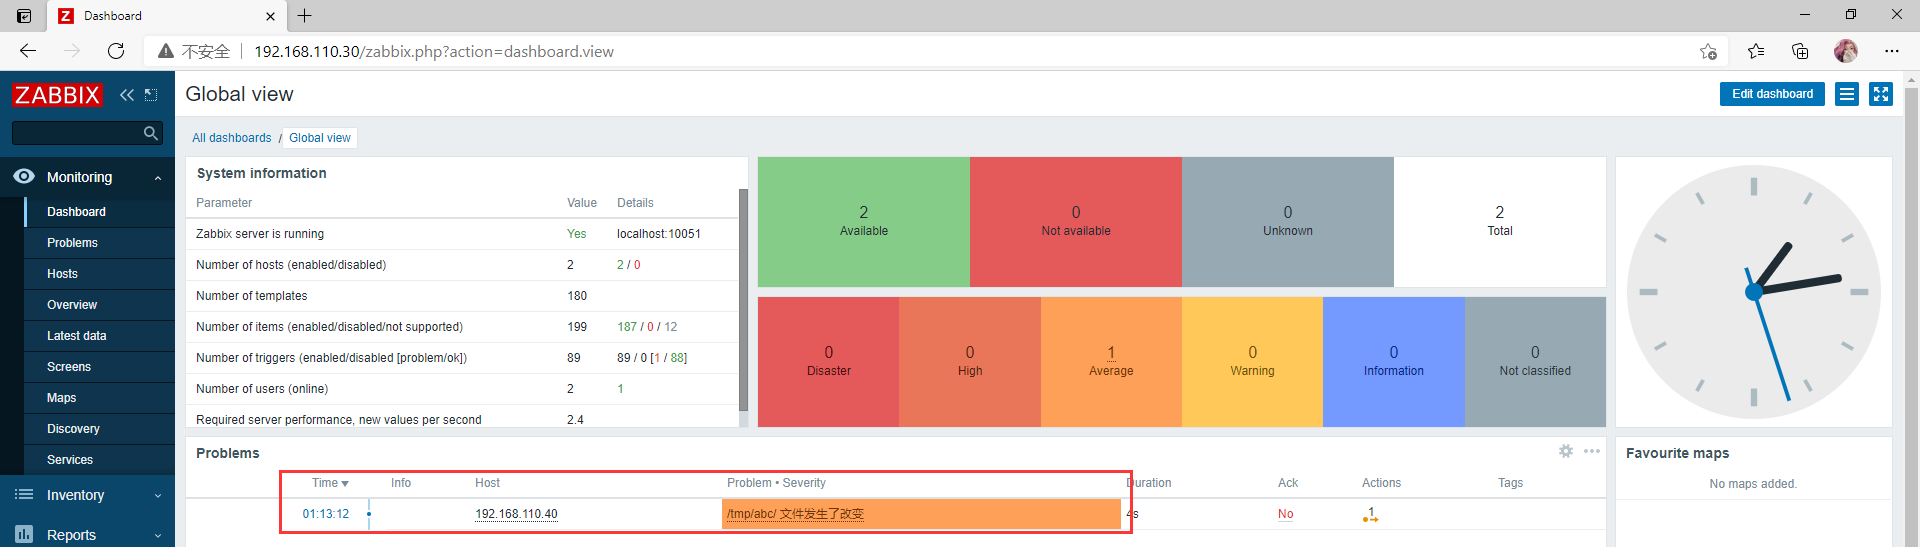
//更改abc文件
[root@agent ~]# echo 852 > /tmp/abc
触发成功

邮箱验证
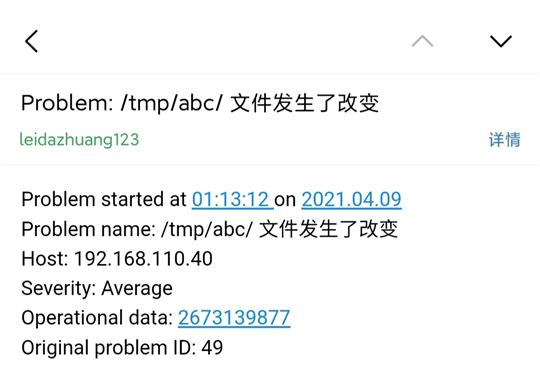
触发成功,验证成功 ! ! !
原文:https://www.cnblogs.com/leixixi/p/14635559.html