5.8.1 简介
Nginx是一款使用C语言编写的轻量级开源Web服务器/代理服务器软件,它占用内存少,资源消耗低,并发能力强,功能丰富,稳定性好,深受一线互联网大厂的青睐。常用在web服务和负载均衡服务中,目前web市场占有率第一,它简单易用,功能强大,市场上升趋势依旧明显。是web服务器的推荐首选产品。
5.8.2 安装
1) yum安装nginx
[root@centos7 ~]# yum install nginx -y
[root@centos7 ~]# systemctl start nginx
[root@centos7 ~]# ps -ef |grep nginx
[root@centos7 ~]# vi /etc/nginx/nginx.conf
location / {
root html;
index index.php index.html index.htm;
}
[root@centos7 ~]# nginx -t
[root@centos7 ~]# nginx -s reload
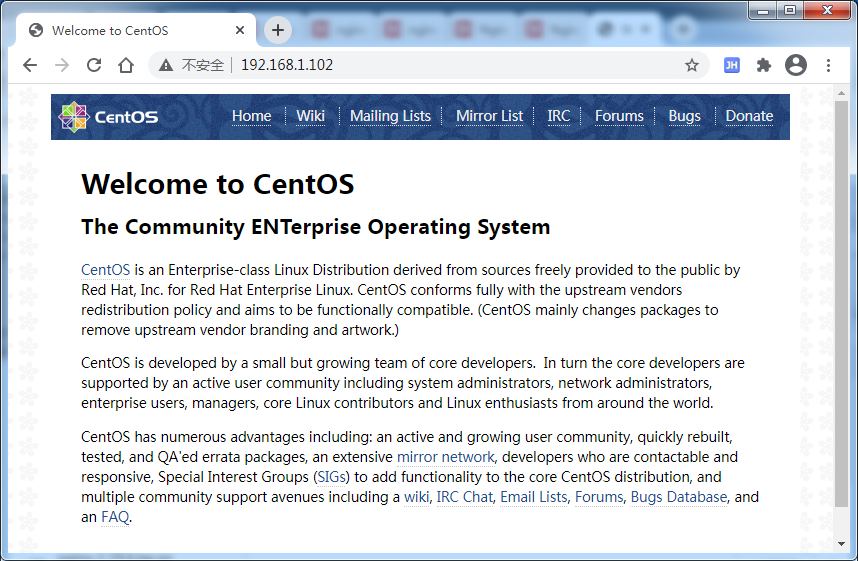
访问web页面http://192.168.1.102
2) 源码编译安装
[root@centos7 ~]# yum -y install gcc gcc-c++ autoconf automake
[root@centos7 ~]# yum -y install zlib zlib-devel openssl openssl-devel pcre-devel
[root@centos7 ~]# groupadd -r nginx
[root@centos7 ~]# useradd -s /sbin/nologin -g nginx -r nginx
[root@centos7 ~]# chown nginx.nginx /var/tmp/ -R
[root@centos7 ~]# wget http://nginx.org/download/nginx-1.19.6.tar.gz
[root@centos7 ~]# tar zxf nginx-1.19.6.tar.gz
[root@centos7 ~]# cd nginx-1.19.6
./configure \
--prefix=/usr \
--sbin-path=/usr/sbin/nginx \
--conf-path=/etc/nginx/nginx.conf \
--error-log-path=/var/log/nginx/error.log \
--pid-path=/var/run/nginx/nginx.pid \
--user=nginx \
--group=nginx \
--with-http_ssl_module \
--with-http_flv_module \
--with-http_gzip_static_module \
--http-log-path=/var/log/nginx/access.log \
--http-client-body-temp-path=/var/tmp/nginx/client \
--http-proxy-temp-path=/var/tmp/nginx/proxy \
--http-fastcgi-temp-path=/var/tmp/nginx/fcgi \
--with-http_stub_status_module
[root@centos7 ~]# make && make install
[root@centos7 ~]# chown nginx.nginx /var/tmp/ -R
[root@centos7 ~]# mkdir -p /var/tmp/nginx/client
[root@centos7 ~]# nginx -t
[root@centos7 ~]# nginx
[root@centos7 ~]# ps -ef|grep nginx
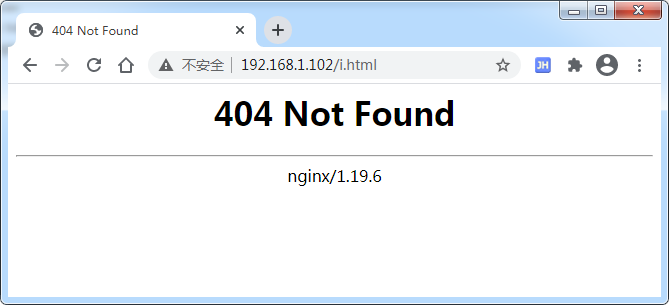
浏览器访问:192.168.1.102/i.html 查看版本
5.8.3 配置解析
#运行用户
user nginx;
#启动进程,通常设置成和cpu的数量相等
worker_processes 1;
#全局错误日志及PID文件
#error_log logs/error.log;
#error_log logs/error.log notice;
#error_log logs/error.log info;
#pid logs/nginx.pid;
#工作模式及连接数上限
events {
#epoll是多路复用IO(I/O Multiplexing)中的一种方式,
#仅用于linux2.6以上内核,可以大大提高nginx的性能
use epoll;
#单个后台worker process进程的最大并发链接数
worker_connections 1024;
# 并发总数是 worker_processes 和 worker_connections 的乘积,即 max_clients = worker_processes * worker_connections
# 在设置了反向代理的情况下,max_clients = worker_processes * worker_connections / 4
# 为什么上面反向代理要除以4,应该说是一个经验值
# 根据以上条件,正常情况下的Nginx Server可以应付的最大连接数为:4 * 8000 = 32000
# worker_connections 值的设置跟物理内存大小有关
# 因为并发受IO约束,max_clients的值须小于系统可以打开的最大文件数
# 而系统可以打开的最大文件数和内存大小成正比,一般1GB内存的机器上可以打开的文件数大约是10万左右
# 我们来看看360M内存的VPS可以打开的文件句柄数是多少:
# $ cat /proc/sys/fs/file-max
# 输出 34336
# 32000 < 34336,即并发连接总数小于系统可以打开的文件句柄总数,这样就在操作系统可以承受的范围之内
# 所以,worker_connections 的值需根据 worker_processes 进程数目和系统可以打开的最大文件总数进行适当地进行设置
# 使得并发总数小于操作系统可以打开的最大文件数目
# 其实质也就是根据主机的物理CPU和内存进行配置
# 当然,理论并发总数会和实际有所偏差,因为主机还有其他的工作进程需要消耗系统资源。
# ulimit -SHn 65535
}
http {
#设定mime类型,类型由mime.type文件定义
include mime.types;
default_type application/octet-stream;0
#设定日志格式
log_format main ‘$remote_addr - $remote_user [$time_local] "$request" ‘
‘$status $body_bytes_sent "$http_referer" ‘
‘"$http_user_agent" "$http_x_forwarded_for"‘;
access_log logs/access.log main;
#sendfile 指令指定 nginx 是否调用 sendfile 函数(zero copy 方式)来输出文件,
#对于普通应用,必须设为 on,
#如果用来进行下载等应用磁盘IO重负载应用,可设置为 off,
#以平衡磁盘与网络I/O处理速度,降低系统的uptime.
sendfile on;
#tcp_nopush on;
#连接超时时间
#keepalive_timeout 0;
keepalive_timeout 65;
tcp_nodelay on;
#开启gzip压缩
gzip on;
gzip_disable "MSIE [1-6].";
#设定请求缓冲
client_header_buffer_size 128k;
large_client_header_buffers 4 128k;
#设定虚拟主机配置
server {
#侦听80端口
listen 80;
#定义使用 www.nginx.cn访问
server_name www.nginx.cn;
#设定本虚拟主机的访问日志
access_log logs/nginx.access.log main;
#默认请求
location / {
#定义服务器的默认网站根目录位置
root html;
#定义首页索引文件的名称
index index.php index.html index.htm;
}
# 定义错误提示页面
error_page 500 502 503 504 /50x.html;
location = /50x.html {
root html;
}
#静态文件,nginx自己处理
location ~ ^/(p_w_picpaths|javascript|js|css|flash|media|static)/ {
#过期30天,静态文件不怎么更新,过期可以设大一点,
#如果频繁更新,则可以设置得小一点。
expires 30d;
}
若果访问URL中以.php结尾,请求转发给127.0.0.1服务器,proxy_pass 实现代理功能
location ~ .php$ {
proxy_pass http://127.0.0.1;
}
#PHP 脚本请求全部转发到 FastCGI处理. 使用FastCGI默认配置.
location ~ .php$ {
root html;
fastcgi_pass 127.0.0.1:9000;
fastcgi_index index.php;
fastcgi_param SCRIPT_FILENAME $document_root$fastcgi_script_name;
include fastcgi_params;
}
#禁止访问 .ht文件
location ~ /.ht {
deny all;
}
}
}
5.8.4 高级配置
一、用户认证
用户认证功能是利用Apache的工具htpasswd生成的密钥,所以需要安装Apache的这个工具即可,我们用yum来安装就可以。
[root@localhost ~]# yum install -y httpd
[root@localhost ~]# htpasswd -c /usr/local/nginx/conf/.htpasswd test
New password:
Re-type new password: ##创建第二个账户密码,不需要-c
Adding password for user mydiscuz
[root@localhost ~]# cat /usr/local/nginx/conf/.htpasswd
mydiscuz:$apr1$ejPLa15T$kuyykf8at2I77oogZ0kUz1
修改配置,主要是修改server模块
location ~ .*admin\.php$ {
auth_basic "testlinux auth";
auth_basic_user_file /usr/local/nginx/conf/.htpasswd;
include fastcgi_params;
fastcgi_pass 127.0.0.1:9000;
fastcgi_index index.php;
fastcgi_param SCRIPT_FILENAME /data/www$fastcgi_script_name;
}
[root@localhost ~]#/usr/local/nginx/sbin/nginx -t 检查
[root@localhost ~]# service nginx reload 重新加载
二、域名重定向(域名跳转)
cd /usr/local/nginx/conf/vhosts/--> vim test.conf插入
server
{
listen 80;
server_name www.test.com www.aaa.com www.bbb.com;
if ($host != ‘www.test.com‘)
{
rewrite ^/(.*)$ http://www.test.com/$1 permanent;
}
index index.html index.htm index.php;
root /data/www;
location ~ .*admin\.php$ {
以下无改动
2. /usr/local/nginx/sbin/nginx -t 检查。 /usr/local/nginx/sbin/nginx -s reload 重新加载
3.在C:\Windows\System32\drivers\etc找到hosts用文本打开在
# localhost name resolution is handled within DNS itself.
# 127.0.0.1 localhost
# ::1 localhost
192.168.52.120 www.test.com www.aaa.com www.222.com www.bbb.com
三、静态文件缓存
location ~ .*\.(gif|jpg|jpeg|png|bmp|swf)$
{
expires 30d;
access_log off;
}
location ~ .*\.(js|css)?$
{
expires 12h;
access_log off;
}
四、防盗链
location ~ .*\.(gif|jpg|jpeg|png|bmp|swf|flv|rar|zip|gz|bz2)$
#针对这些文件进行防盗链配置
{
access_log off;
expires 15d;
valid_referers none blocked *.test.com *.aaa.com *.bbb.com; #只允许这几个域名
if ($invalid_referer)
{
return 403;
# rewrite ^/ http://www.example.com/nophoto.gif; ##可以跳转到某图片
}
}
/usr/local/nginx/sbin/nginx -t 检验 /usr/local/nginx/sbin/nginx -s reload 重启
五、设置日志记录的内容
1. vim /usr/local/nginx/conf/nginx.conf 做出如下更改
http
{
include mime.types;
default_type application/octet-stream;
server_names_hash_bucket_size 3526;
server_names_hash_max_size 4096;
log_format test ‘$remote_addr $http_x_forwarded_for [$time_local]‘
‘$host "$request_uri" $status‘
‘"$http_referer" "$http_user_agent"‘;
sendfile on;
2.vim test.conf配置文件
index index.html index.htm index.php;
root /data/www;
access_log /tmp/access.log test; 自定义地址及名字最好是比较大的一个磁盘下面
六 、日志切割
因为Nginx没有自动切割日志功能,所以需要手动编辑脚本
1.脚本实现
#vim /usr/local/sbin/nginx_log.sh
nginx日志按日期自动切割脚本如下:
#!/bin/bash
d=`date -d "-1 day" +%F` #定义切割脚本的格式
[ -d /tmp/nginx_log ] || mkdir /tmp/nginx_log #检查此目录,如果没有就新建
mv /tmp/access.log /tmp/nginx_log/$d.log #移动切割后的日志到新的目录下
/etc/init.d/nginx reload > /dev/null
cd /tmp/nginx_log/
gzip -f $d.log #压缩切割后的额脚本
2.定时工作
在crontab中设置作业
#crontab -e
0 0 * * * bash /usr/local/sbin/nginx_log.sh
七、访问控制
1. 限制只让某个ip访问
allow 219.232.244.234;
deny all;
2.禁止某个IP或者IP段访问站点的设置方法
首先建立下面的配置文件放在nginx的conf目录下面,命名为deny.ip
cat deny.ip
deny 192.168.1.11;
deny 192.168.1.123;
deny 10.0.1.0/24;
在nginx的配置文件nginx.conf中加入:
include deny.ip;
重启一下nginx的服务:/usr/local/nginx/sbin/nginx reload 就可以生效了。
deny.ip 的格式中也可以用deny all;
如果你想实现这样的应用,除了几个IP外,其他全部拒绝,
那需要你在deny.ip 中这样写
allow 1.1.1.1;
allow 1.1.1.2;
deny all;
3.有时候会根据目录来限制php解析:
location ~ .*(diy|template|p_w_uploads|forumdata|p_w_upload|p_w_picpath|admin)/.*\.php$
{
allow 127.0.0.1;
deny all;
}
八、使用 user_agent 控制客户端访问
location /
{
if ($http_user_agent ~ ‘bingbot/2.0|MJ12bot/v1.4.2|Spider/3.0|YoudaoBot|Tomato|Gecko/20100315‘){
return 403;
}
}
九、Nginx代理
1.绑定多个地址:yum install bind*先安装-->dig www.baidu.com 查询到多个地址
#cd /usr/local/nginx/conf/vhosts
#vim proxy.conf 编辑如下:
upstream test{
server 61.135.169.125:80;
server 61.135.169.121:80;
}
server {
listen 80;
server_name www.baidu.com;
location / {
proxy_pass http://test/;
proxy_set_header Host $host;
}
}
2.绑定一个地址:可通过ping www.baidu.com 获得。如果无需vim /etc/hosts×××相关一行,重新ping
server {
listen 80;
server_name www.baidu.com;
location / {
proxy_pass http://61.135.169.121/;
#proxy_set_header Host $host;
}
}
5.8.5 虚拟主机应用示例
论坛配置实例
server {
listen 80;
include vhosts/servername; // 这里的文件就是上边那个servername列表文件
location / {
proxy_pass http://1.2.1.2/; //这里就是需要做代理的服务器ip地址了
proxy_set_header Host $host;
proxy_set_header X-Real-IP $remote_addr;
proxy_set_header X-Forwarded-For $proxy_add_x_forwarded_for;
}
access_log /dev/null;
}
论坛配置实例
server
{
listen 80;
server_name www.1.com www.a.com www.b.com;
#域名跳转
if ($host != ‘www.a.com‘ ) {
rewrite ^/(.*)$ http://www.a.com/$1 permanent;
}
index index.html index.htm index.php;
root /data/www;
# location /uc_server/ {
# auth_basic "Auth";
# auth_basic_user_file /usr/local/nginx/conf/.htpasswd;
# }
#黑名单
# deny 127.0.0.1;
# allow all;
#白名单
# allow 127.0.0.1;
# allow 192.168.31.141;
# deny all;
#某个目录下限制ip
location /uc_server/ {
allow 192.168.31.0/24;
deny all;
location ~ \.php$ {
include fastcgi_params;
fastcgi_pass 127.0.0.1:9000;
fastcgi_index index.php;
fastcgi_param SCRIPT_FILENAME /data/www$fastcgi_script_name;
}
}
#针对目录限制php解析
location ~ .*(diy|template|p_w_uploads|forumdata|p_w_upload|p_w_picpath)/.*\.php$
{
deny all;
}
#根据user_agent控制
if ($http_user_agent ~ ‘bingbot/2.0|MJ12bot/v1.4.2|Spider/3.0|YoudaoBot|Tomato|Gecko/20100315‘){
return 403;
}
location ~ \.php$ {
include fastcgi_params;
fastcgi_pass 127.0.0.1:9000;
fastcgi_index index.php;
fastcgi_param SCRIPT_FILENAME /data/www$fastcgi_script_name;
}
#缓存时间
# location ~ .*\.(gif|jpg|jpeg|png|bmp|swf)$
# {
# expires 30d;
# access_log off;
# }
location ~ .*\.(js|css)?$
{
expires 12h;
access_log off;
}
#防盗链
location ~* ^.+\.(gif|jpg|png|swf|flv|rar|zip|doc|pdf|gz|bz2|jpeg|bmp|xls)$ {
expires 10d;
valid_referers none blocked server_names *.1.com *.a.com *.b.com *.baidu.com\
*.google.com *.google.cn *.soso.com ;
if ($invalid_referer) {
return 403;
#rewrite ^/ http://www.example.com/nophoto.gif;
}
access_log off;
}
#伪静态rewrite规则
rewrite ^([^\.]*)/topic-(.+)\.html$ $1/portal.php?mod=topic&topic=$2 last;
rewrite ^([^\.]*)/forum-(\w+)-([0-9]+)\.html$ $1/forum.php?mod=forumdisplay&fid=$2&page=$3 last;
rewrite ^([^\.]*)/thread-([0-9]+)-([0-9]+)-([0-9]+)\.html$ $1/forum.php?mod=viewthread&tid=$2&extra=page%3D$4&page=$3 last;
rewrite ^([^\.]*)/group-([0-9]+)-([0-9]+)\.html$ $1/forum.php?mod=group&fid=$2&page=$3 last;
rewrite ^([^\.]*)/space-(username|uid)-(.+)\.html$ $1/home.php?mod=space&$2=$3 last;
rewrite ^([^\.]*)/(fid|tid)-([0-9]+)\.html$ $1/index.php?action=$2&value=$3 last;
#docment_uri
# if ($document_uri !~ ‘abc‘)
# {
# rewrite ^/(.*)$ /abc/$1 redirect;
# }
access_log /home/logs/discuz.log combined_realip;
}
多ssl 多域名配置
upstream shop_wechat {
server 127.0.0.1:80;
}
server {
listen 443 ssl;
server_name www.test1.com;
ssl_certificate cert/214257281110004.pem;
ssl_certificate_key cert/214257281110004.key;
ssl_session_timeout 5m;
ssl_ciphers ECDHE-RSA-AES128-GCM-SHA256:ECDHE:ECDH:AES:HIGH:!NULL:!aNULL:!MD5:!ADH:!RC4;
ssl_protocols TLSv1 TLSv1.1 TLSv1.2;
ssl_prefer_server_ciphers on;
location / {
proxy_pass http://shop_wechat;
}
}
upstream shop_app {
server 127.0.0.1:1098;
}
server {
listen 443 ssl;
server_name app.test2.com;
ssl_certificate cert/214257663690004.pem;
ssl_certificate_key cert/214257663690004.key;
ssl_session_timeout 5m;
ssl_ciphers ECDHE-RSA-AES128-GCM-SHA256:ECDHE:ECDH:AES:HIGH:!NULL:!aNULL:!MD5:!ADH:!RC4;
ssl_protocols TLSv1 TLSv1.1 TLSv1.2;
ssl_prefer_server_ciphers on;
location / {
proxy_pass http://shop_app;
}
}
5.8.6 代理服务器配置示例
server {
listen 443 ssl;
server_name web-dev.test;
ssl_certificate /etc/nginx/cert/10086__test.pem;
ssl_certificate_key /etc/nginx/cert/10086__test.key;
ssl_session_timeout 5m;
ssl_protocols TLSv1 TLSv1.1 TLSv1.2;
ssl_ciphers ALL:!ADH:!EXPORT56:RC4+RSA:+HIGH:+MEDIUM:+LOW:+SSLv2:+EXP;
ssl_prefer_server_ciphers on;
charset utf-8;
error_page 500 502 503 504 /50x.html;
location = /50x.html {
root html;
}
location = /favicon.ico {
log_not_found off;
access_log off;
expires 90d;
}
location / {
# root /usr/share/nginx/html;
# index index.html index.htm;
proxy_pass http://127.0.0.1:31081;
}
}
server {
listen 80;
server_name web-dev.test;
charset utf-8;
error_page 500 502 503 504 /50x.html;
location = /50x.html {
root html;
}
location = /favicon.ico {
log_not_found off;
access_log off;
expires 90d;
}
location / {
# root /usr/share/nginx/html;
# index index.html index.htm;
proxy_pass http://127.0.0.1:31081;
}
}
---------------------
代理三方接口
location ^~ /app-wx {
rewrite ^/app-wx/(.*)$ /$1 break;
proxy_pass https://api.weixin.qq.com/;
}
以上nginx的内容仅仅是一些常用基础知识示例,可以满足大多数中小企业场景的使用要求,想要更深入了解nginx,可以到nginx官网探索更多功能。nginx的强大远远超出想象,动手去试,会有更过精彩。
原文:https://www.cnblogs.com/superleedo/p/13965602.html