1.资源: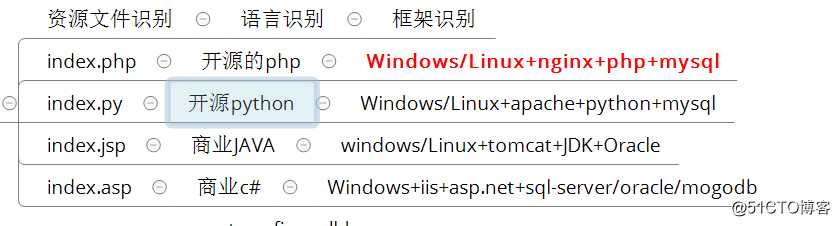
1.LINUX部署
stop firewalld
disable selinux
2.Nginx部署
yum install -y nginx
3.php-fpm部署
(1):yum install -y php-fpm php-mysql php-gd
//php-fpm:php接收动态请求的程序
//php-mysql:php链接mysql的程序
//php-gd:图形库程序(GD库可以处理图片,或者生成图片)
(2):systemctl restart php-fpm //启动php-fpm
(3):systemctl enable php-fpm //开机启动php-fpm
(4):netstat -anpt | grep 9000 //查找端口
(5):vim /usr/share/nginx/html/index.php //测试php页面(php基本信息)
<?php
phpinfo();
?>   //测试语句
(6):vim /etc/nginx/conf.d/default.conf //增加PHP主页名称:index.php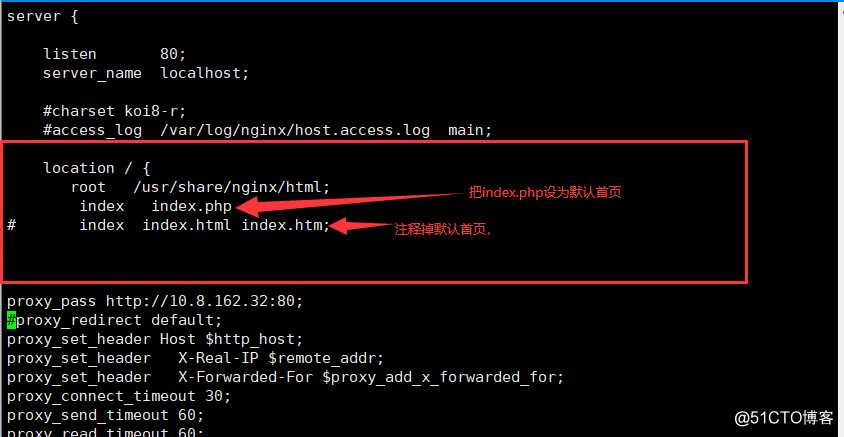
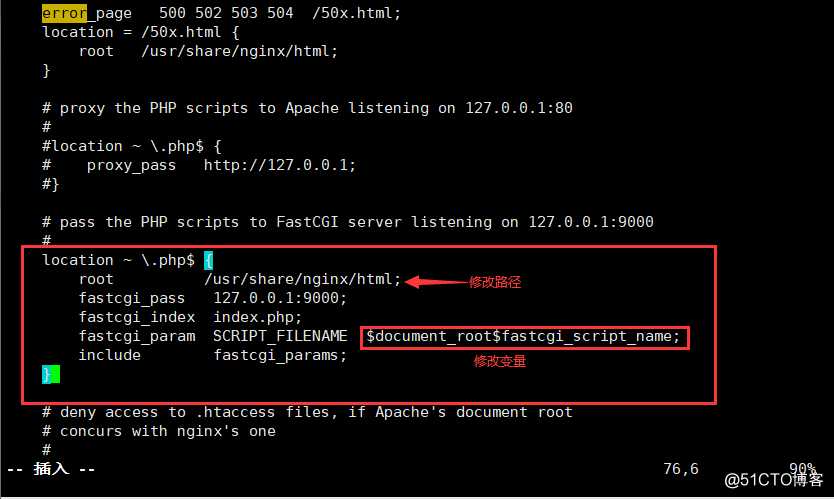
(7):vim /etc/nginx/conf.d/default.conf //启动nginx_fastcgi功能,解除#注释修改路径即可。
location ~ \.php$ {
root /usr/share/nginx/html;
fastcgi_pass 127.0.0.1:9000;
fastcgi_index index.php;
fastcgi_param SCRIPT_FILENAME $document_root$fastcgi_script_name;
include fastcgi_params;
}
(8):重启服务:systemctl restart nginx
(9):浏览器访问IP: 出现这个页面实验成功: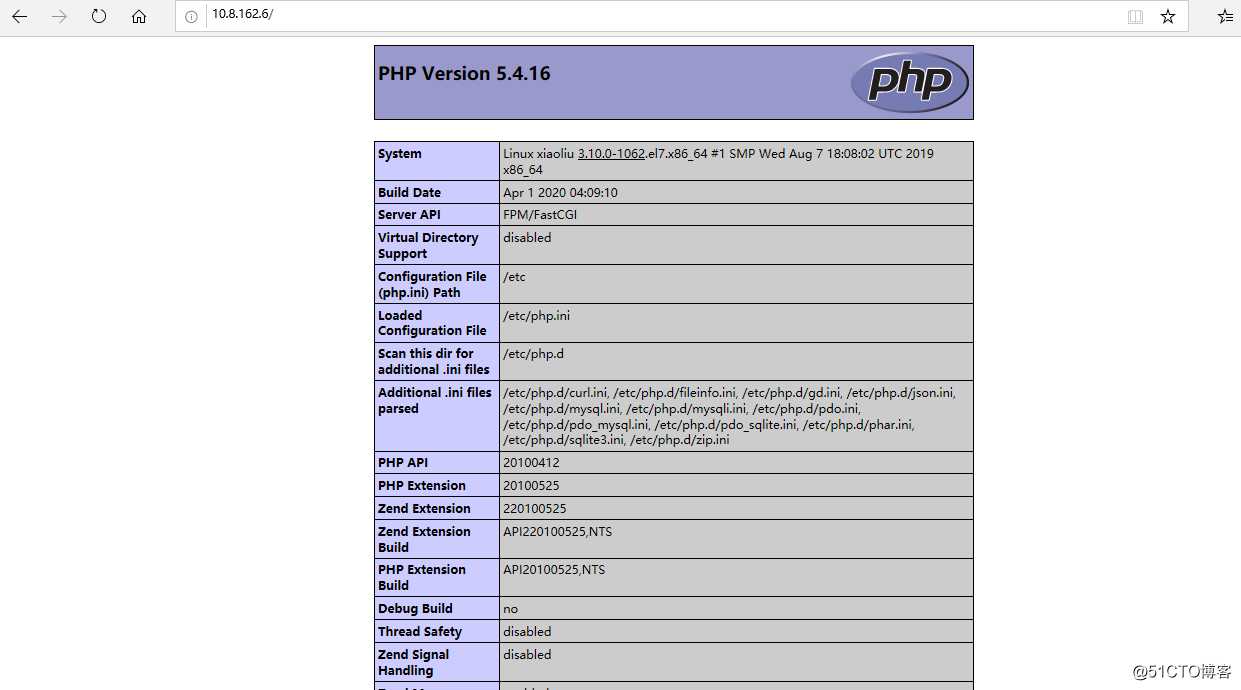
1.yum -y install mariadb-server mariadb //安装mysql服务器程序和客户机程序。
2.systemctl start mariadb //启动mysql服务器
3.systemctl enable mariadb //开机启动mysql服务器
4.mysqladmin password ‘123456‘ //修改mysql的root密码为‘123456’
5.mysql -uroot -p‘123456’ //进入mysql数据库
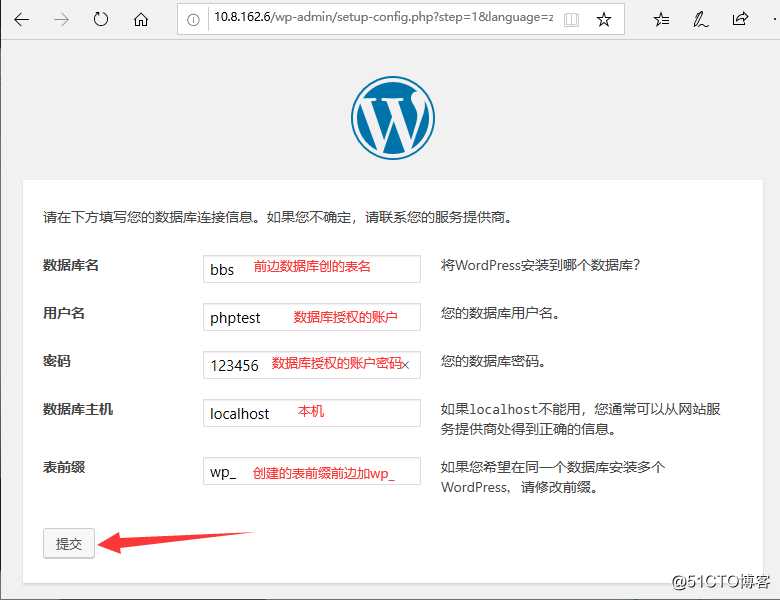
6create database bbs; //准备数据库,存放app
<?php
$link=mysql_connect(‘10.8.162.6‘,‘phptest‘,‘123456‘);
if ($link)
          echo "Successfuly";
else
          echo "Faile";
mysql_close();
?>
11.浏览器访问: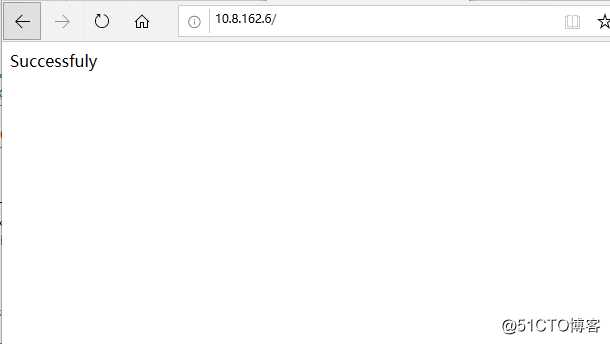
1.上传app:
(1):网上搜索 wordpress zip 下载 ,好多下载方法
(2):unzip wordpress-4.9.1-zh_CN.zip //解压压缩包
(3):rm -rf /usr/share/nginx/html/index.php //防止环境混乱
(4):cp -rf /root/wordpress/ /usr/share/nginx/html //解压包的所有文件复制到网站目录下
(5):chown -R nginx.nginx /usr/share/nginx/html/ //把解压文件设置属主属组
(6):chmod 777 /usr/share/nginx/html/
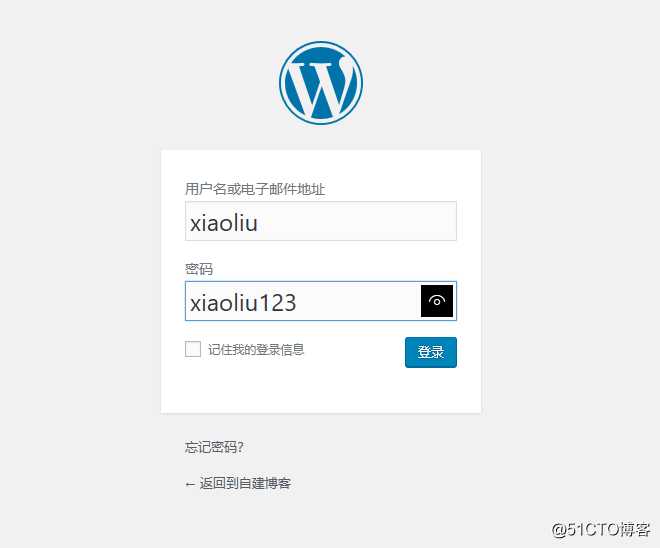
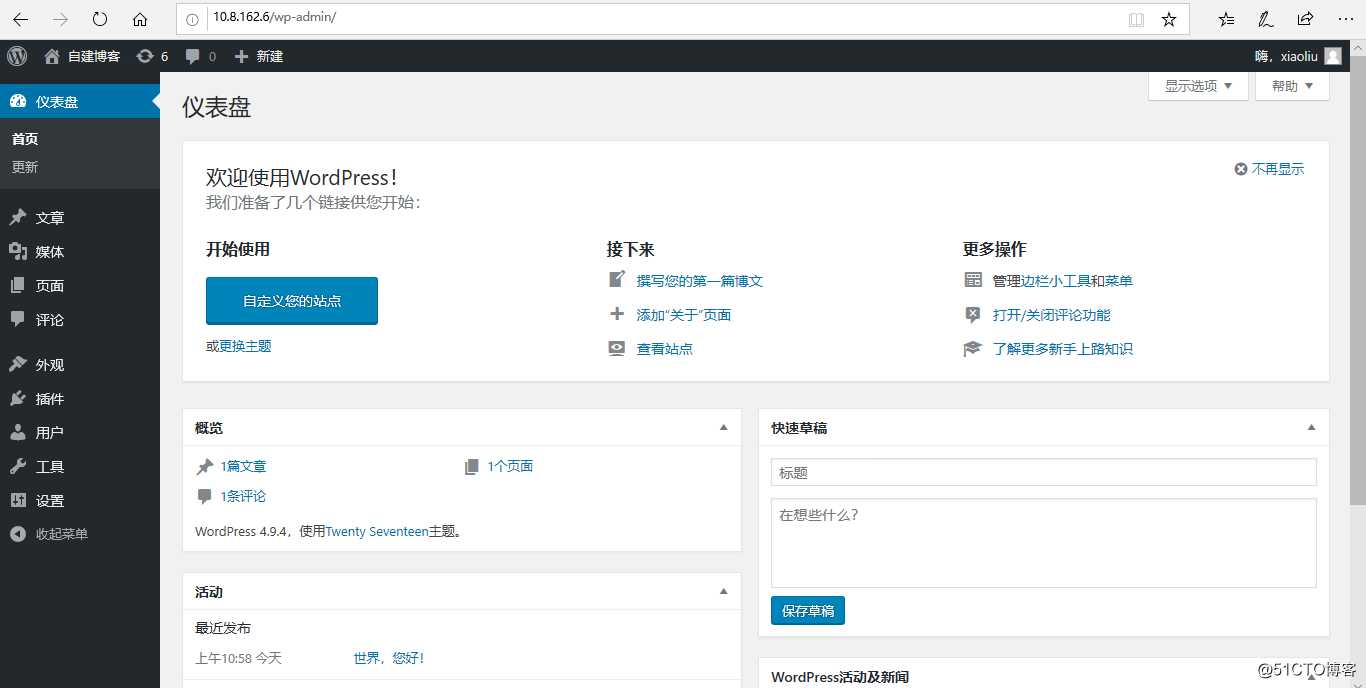
(7):浏览器访问IP (10.8.162.6):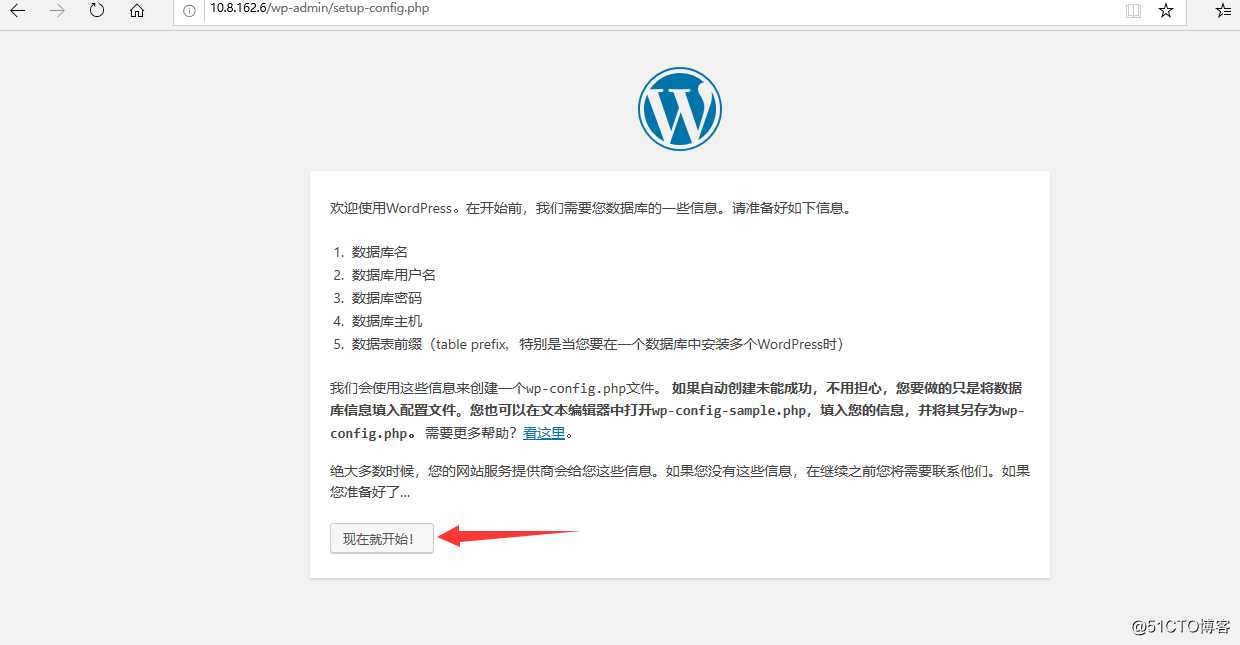
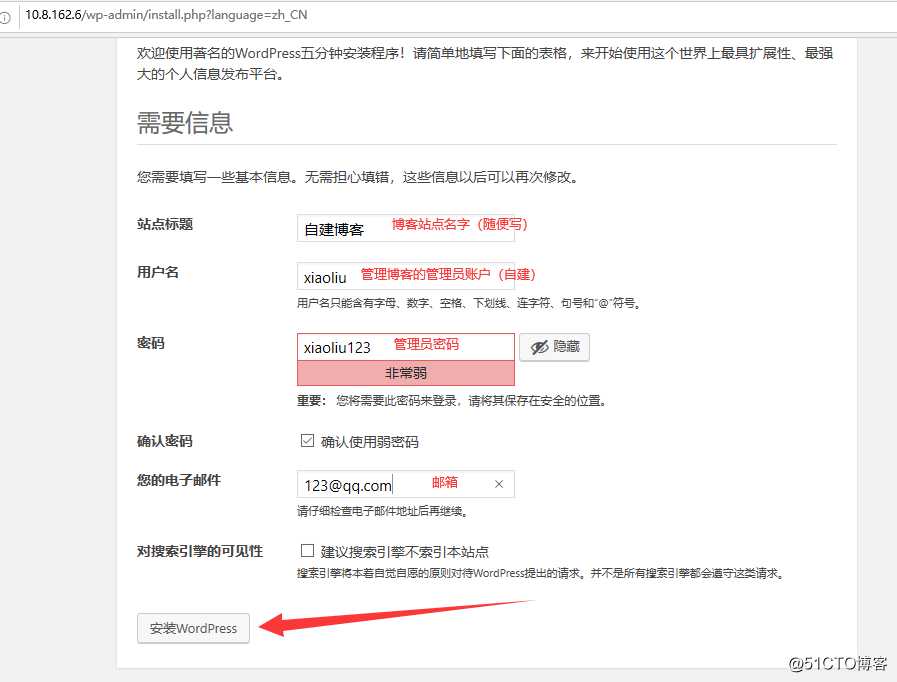
(8):如果出现wp-config.php文件不可写。请手动创建。
vim /usr/local/nginx/html/wp-config.php //配置连接数据库,非商业的应用需要手动配置连接数据库
原文:https://blog.51cto.com/14881339/2540258