
curl -o /etc/yum.repos.d/CentOS-Base.repo https://mirrors.aliyun.com/repo/Centos-7.repo
sed -i -e ‘/mirrors.cloud.aliyuncs.com/d‘ -e ‘/mirrors.aliyuncs.com/d‘ /etc/yum.repos.d/CentOS-Base.repo
rpm -Uvh http://repo.zabbix.com/zabbix/4.0/rhel/7/x86_64/zabbix-release-4.0-2.el7.noarch.rpm
sed -i ‘s/repo.zabbix.com/mirrors.aliyun.com\/zabbix/g‘ /etc/yum.repos.d/zabbix.repo
yum install zabbix-server-mysql zabbix-web-mysql
# ①、安装启动并设置开机自启 yum install mariadb-server systemctl start mariadb systemctl enable mariadb

# ②、首次安装进行数据库配置,命令与mysql一样 mysql_secure_installation

# ③、配置时出现的选项简要说明
Enter current password for root (enter for none): # 输入数据库超级管理员root的密码(注意不是系统root的密码),第一次进入还没有设置密码则直接回车
Set root password? [Y/n]                          # 设置数据库root管理员用户密码,输入Y ,然后输入密码,注意密码需要设置成12位以上复杂密码
New password:
Re-enter new password:
Remove anonymous users? [Y/n]                     # 移除匿名用户 Y
Disallow root login remotely? [Y/n]               # 拒绝root远程登陆 Y
Remove test database and access to it? [Y/n]      # 删除test数据库 Y
Reload privilege tables now? [Y/n]                # 重新加载权限表 Y

# ④、 设置mariadb的字符集 1)修改/etc/my.cnf , 在 [mysqld]标签下边添加 ,注意单引号为英文状态下的单引号
# vi /etc/my.cnf
  init_connect=‘SET collation_connection = utf8_unicode_ci‘
  init_connect=‘SET NAMES utf8‘
  character-set-server=utf8
  collation-server=utf8_unicode_ci
  skip-character-set-client-handshake

2)修改/etc/my.cnf.d/client.cnf , 在 [client]标签下添加
# vi /etc/my.cnf.d/client.cnf
  default-character-set=utf8

3) 修改 /etc/my.cnf.d/mysql-clients.cnf , 在[mysql]标签下添加
# vi /etc/my.cnf.d/mysql-clients.cnf
  default-character-set=utf8

# ⑤、重启mariadb服务
# systemctl restart mariadb

# ⑥、登陆查看字符集
# mysql -uroot -p
  mysql> show variables like "%character%";show variables like "%collation%";
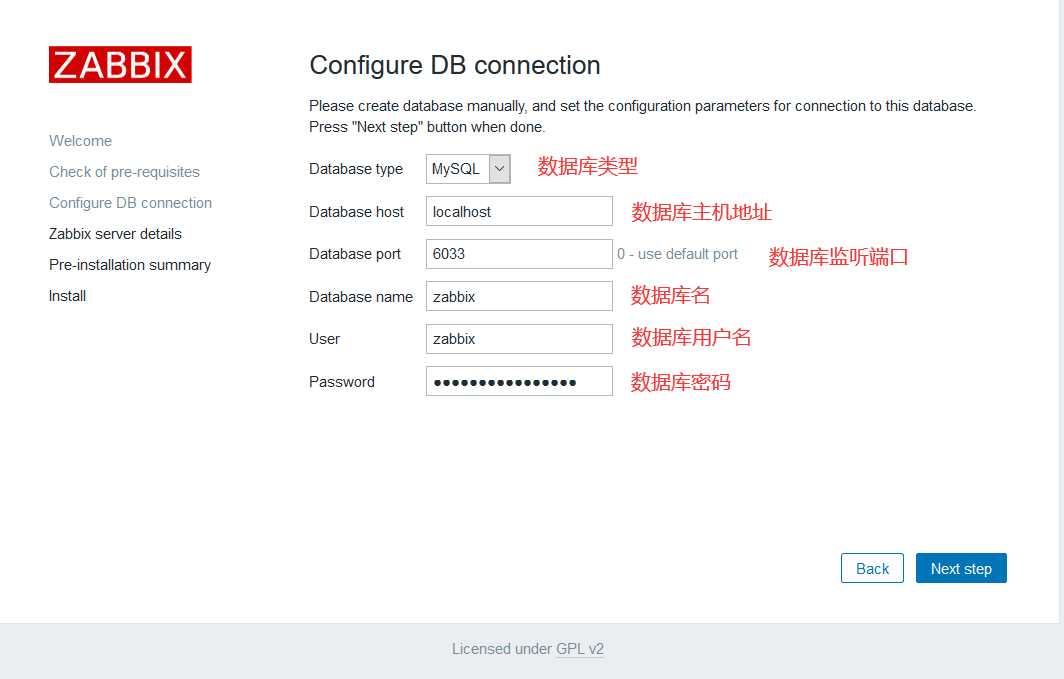
mysql> create database zabbix character set utf8 collate utf8_bin;
mysql> grant all privileges on zabbix.* to zabbix@localhost identified by ‘<strongPassword>‘;
mysql> flush privileges;
# zcat /usr/share/doc/zabbix-server-mysql*/create.sql.gz | mysql -uzabbix -p zabbix
1 # vi /etc/zabbix/zabbix_server.conf
2  DBHost=localhost
3  DBName=zabbix
4  DBUser=zabbix
5  DBPassword=<strongPassword>
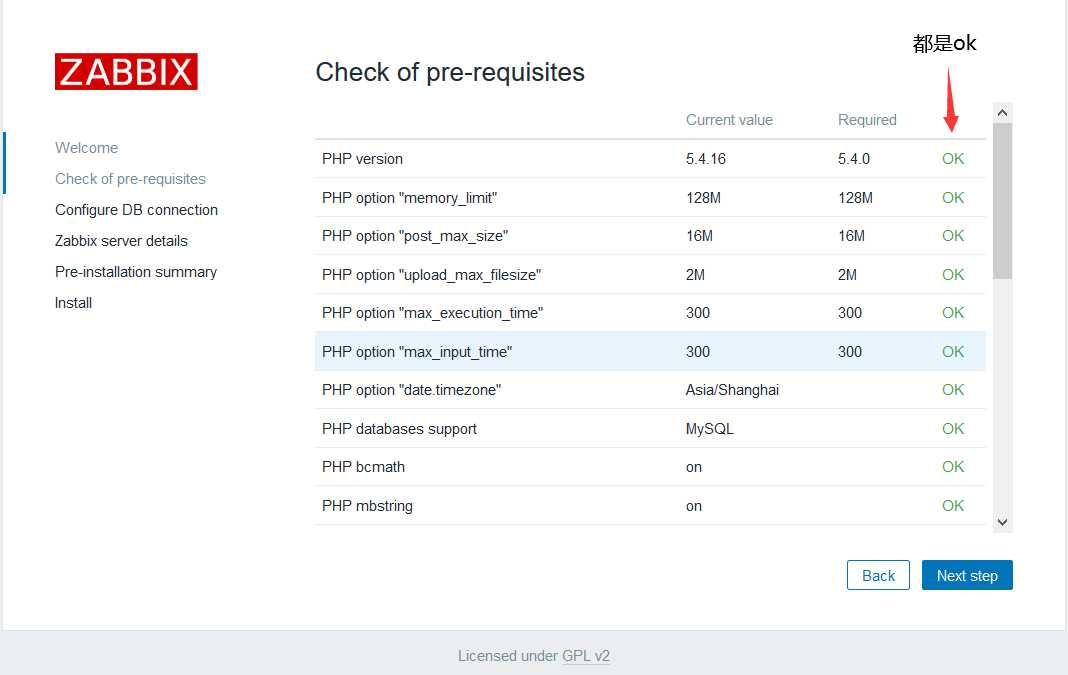
 1 # 最后一行是需要修改的: #号去掉及时区修改
 2 # vi /etc/httpd/conf.d/zabbix.conf
 3    php_value max_execution_time 300
 4    php_value memory_limit 128M
 5    php_value post_max_size 16M
 6    php_value upload_max_filesize 2M
 7    php_value max_input_time 300
 8    php_value always_populate_raw_post_data -1
 9    php_value date.timezone Asia/Shanghai
10
11 # 重启httpd服务 systemctl restart httpd
setsebool -P httpd_can_connect_zabbix on
setsebool -P httpd_can_network_connect_db on
firewall-cmd --add-port=80/tcp --permanent
firewall-cmd --reload
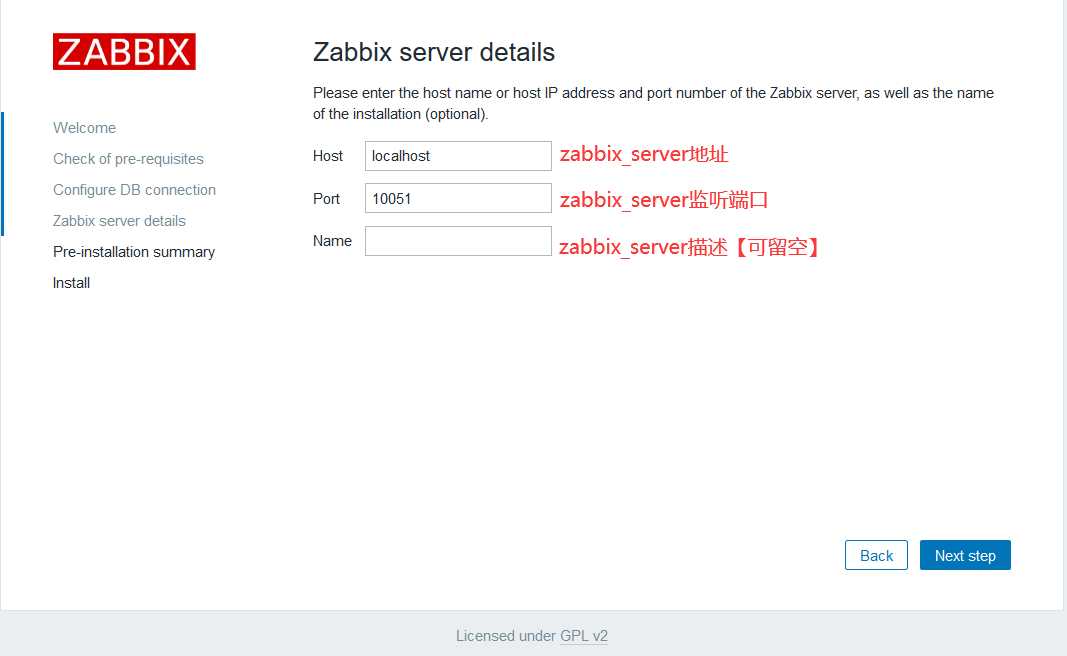
systemctl enable zabbix-server
systemctl start zabbix-server

zabbix_sender -z zabbix -s "Linux DB3" -k db.connections -o 43
其中:
z - Zabbix server 主机(也可以使用 IP 地址)
s - 被监控主机的名称(在前端注册)
k - 监控项键值
o - 要发送的值 包含空格的选项必须使用双引号引用。
Zabbix sender 可通过从输入文件发送多个值。 详见Zabbix sender manpage。
Zabbix sender 接受 UTF-8 编码的字符串(对于类 UNIX 系统和 Windows ),且在文件中没有字节顺序标记(BOM)。
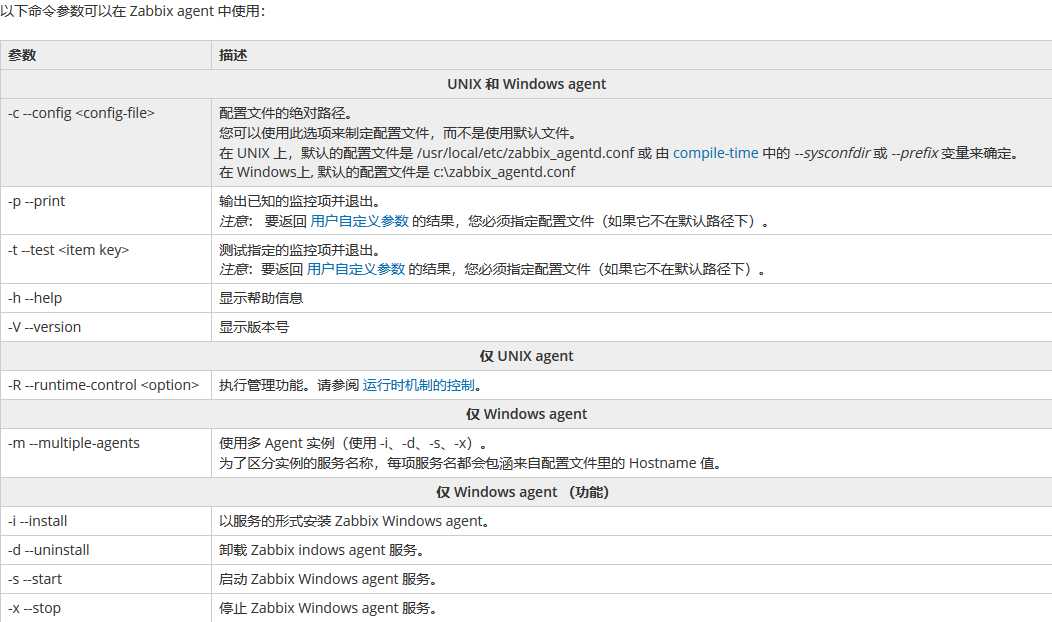
1 # Zabbix get 从 Zabbix agent 获取 processor load 的值
2 zabbix_get -s 127.0.0.1 -p 10050 -k system.cpu.load[all,avg1]
3 参数选项
4 -s --host <host name or IP> 指定目标主机名或IP地址
5 -p --port <port number> 指定主机上运行 Zabbix agent 的端口号。默认端口10050
6 -I --source-address <IP address> 指定源 IP 地址
7 -k --key <item key> 指定要从监控项键值检索的值
8 -h --help 获得帮助
9 -V --version 显示版本号

mv /usr/share/fonts/dejavu/DejaVuSans.ttf /usr/share/fonts/dejavu/DejaVuSans.ttf.bak
mv simkai.ttf /usr/share/fonts/dejavu/DejaVuSans.tt
vim /etc/zabbix/zabbix_server.conf
CacheSize=1024M #第385行
原文:https://www.cnblogs.com/hbgs/p/9816448.html