如,有两个 Spring Boot 项目 cors1 和 cors2。
其中 cors1 为生产者,端口号为 8082;cors2 为消费者,端口号为 8083。
cors1 中有一个 HelloController 类,代码如下:
@RestController
public class HelloController {
    @GetMapping("/hello")
    @CrossOrigin(origins = "http://localhost:8083") //使用该注解允许跨域
    public String hello(){
        return "hello cors1";
    }
}
其中
@CrossOrigin(origins = "http://localhost:8083") //使用该注解允许跨域
是实现跨域请求的关键,它允许来自http://localhost:8083的请求。
cors2 中的 static 目录下有一个页面文件 index.html
index.html 针对 cors1 发送 get 请求,代码如下:
<!DOCTYPE html>
<html lang="en">
<head>
    <meta charset="UTF-8">
    <title>Title</title>
    <script src="https://ajax.googleapis.com/ajax/libs/jquery/3.3.1/jquery.js"></script>
</head>
<body>
<div id="app"></div>
<input type="button" value="GET" onclick="getData()">
<script >
    function getData() {
        $.get(‘http://localhost:8082/hello‘,function (msg) {
            $("#app").html(msg);
        })
    }
</script>
</body>
</html>
最后访问 http://localhost:8083/index.html,如下图:
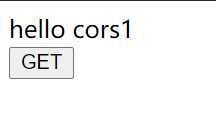
成功实现跨域请求。
全局配置只需要在配置类中重写 addCorsMappings 方法即可
如,在 cors1 中新建一个 WebMvcConfig 类,它继承接口 WebMvcConfigurer,并重写其中的 addCorsMappings 方法,代码如下:
@Configuration
public class WebMvcConfig implements WebMvcConfigurer {
    @Override
    public void addCorsMappings(CorsRegistry registry) {
        registry.addMapping("/**")
                .allowedOrigins("http://localhost:8083")
                .allowedHeaders("*")
                .allowedMethods("*")
                .maxAge(30 * 1000);
    }
}
这时,就不再需要使用注解 @CrossOrigin 了。
参考文章:http://www.javaboy.org/2019/0613/springboot-cors.html
每天学习一点点,每天进步一点点。
原文:https://www.cnblogs.com/youcoding/p/13188123.html