最近把活动室预约的项目做了一个升级,预约活动室需要登录才能预约,并用 IdentityServer4 做了一个统一的登录注册中心,这样以后就可以把其他的需要用户操作的应用统一到 IdentityServer 这里,这样就不需要在每个应用里都做一套用户的机制,接入 IdentityServer 就可以了。
目前活动室预约的服务器端和基于 angular 的客户端已经完成了 IdentityServer 的接入,并增加了用户的相关的一些功能,比如用户可以查看自己的预约记录并且可以取消自己未开始的预约,
还有一个小程序版的客户端暂时还未完成接入,所以小程序版目前暂时是不能够预约的
目前在网上看到很多都是基于 implicit 模式接入 IdentityServer,这样实现起来很简单,但是现在 OAuth 已经不推荐这样做了,OAuth 推荐使用 code 模式来代替 implicit
implicit 模式会有一些安全风险,implicit 模式会将 accessToken 直接返回到客户端,而 code 模式只是会返回一个 code,accessToken 和 code 的分离的两步,implicit 模式很有可能会将 token 泄露出去
详细可以参考 StackOverflow 上的这个问答
除此之外,还有一个小原因,大多是直接基于 oidc-client 的 一个 npm 包来实现的,我是用了一个针对 angular 封装的一个库 angular-oauth2-oidc,如果你在用 angular ,建议你可以尝试一下,针对 angular 做了一些封装和优化,对 angular 更友好一些
预约系统的 API 和网站管理系统是在一起的,针对需要登录才能访问的 API 单独设置了的 policy 访问
services.AddAuthentication()
    .AddIdentityServerAuthentication(IdentityServerAuthenticationDefaults.AuthenticationScheme, options =>
    {
        options.Authority = Configuration["Authorization:Authority"];
        options.RequireHttpsMetadata = false;

        options.NameClaimType = "name";
        options.RoleClaimType = "role";
    })
    ;

services.AddAuthorization(options =>
{
    options.AddPolicy("ReservationApi", builder => builder
        .AddAuthenticationSchemes(IdentityServerAuthenticationDefaults.AuthenticationScheme)
        .RequireAuthenticatedUser()
        .RequireScope("ReservationApi")
    );
});
需要授权才能访问的接口设置 Authorize 并指定 Policy 为 ReservationApi
[Authorize(Policy = "ReservationApi")]
[HttpPost]
public async Task<IActionResult> MakeReservation([FromBody] ReservationViewModel model)
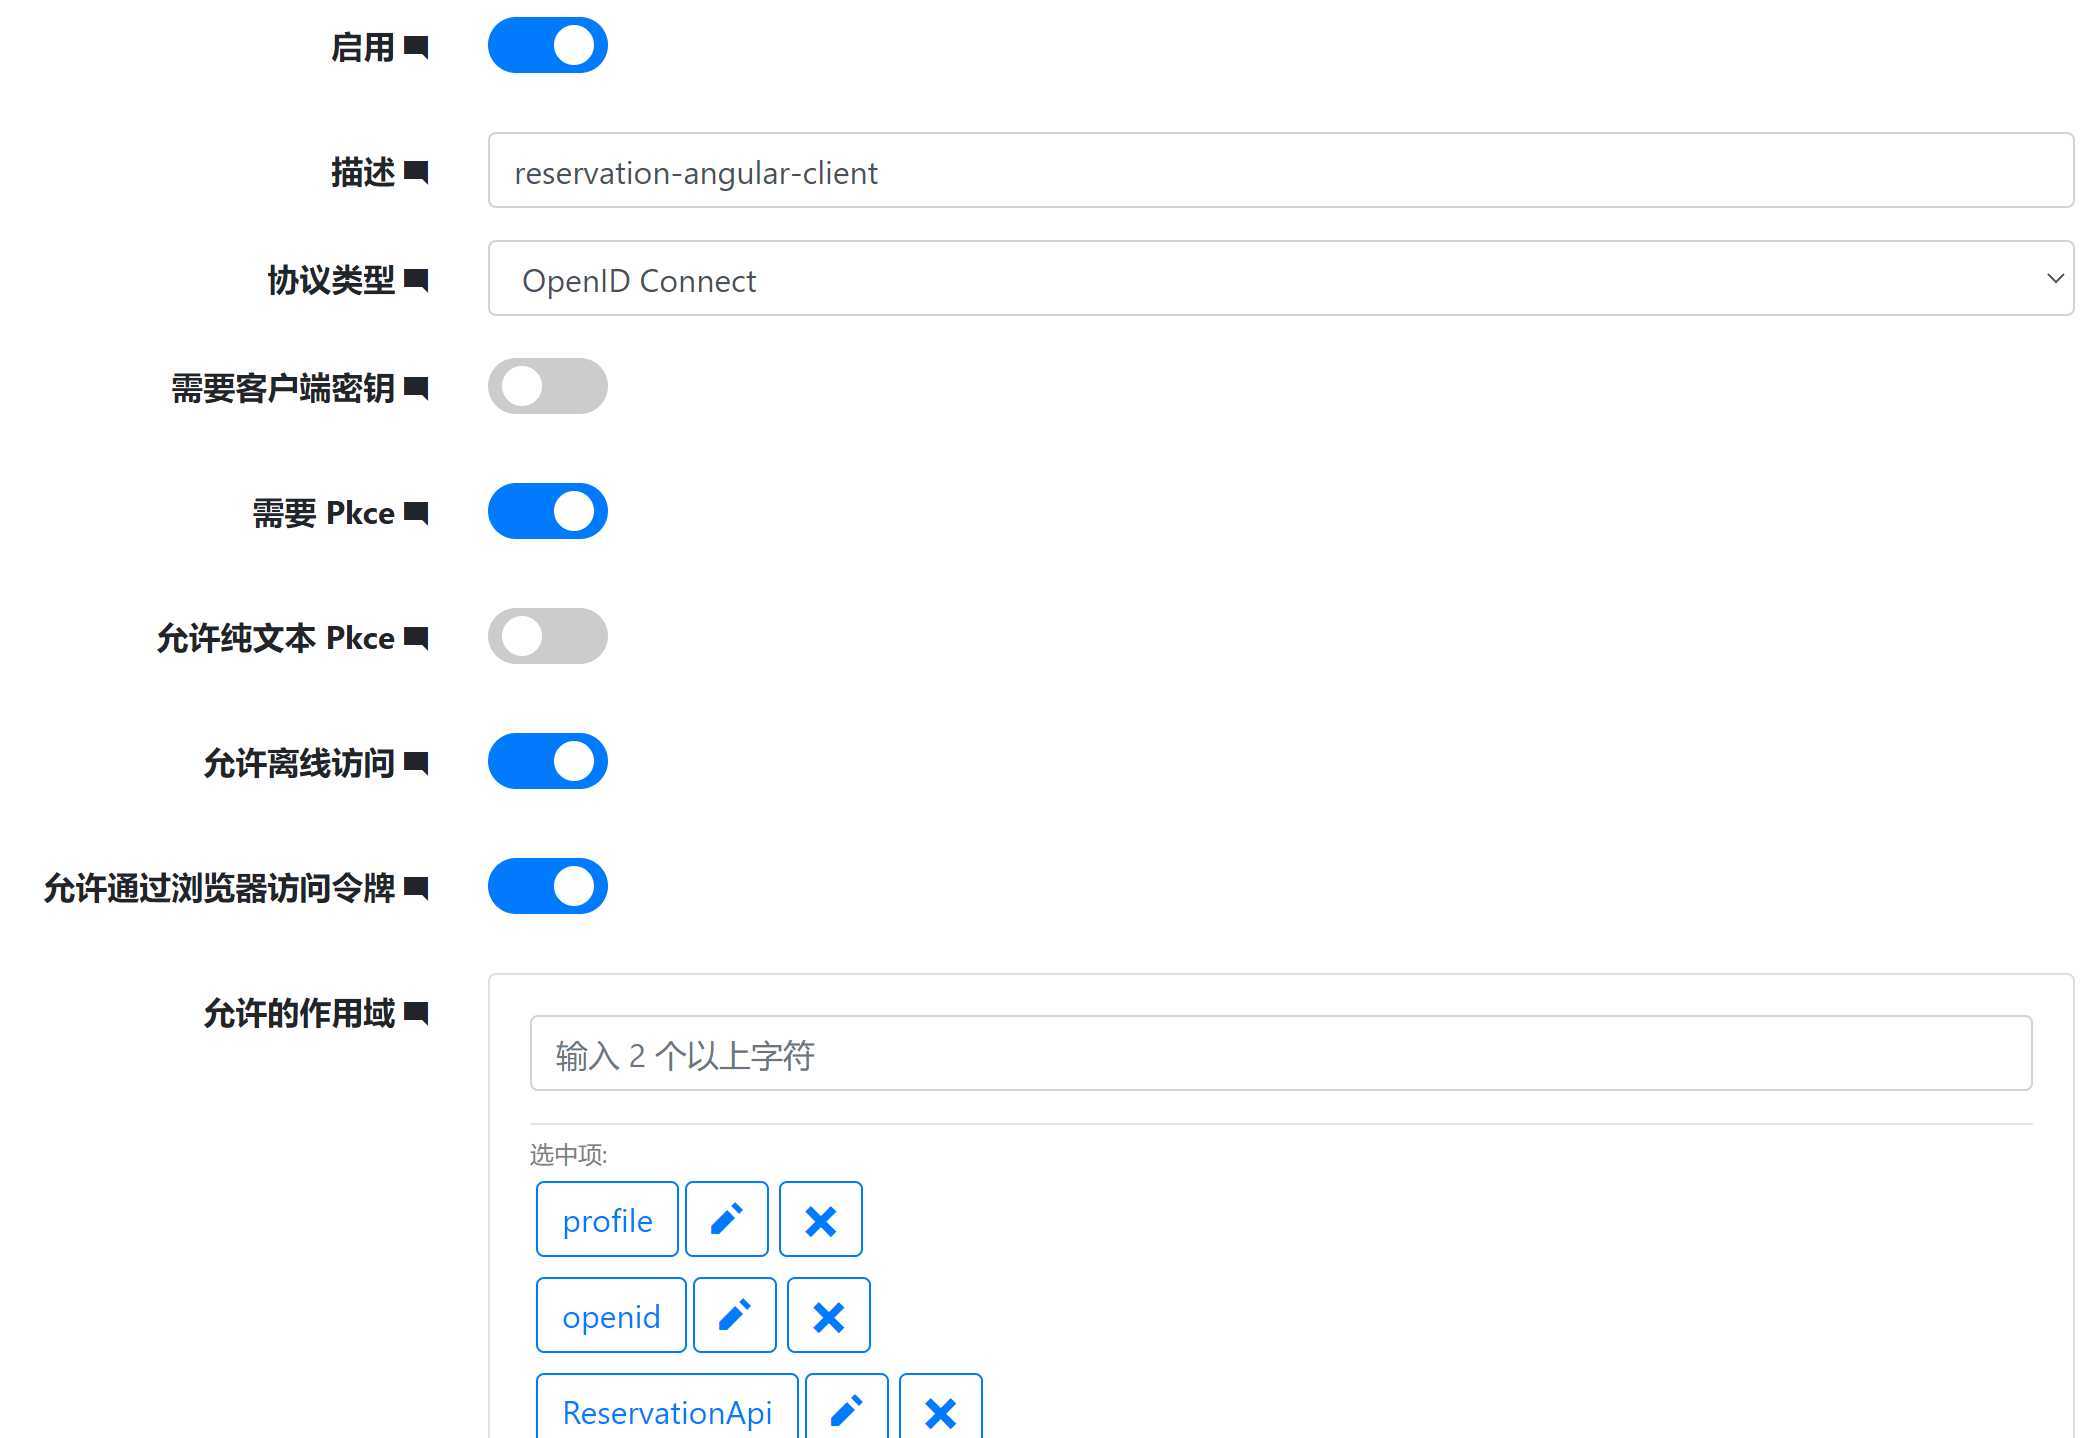
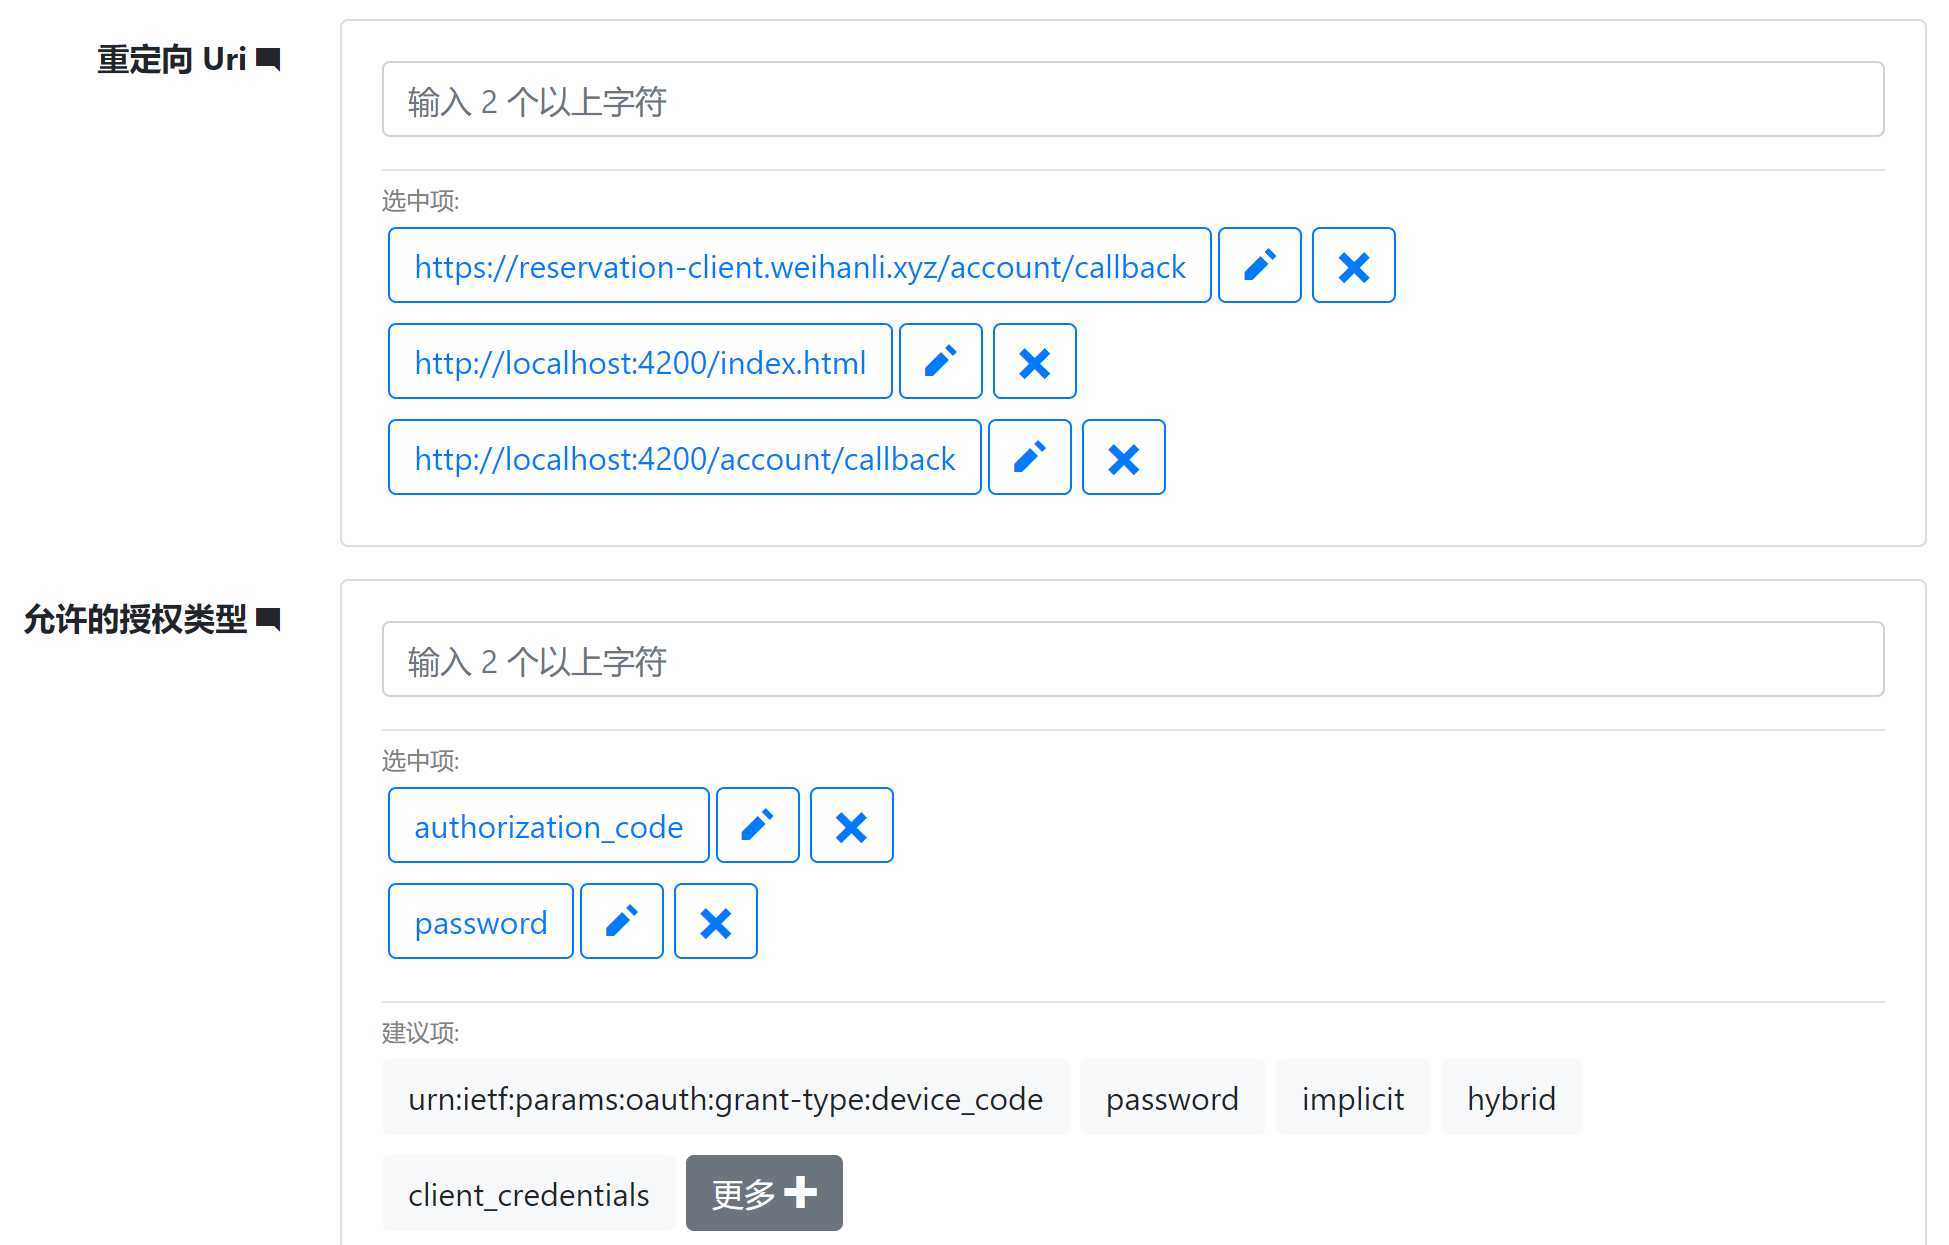
首先我们需要在 IdentityServer 这边添加一个客户端,因为我们要使用 code 模式,所以授权类型需要配置 authorization-code 模式,不使用 implicit 模式
允许的作用域(scope) 是客户端允许访问的 api 资源和用户的信息资源,openid 必选,profile 是默认的用户基本信息的集合,根据自己客户端的需要进行配置,ReservationApi 是访问 API 需要的 scope,其他的 scope 根据客户端需要进行配置
安装 angular-oauth2-oidc npm 包,我现在使用的是 9.2.0 版本
添加 oidc 配置:
export const authCodeFlowConfig: AuthConfig = {
  issuer: ‘https://id.weihanli.xyz‘,

  // URL of the SPA to redirect the user to after login
  redirectUri: window.location.origin + ‘/account/callback‘,

  clientId: ‘reservation-angular-client‘,

  dummyClientSecret: ‘f6f1f917-0899-ef36-63c8-84728f411e7c‘,

  responseType: ‘code‘,

  scope: ‘openid profile ReservationApi offline_access‘,

  useSilentRefresh: false,

  showDebugInformation: true,

  sessionChecksEnabled: true,

  timeoutFactor: 0.01,

  // disablePKCI: true,

  clearHashAfterLogin: false
};
在 app.module 引入 oauth 配置
  imports: [
    BrowserModule,
    AppRoutingModule,
    AppMaterialModule,
    HttpClientModule,
    FormsModule,
    ReactiveFormsModule,
    BrowserAnimationsModule,
    OAuthModule.forRoot({
      resourceServer: {
        allowedUrls: [‘https://reservation.weihanli.xyz/api‘],
        sendAccessToken: true
      }
    })
  ]
OAuthModule 里 resourceServer 中的 allowedUrls 是配置的资源的地址,访问的资源符合这个地址时就会自动发送 accessToken,这样就不需要自己实现一个 interceptor 来实现自动在请求头中设置 accessToken 了
在 AppComponment 的构造器中初始化 oauth 配置,并加载 ids 的发现文档
export class AppComponent {
  constructor(
        private oauth: OAuthService
    ) {
    this.oauth.configure(authConfig.authCodeFlowConfig);
    this.oauth.loadDiscoveryDocument();
    }
    // ...
}
添加一个 AuthGuard,路由守卫,需要登录才能访问的页面自动跳转到 /account/login 自动登录
AuthGuard:
import { Injectable } from ‘@angular/core‘;
import { CanActivate, Router } from ‘@angular/router‘;
import { OAuthService } from ‘angular-oauth2-oidc‘;

@Injectable({
  providedIn: ‘root‘
})
export class AuthGuard implements CanActivate {
  constructor(private router: Router, private oauthService: OAuthService) {}

  canActivate() {
    if (this.oauthService.hasValidAccessToken()) {
      return true;
    } else {
      this.router.navigate([‘/account/login‘]);
      return false;
    }
  }
}
路由配置:
import { NgModule } from ‘@angular/core‘;
import { Routes, RouterModule } from ‘@angular/router‘;
import { ReservationListComponent } from ‘./reservation/reservation-list/reservation-list.component‘;
import { NoticeListComponent } from ‘./notice/notice-list/notice-list.component‘;
import { NoticeDetailComponent } from ‘./notice/notice-detail/notice-detail.component‘;
import { AboutComponent } from ‘./about/about.component‘;
import { NewReservationComponent } from ‘./reservation/new-reservation/new-reservation.component‘;
import { LoginComponent } from ‘./account/login/login.component‘;
import { AuthGuard } from ‘./shared/auth.guard‘;
import { AuthCallbackComponent } from ‘./account/auth-callback/auth-callback.component‘;
import { MyReservationComponent } from ‘./account/my-reservation/my-reservation.component‘;

const routes: Routes = [
  { path: ‘‘, component: ReservationListComponent },
  { path: ‘reservations/new‘, component:NewReservationComponent, canActivate: [AuthGuard] },
  { path: ‘reservations‘, component: ReservationListComponent },
  { path: ‘notice‘, component: NoticeListComponent },
  { path: ‘notice/:noticePath‘, component: NoticeDetailComponent },
  { path: ‘about‘, component: AboutComponent },
  { path: ‘account/login‘, component: LoginComponent },
  { path: ‘account/callback‘, component: AuthCallbackComponent },
  { path: ‘account/reservations‘, component: MyReservationComponent, canActivate: [AuthGuard] },
  { path: ‘**‘, redirectTo: ‘/‘}
];

@NgModule({
  imports: [RouterModule.forRoot(routes)],
  exports: [RouterModule]
})
export class AppRoutingModule { }
AccountLogin 会将用户引导到 ids 进行登录,登录之后会跳转到配置的重定向 url,我配置的是 account/callback
import { Component, OnInit } from ‘@angular/core‘;
import { OAuthService } from ‘angular-oauth2-oidc‘;

@Component({
  selector: ‘app-login‘,
  templateUrl: ‘./login.component.html‘,
  styleUrls: [‘./login.component.less‘]
})
export class LoginComponent implements OnInit {

  constructor(private oauthService: OAuthService) {
  }

  ngOnInit(): void {
    // 登录
    this.oauthService.initLoginFlow();
  }

}
Auth-Callback
import { Component, OnInit } from ‘@angular/core‘;
import { OAuthService } from ‘angular-oauth2-oidc‘;
import { Router } from ‘@angular/router‘;

@Component({
  selector: ‘app-auth-callback‘,
  templateUrl: ‘./auth-callback.component.html‘,
  styleUrls: [‘./auth-callback.component.less‘]
})
export class AuthCallbackComponent implements OnInit {

  constructor(private oauthService: OAuthService, private router:Router) {
  }

  ngOnInit(): void {
    this.oauthService.loadDiscoveryDocumentAndTryLogin()
    .then(_=> {
      this.oauthService.loadUserProfile().then(x=>{
        this.router.navigate([‘/reservations/new‘]);
      });
    });
  }

}
当前实现还不太完善,重定向现在始终是跳转到的新预约的页面,应当在跳转登录之前记录一下当前的地址保存在 storage 中,在 auth-callback 里登录成功之后跳转到 storage 中之前的地址
原文:https://www.cnblogs.com/weihanli/p/13179968.html