1.添加EPEL仓库(如果已安装可以跳过,如有提示按“y"键 确认继续)
# yum install epel-release
# rpm --import /etc/pki/rpm-gpg/RPM-GPG-KEY-EPEL-7
升级包管理:(可以跳过
# yum update
2.安装Apache Web服务器(如有提示按“y"键 确认继续)
#yum install httpd

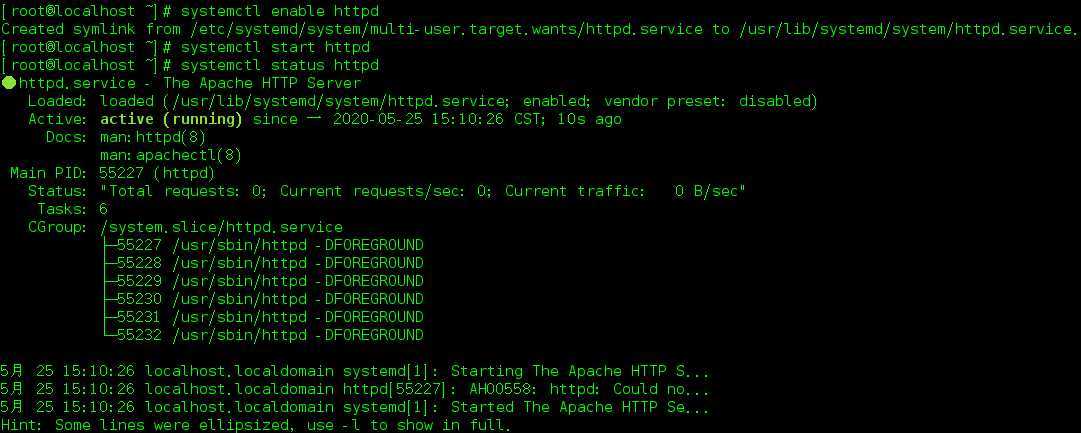
启用Apache服务,并查看服务状态
#systemctl enable httpd
#systemctl start httpd
#systemctl status httpd
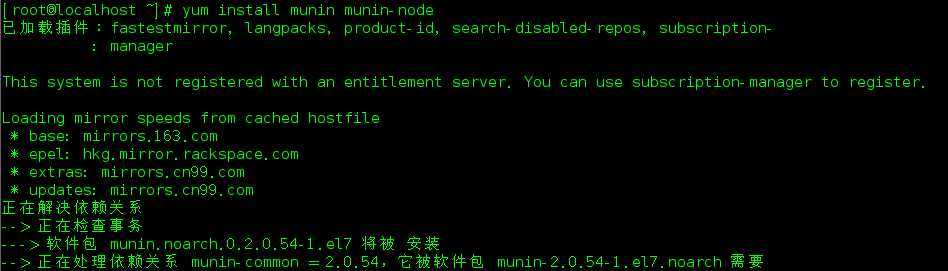
3.使用‘yum‘命令通过CentOS 上的可用存储库安装Munin和Munin Node(如有提示按“y"键 确认继续)(目前安装的是Munin version 2.0.54 )
# yum install munin munin-node
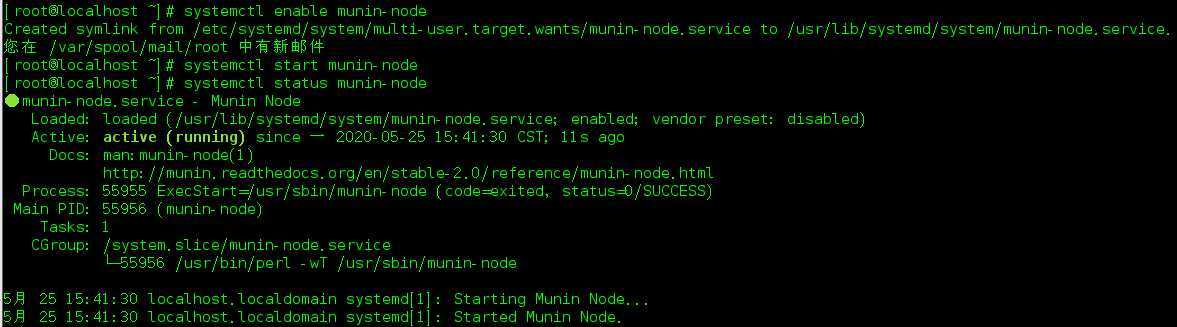
启用Munin Node服务
# systemctl enable munin-node
# systemctl start munin-node
# systemctl status munin-node
4.Munin配置(修改/etc/munin/munin.conf文件)
# vim /etc/munin/munin.conf
修改(把以下配置前面的#号去掉,如下):
[localhost]
    address 127.0.0.1
    use_node_name yes

修改(把以下配置前面的#号去掉,如下)
dbdir     /var/lib/munin
htmldir   /var/www/html/munin
logdir    /var/log/munin
rundir    /var/run/munin
tmpldir   /etc/munin/templates
includedir /etc/munin/conf.d
5.配置 apache web 服务器使其包括 munin 配置。在 /etc/apache/conf.d 目录中编辑或创建文件 munin.conf 用于包括 Munin 和 Apache 相关的配置,另外注意一点,默认其它和 web 相关的 Munin 配置保存在 /var/www/munin 目录。
vim /etc/apache/conf.d/munin.conf
内容:
Alias /munin /var/www/html/munin
<Directory /var/www/html/munin>
    AuthUserFile /etc/munin/munin-htpasswd
    AuthName "admin"
    AuthType Basic
    require valid-user
    Order Deny,Allow
    Deny from all
    Allow from 127.0.0.1 172.0.0.0/24
</Directory>
6:为 web 界面创建用户名和密码。现在为查看 munin 的图示而创建用户名和密码,命令如下(账号:munin 密码123456(你可以修改成你记住的密码)):
# htpasswd -c /etc/munin/munin-htpasswd munin

7.重启Apache与munin-node
# systemctl restart httpd
# systemctl restart munin-node
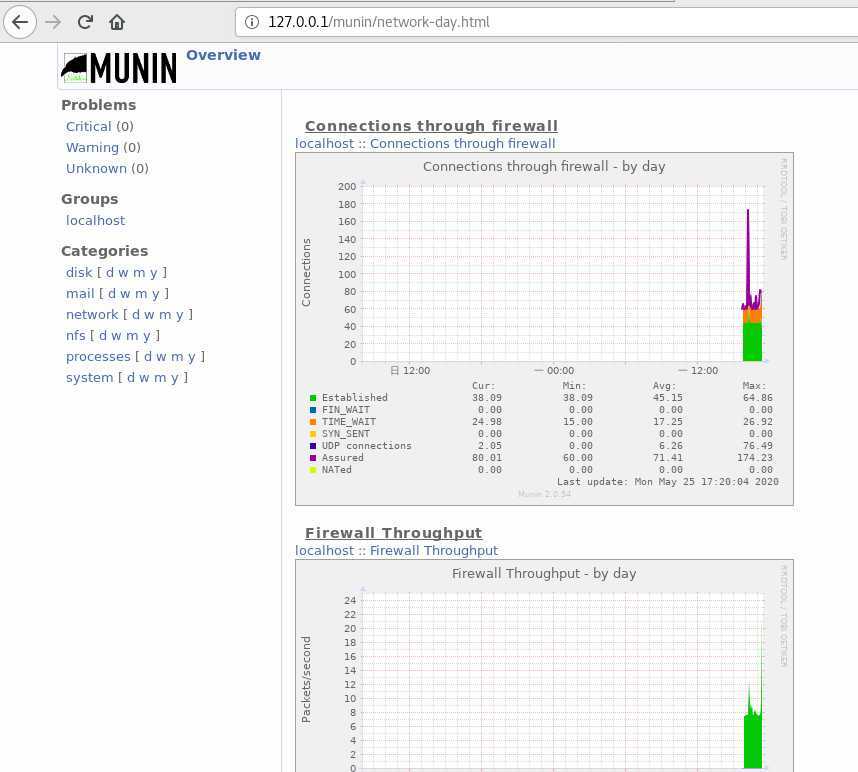
8.输入网址:http://127.0.0.1/munin/index.htm 输入账号munin 密码123456即可访问
如果提示Forbidden You don‘t have permission to access /munin/ on this server.用命令
chmod -R 777 /var/www/html/munin/*
参考文章:
https://www.cnblogs.com/linuxprobe/p/5340054.html
http://www.vue5.com/centos/23012.html
https://www.cnblogs.com/longronglang/p/8295186.html
https://www.zxar520.com/linux/623.html
https://www.cnblogs.com/vae860514/p/8276916.html
原文:https://www.cnblogs.com/q149072205/p/12958106.html