thymeleaf 跟 JSP 一样,就是运行之后,就得到纯 HTML了。 区别在与,不运行之前, thymeleaf 也是 纯 html ...
所以 thymeleaf 不需要服务端的支持,就能够被以 html 的方式打开,这样就方便前端人员独立设计与调试, jsp 就不行了, 不启动服务器 jsp 都没法运行出结果来。
thymeleaf 可以配合 Servlet 运行,但是比较常见的是配合 springboot 来运行。 当然本质上也是配合 springboot 里的 springmvc 来运行的,毕竟 springboot 本身就是个老鸨,干活的还是 springmvc。
本知识点基于前面的( springboot 配置切换 )的基础上展开。 所以如果没有学过 springboot, 还是把 springboot 过一遍的好,至少要过到( springboot 配置切换 )这里。
首先下载一个简单的可运行项目作为演示:网盘链接:https://newryan.lanzous.com/ic4ji6j
下载后解压,比如解压到 E:\project\springboot 目录下
修改 pom.xml, 增加了对 thymeleaf 的支持。
<dependency>
    <groupId>org.springframework.boot</groupId>
    <artifactId>spring-boot-starter-thymeleaf</artifactId>
</dependency>
完整 pom.xml:
<?xml version="1.0" encoding="UTF-8"?>
<project xmlns="http://maven.apache.org/POM/4.0.0" xmlns:xsi="http://www.w3.org/2001/XMLSchema-instance"
    xsi:schemaLocation="http://maven.apache.org/POM/4.0.0 http://maven.apache.org/xsd/maven-4.0.0.xsd">
    <modelVersion>4.0.0</modelVersion>

  <groupId>com.ryan</groupId>
  <artifactId>thymeleaf</artifactId>
  <version>0.0.1-SNAPSHOT</version>
  <name>thymeleaf</name>
  <description>thymeleaf</description>
  <packaging>war</packaging>

    <parent>
        <groupId>org.springframework.boot</groupId>
        <artifactId>spring-boot-starter-parent</artifactId>
        <version>1.5.9.RELEASE</version>
    </parent>

    <dependencies>
        <dependency>
            <groupId>org.springframework.boot</groupId>
            <artifactId>spring-boot-starter-web</artifactId>
        </dependency>
        <dependency>
          <groupId>org.springframework.boot</groupId>
          <artifactId>spring-boot-starter-thymeleaf</artifactId>
        </dependency>
        <dependency>
            <groupId>org.springframework.boot</groupId>
            <artifactId>spring-boot-starter-tomcat</artifactId>

        </dependency>
        <dependency>
              <groupId>junit</groupId>
              <artifactId>junit</artifactId>
              <version>3.8.1</version>
              <scope>test</scope>
        </dependency>
        <!-- servlet依赖. -->
        <dependency>
              <groupId>javax.servlet</groupId>
              <artifactId>javax.servlet-api</artifactId>

        </dependency>
              <dependency>
                     <groupId>javax.servlet</groupId>
                     <artifactId>jstl</artifactId>
              </dependency>
        <!-- tomcat的支持.-->
        <dependency>
               <groupId>org.apache.tomcat.embed</groupId>
               <artifactId>tomcat-embed-jasper</artifactId>

        </dependency>
        <dependency>
            <groupId>org.springframework.boot</groupId>
            <artifactId>spring-boot-devtools</artifactId>
            <optional>true</optional> <!-- 这个需要为 true 热部署才有效 -->
        </dependency>
    </dependencies>

    <properties>
        <java.version>1.8</java.version>
    </properties>

    <build>
        <plugins>
            <plugin>
                <groupId>org.springframework.boot</groupId>
                <artifactId>spring-boot-maven-plugin</artifactId>
            </plugin>
        </plugins>
    </build>

</project>
注意:修改完 pom.xml ,需要将项目右键 选择 -> Maven -> Update Project... 更新一下目录结构
很简单,访问地址 hello, 跳转到 hello.html ,并带上数据 "name", 其值是 "thymeleaf"
package com.ryan.springboot.web;
import org.springframework.stereotype.Controller;
import org.springframework.ui.Model;
import org.springframework.web.bind.annotation.RequestMapping;

@Controller
public class HelloController {

    @RequestMapping("/hello")
    public String hello(Model m) {
        m.addAttribute("name", "thymeleaf");
        return "hello";
    }

}
在 resources 下新建目录 templates, 然后新建文件 hello.html
注意: 并不是在 webapp 下,这点和 jsp 不一样
hello.html 做了如下事情:
声明当前文件是 thymeleaf, 里面可以用 th 开头的属性
<html xmlns:th="http://www.thymeleaf.org">
把 name 的值显示在当前 p 里,用的是 th 开头的属性: th:text, 而取值用的是 "${name}" 这种写法叫做 ognl,额。。。什么意思呢。。。就是跟EL表达式一样吧。 这样取出来放进 p 里,从而替换到原来 p 标签里的 4个字符 "name" .
<p th:text="${name}" >name</p>
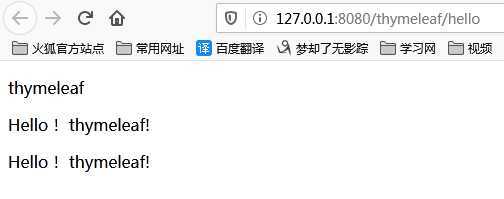
用这种方式,就可以把服务端的数据,显示在当前 html 里了。 重要的是: 这种写法是完全合法的 html 语法,所以可以直接通过浏览器打开 hello.html,也是可以看到效果的, 只不过看到的是 "name", 而不是服务端传过来的值 "thymeleaf"。
<p th:text="‘Hello! ‘ + ${name} + ‘!‘" >hello world</p>
<p th:text="|Hello! ${name}!|" >hello world</p>
这两种方式都会得到: hello thymeleaf。
完整 hello.html
<!DOCTYPE HTML>
<html xmlns:th="http://www.thymeleaf.org">
<head>
    <title>hello</title>
    <meta http-equiv="Content-Type" content="text/html; charset=UTF-8" />
</head>
<body>
<p th:text="${name}" >name</p>
<p th:text="‘Hello! ‘ + ${name} + ‘!‘" >hello world</p>
<p th:text="|Hello! ${name}!|" >hello world</p>
</body>

</html>
#thymeleaf 配置
spring.thymeleaf.mode=HTML5
spring.thymeleaf.encoding=UTF-8
spring.thymeleaf.content-type=text/html
#缓存设置为false, 这样修改之后马上生效,便于调试
spring.thymeleaf.cache=false
#上下文
server.context-path=/thymeleaf
注:若复制到 eclipse 出现中文乱码,可以找到该文件存放目录位置,右键选择以 ‘记事本‘ 打开 -> 选择 ‘另存为‘ -> 选择编码为 ‘UTF-8‘ ,保存即可~
运行 Application.java, 然后访问地址:
测试效果:
更多关于 Springboot-thymeleaf 详细内容,点击学习: https://how2j.cn/k/springboot/springboot-thymeleat/1735.html?p=139689
thymeleaf入门 - 基于 springboot 方式
原文:https://www.cnblogs.com/newRyan/p/12811202.html