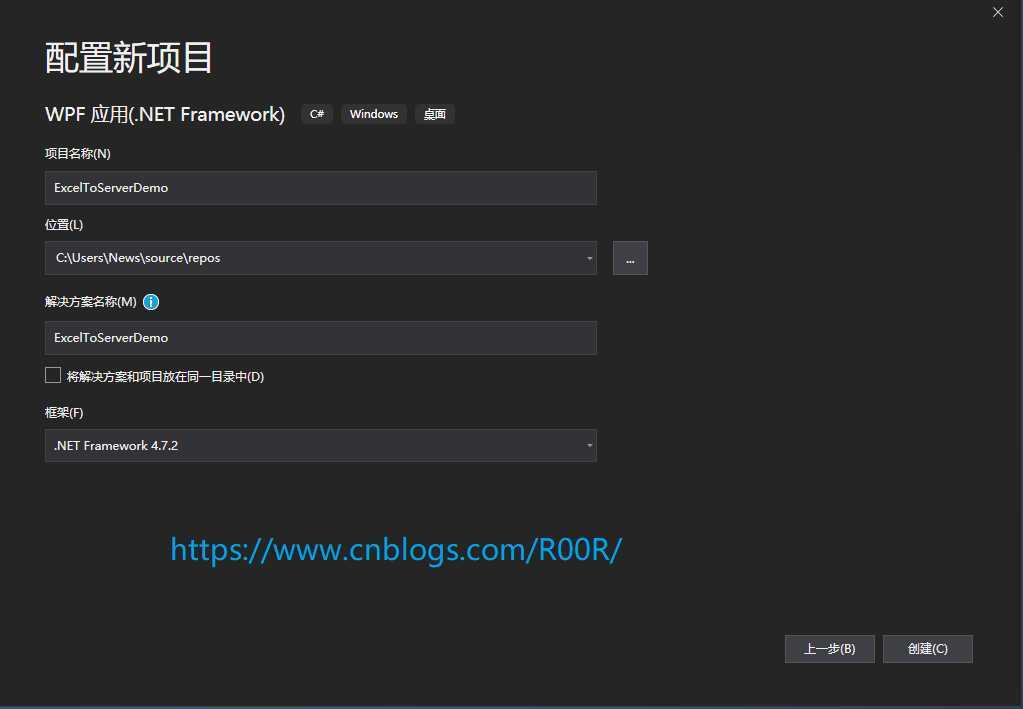
首先新建一个WPF的项目,名为ExcelToServerDemo
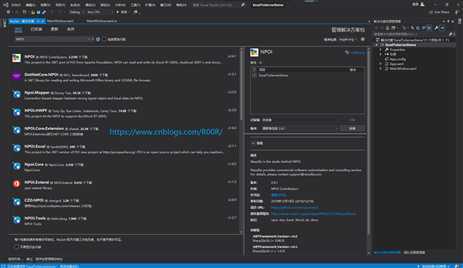
到Nuget去安装NPOI的Nuget包,点击安装即可,会自动引用项目。
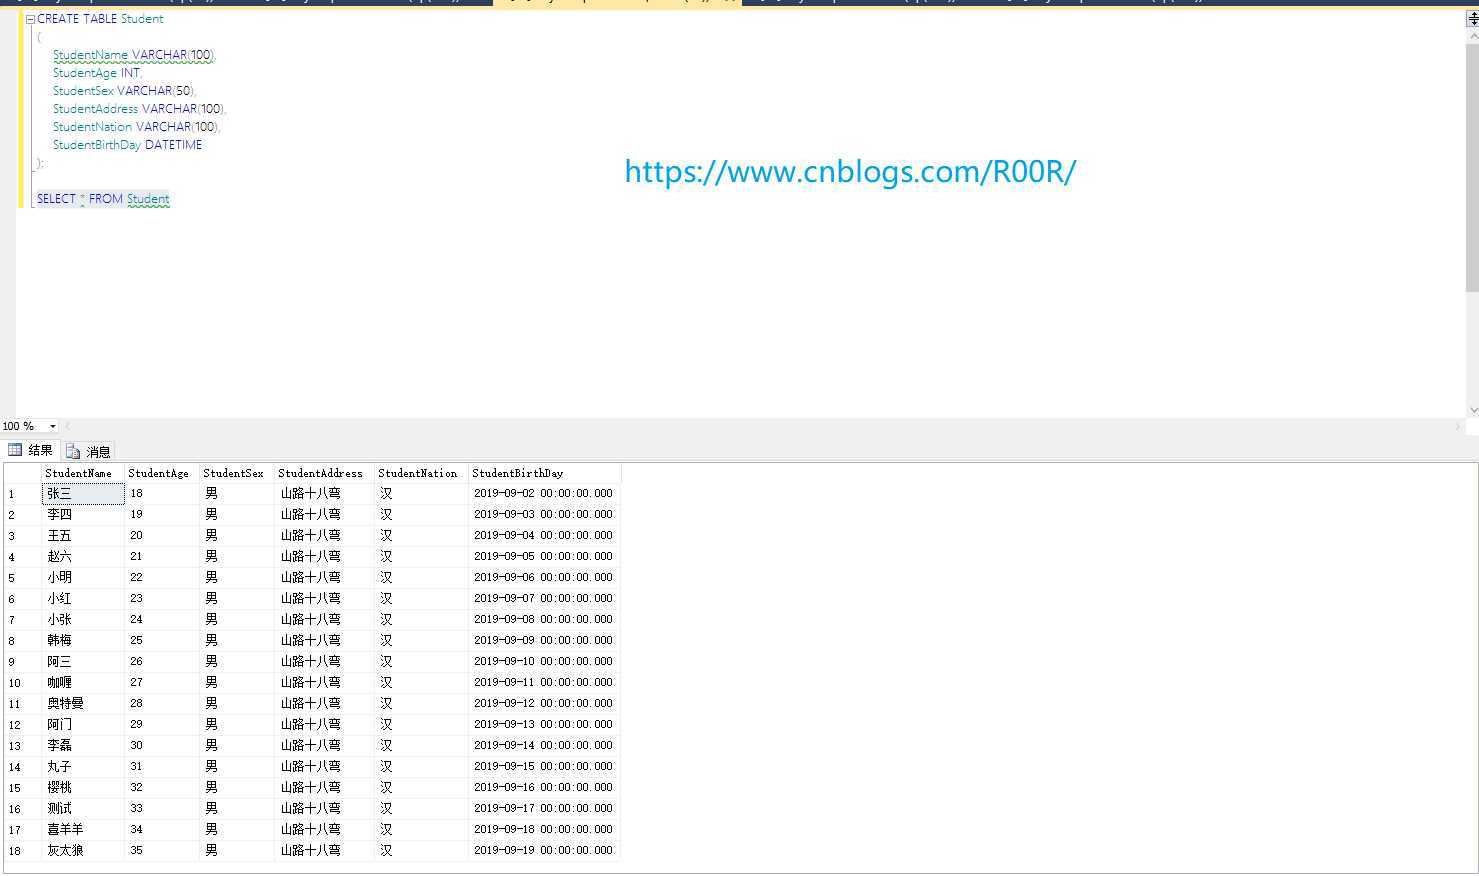
新建一个Student的表格,有名字,年龄,性别,地址,以及民族,以及出生日期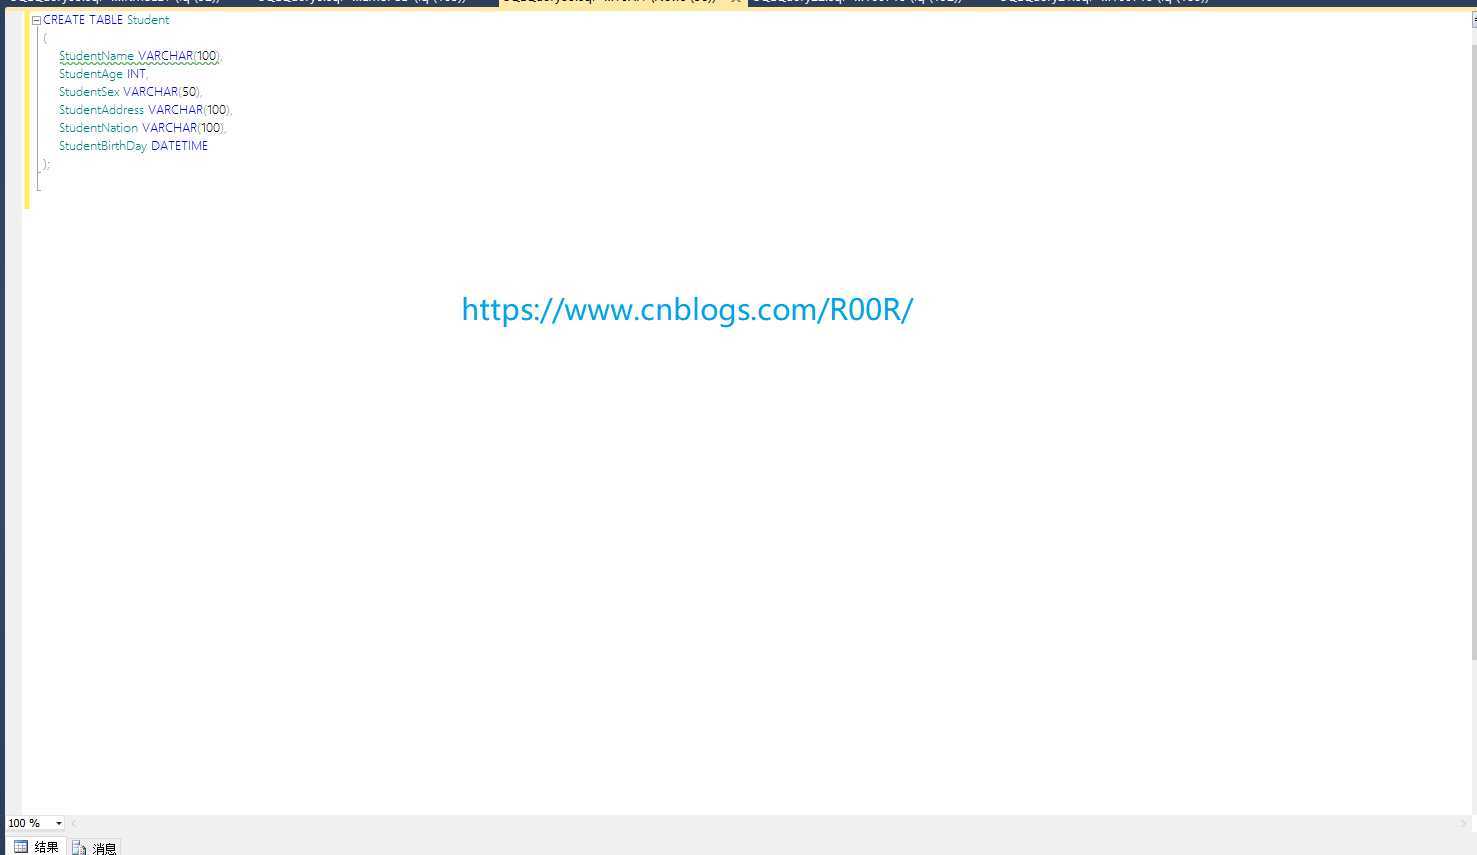

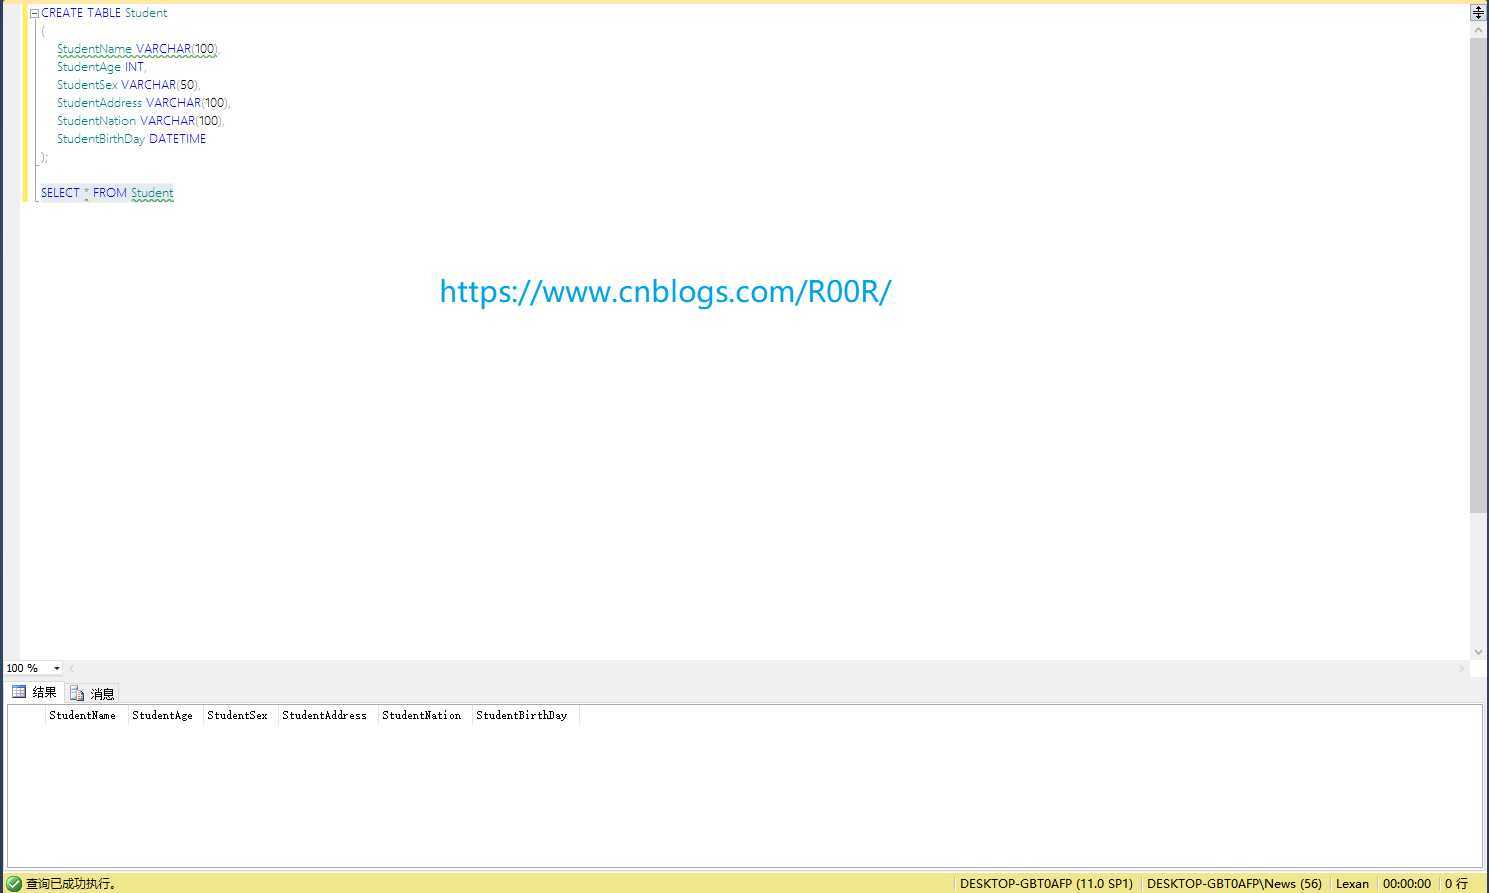
查看Sudent 表格的数据为空
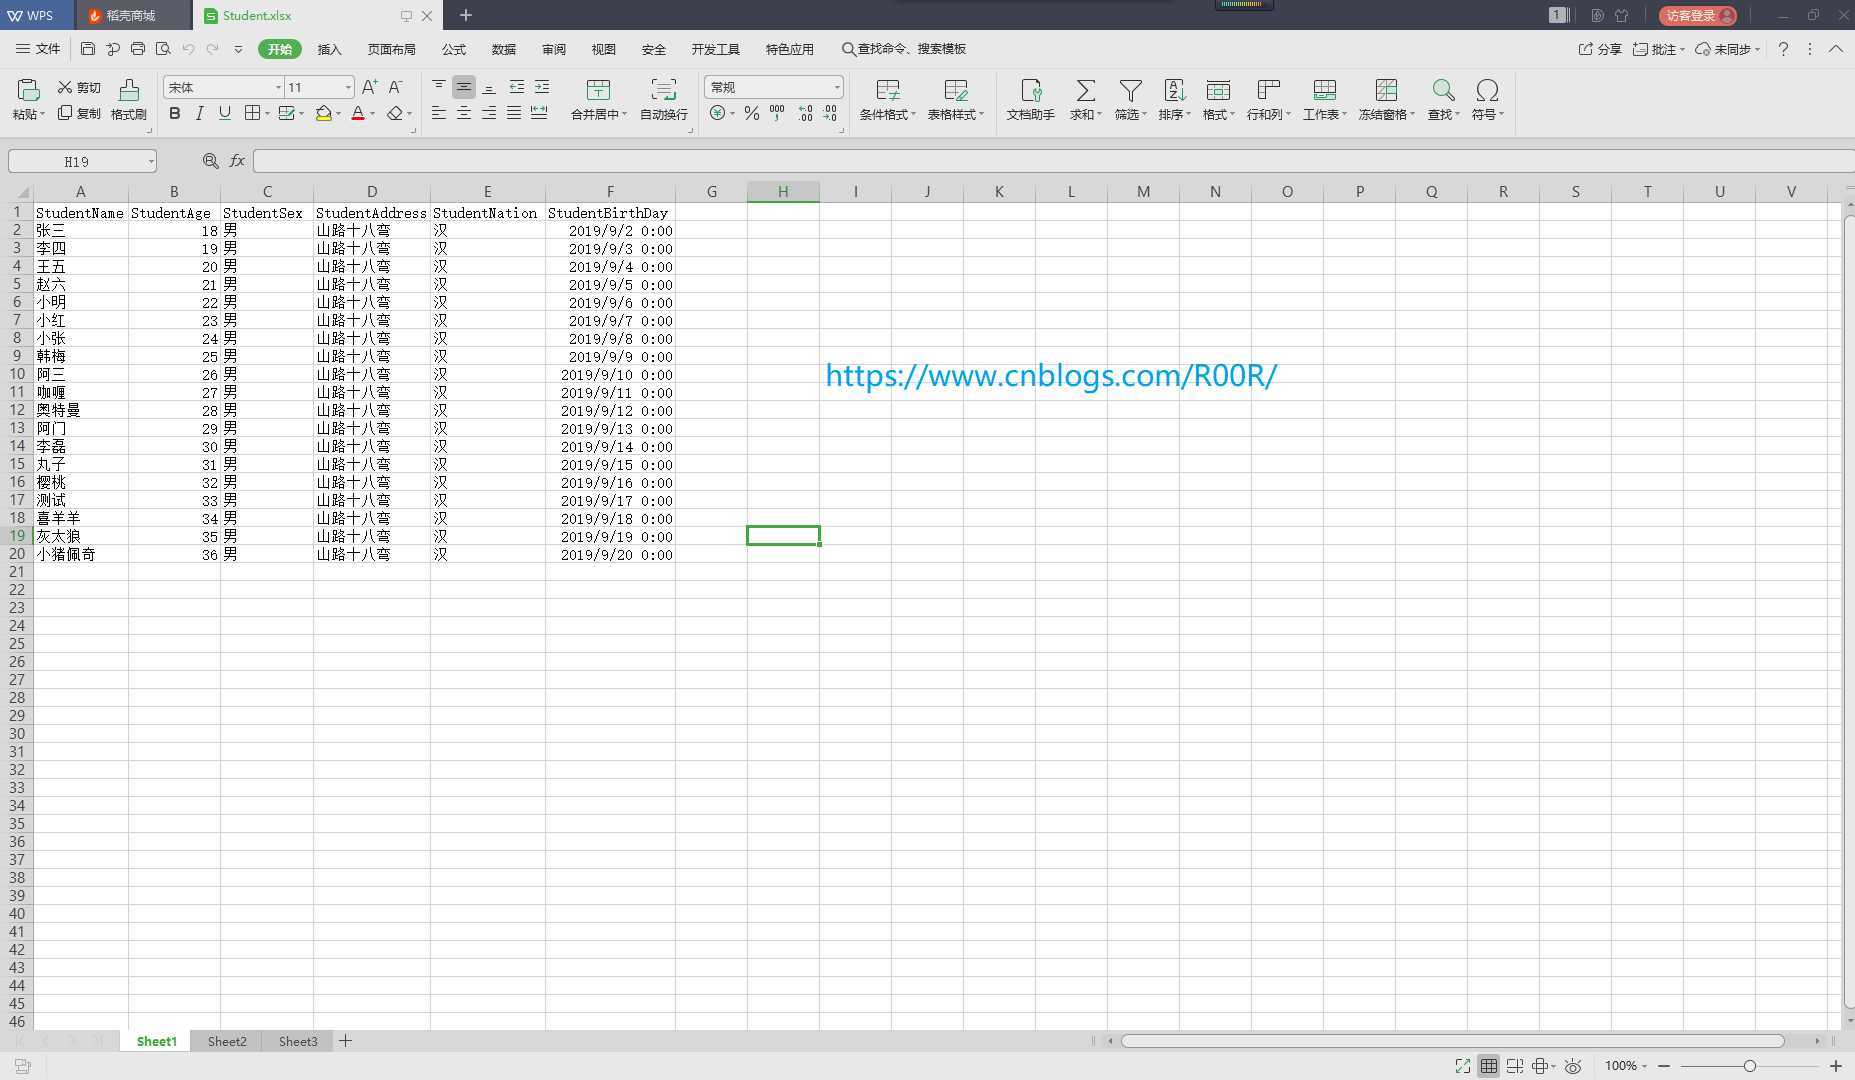
新建个Excel表格数据如下,这里的表头我用了英文,不影响。
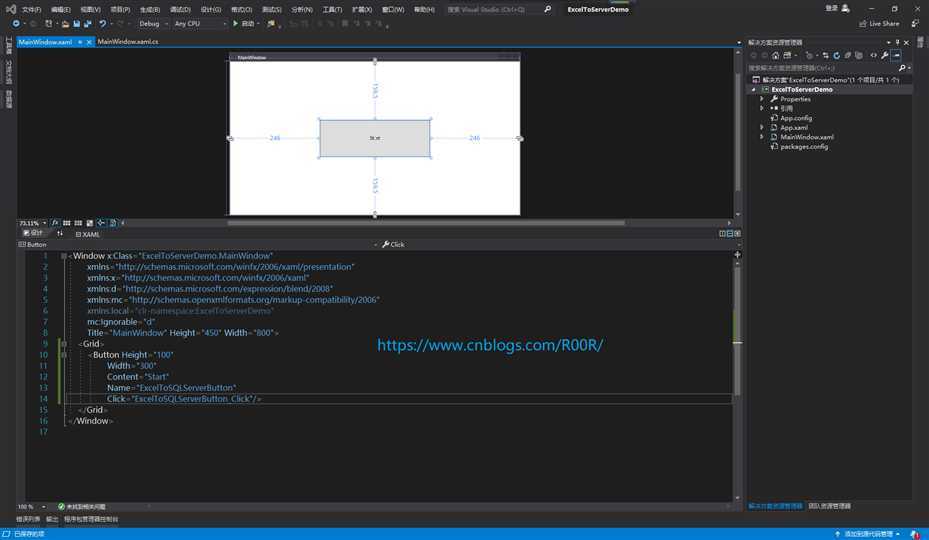
再来设计一下WPF的界面,我们就用一个按钮和一个按钮事件处理就好了,如下图
后台代码如下
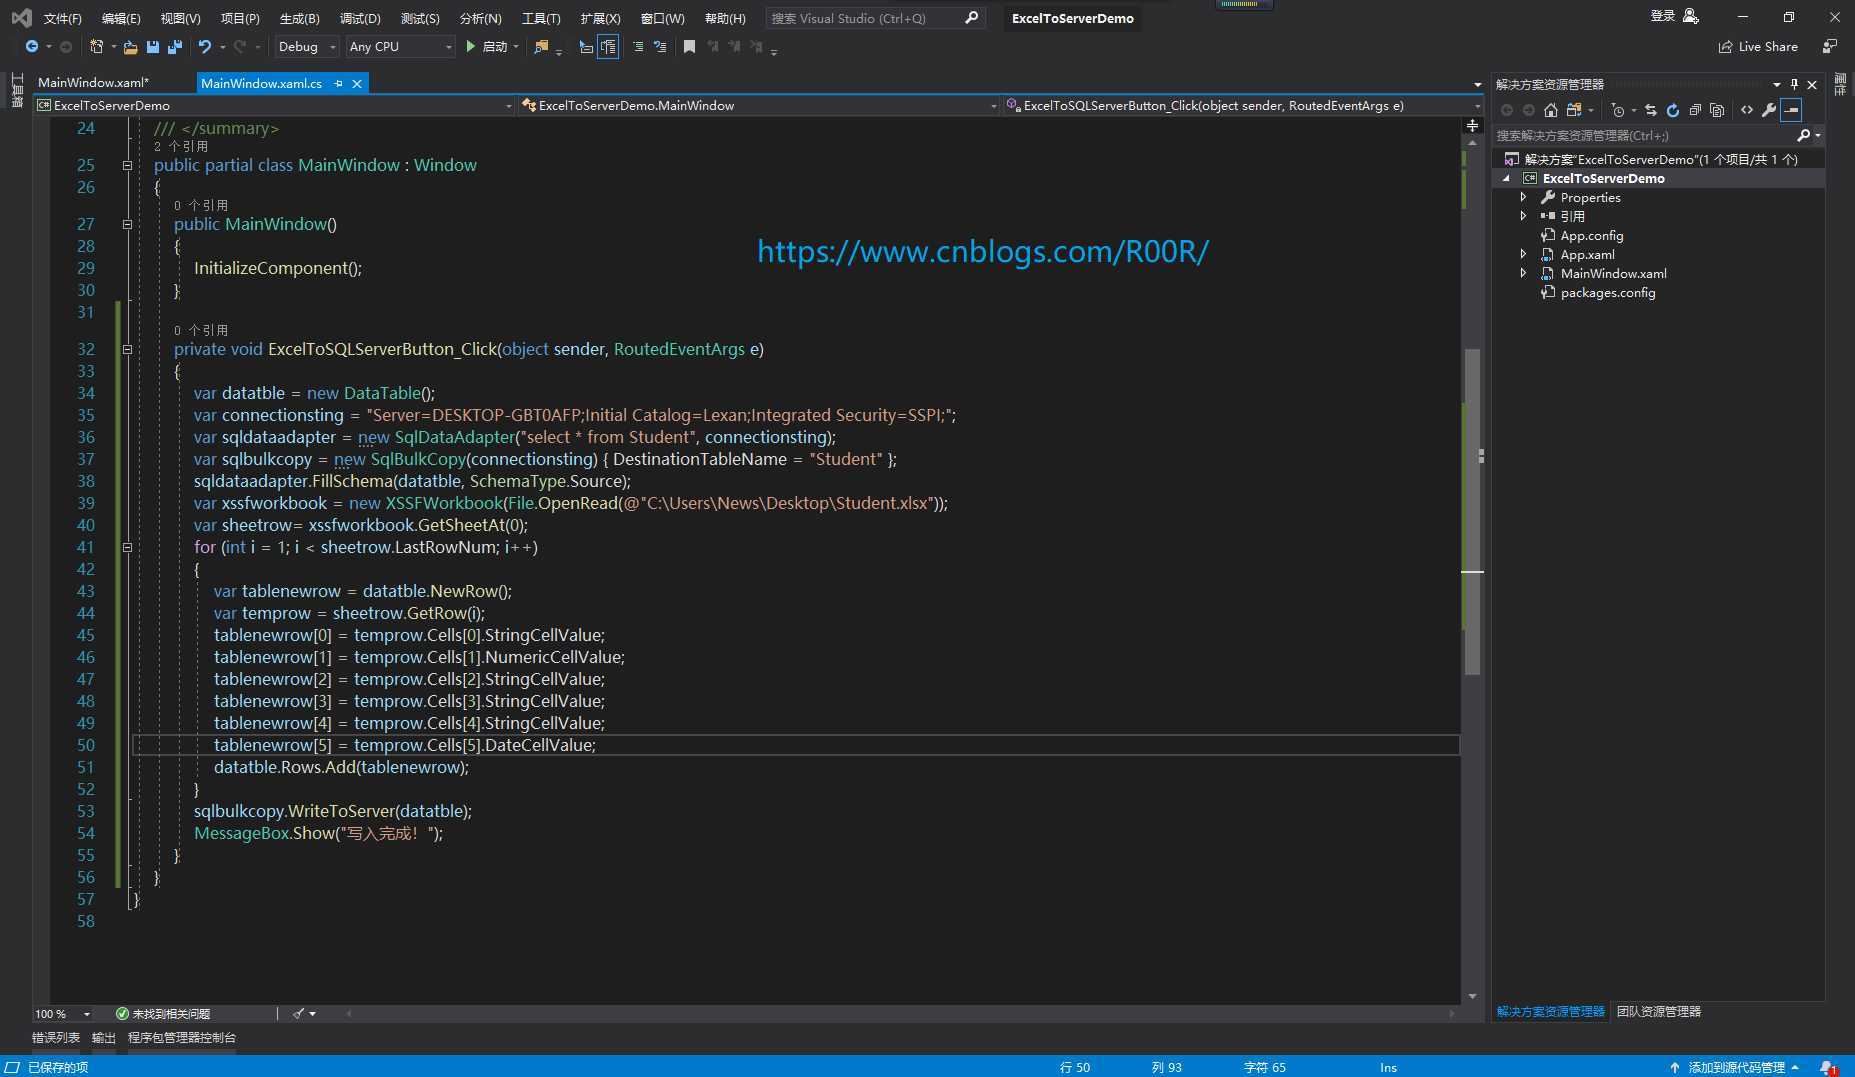
var datatble = new DataTable();
var connectionsting = "Server=DESKTOP-GBT0AFP;Initial Catalog=Lexan;Integrated Security=SSPI;";
var sqldataadapter = new SqlDataAdapter("select * from Student", connectionsting);
var sqlbulkcopy = new SqlBulkCopy(connectionsting) { DestinationTableName = "Student" };
sqldataadapter.FillSchema(datatble, SchemaType.Source);
var xssfworkbook = new XSSFWorkbook(File.OpenRead(@"C:\Users\News\Desktop\Student.xlsx"));
var sheetrow= xssfworkbook.GetSheetAt(0);
for (int i = 1; i < sheetrow.LastRowNum; i++)
{
var tablenewrow = datatble.NewRow();
var temprow = sheetrow.GetRow(i);
tablenewrow[0] = temprow.Cells[0].StringCellValue;
tablenewrow[1] = temprow.Cells[1].NumericCellValue;
tablenewrow[2] = temprow.Cells[2].StringCellValue;
tablenewrow[3] = temprow.Cells[3].StringCellValue;
tablenewrow[4] = temprow.Cells[4].StringCellValue;
tablenewrow[5] = temprow.Cells[5].DateCellValue;
datatble.Rows.Add(tablenewrow);
}
sqlbulkcopy.WriteToServer(datatble);
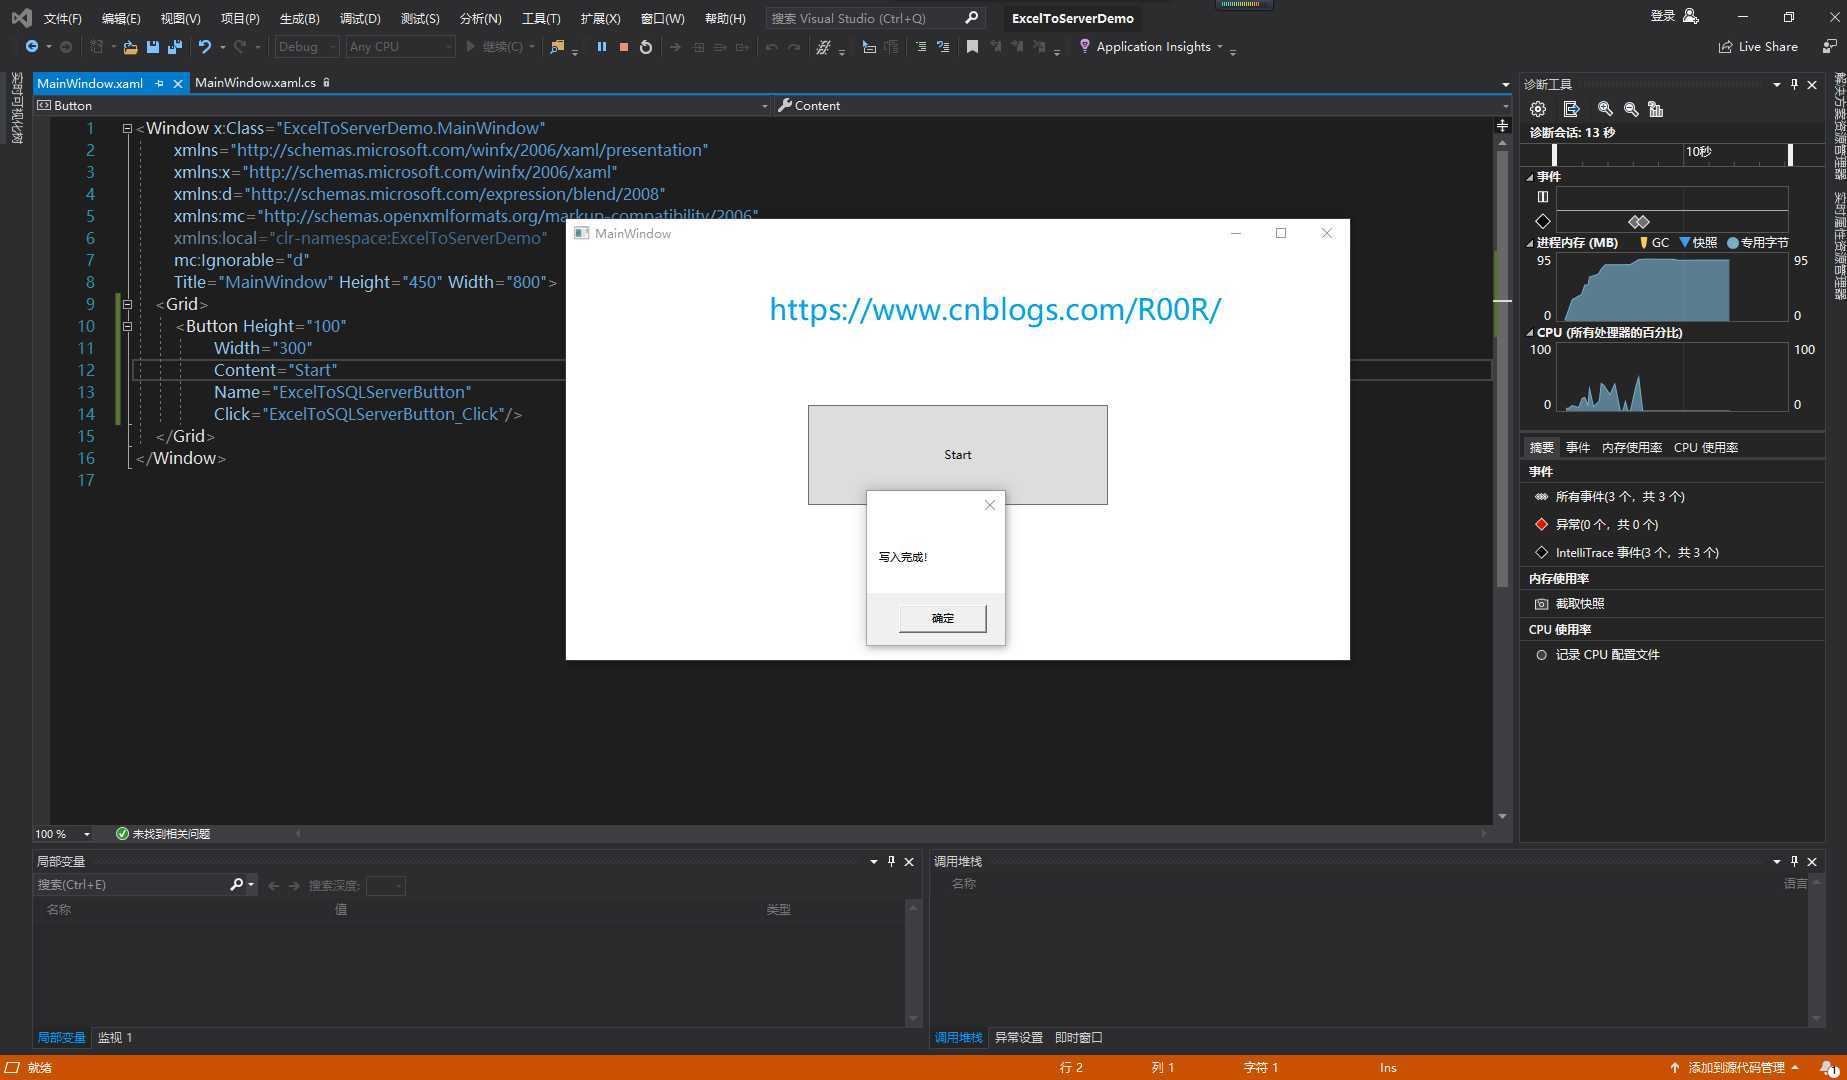
MessageBox.Show("写入完成!");
然后运行一下
再来查看一下数据库
感谢观看。
原文作者:https://www.cnblogs.com/R00R/p/11446911.html
原文:https://www.cnblogs.com/Smina/p/12784687.html