注解配置方式有以下几种
1、@Component声明
2、配置类中使用@Bean
3、实现FactoryBean
4、实现BeanDefinitionRegistryPostProcessor
5、实现ImportBeanDefinitionRegistrar
最常见的是第1中和第2种。
使用注解的优点:
使用简单
开发效率高
高内聚(类的定义和注解是维护在一个文件内的,不会分散开来)
使用注解的缺点
配置分散。不像xml,配置几种在xml文件中。
对象关系不清晰。
配置修改需要重新编译工程。因为配置在java文件中
注解方式配置bean实践
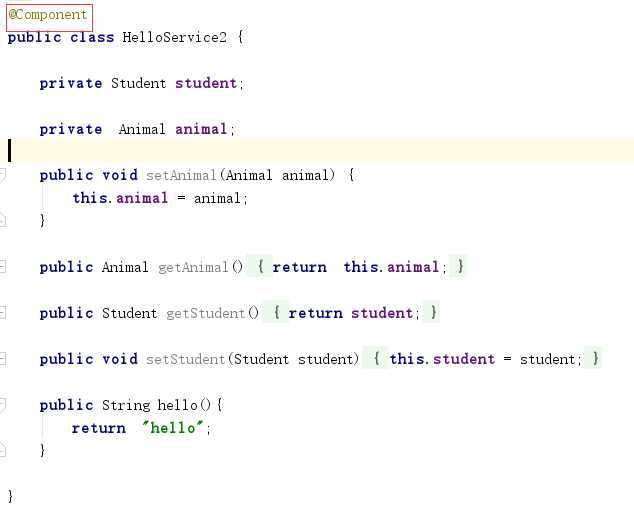
1、@Component声明
1)增加@Component声明
2)在测试类中使用
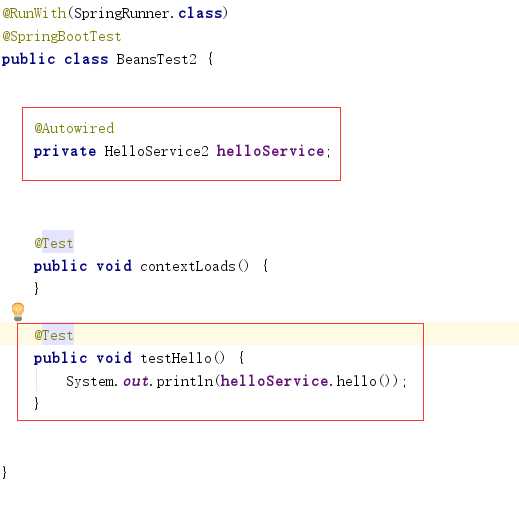
3)输出结果

2、配置类中使用@Bean
1)增加配置文件
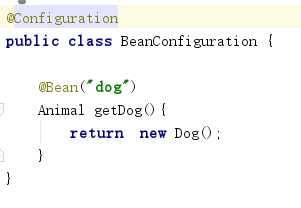
Dog类如下
public class Dog extends  Animal {
    @Override
    String getName() {
        return "Dog";
    }
}
Animal类如下
public abstract class Animal {
    abstract String getName();
}
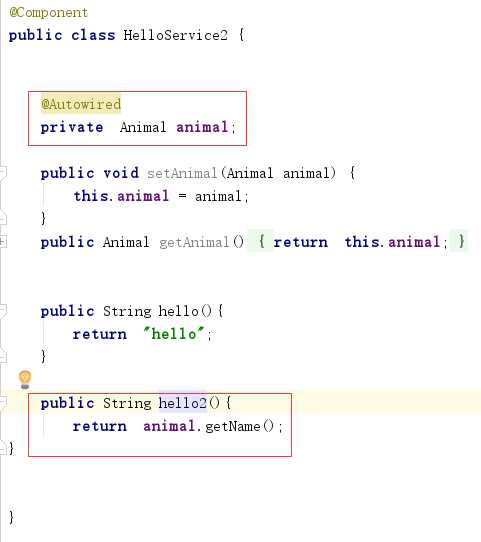
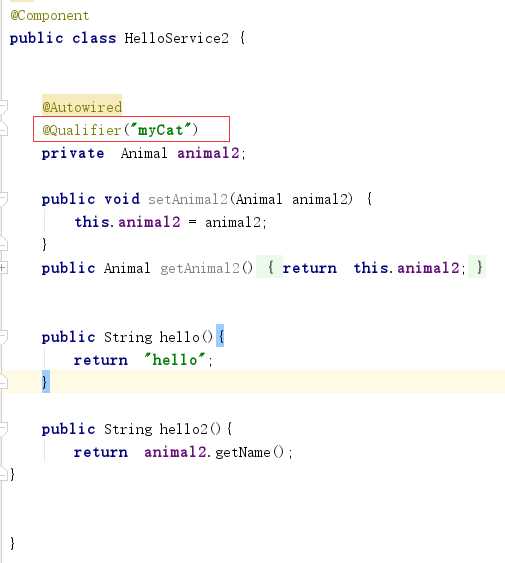
2)在Animal成员变量中增加注解Autowired ,创建hello2方法
3)增加测试类
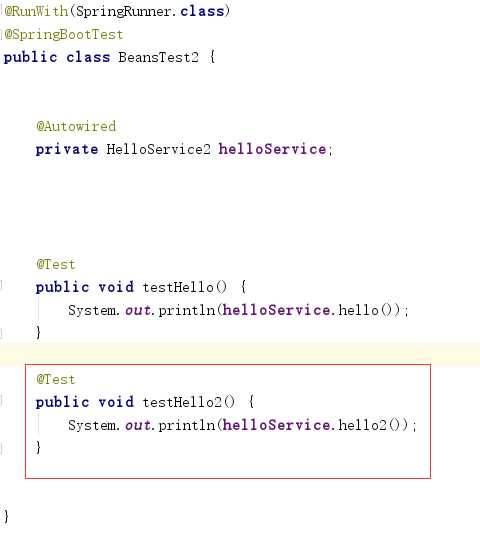
4)输出结果

3、实现FactoryBean
1)创建MyCat
@Component
public class MyCat implements FactoryBean<Animal> {

    @Nullable
    @Override
    public Animal getObject() throws Exception {
        return new Cat();
    }

    @Nullable
    @Override
    public Class<?> getObjectType() {
        return Animal.class;
    }


}
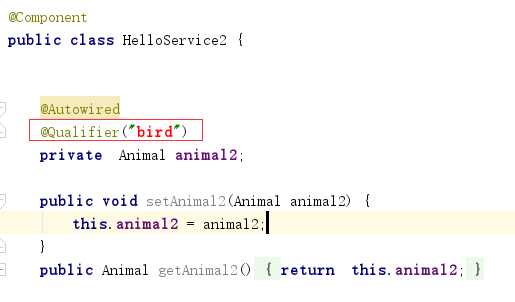
2)增加Qualifier指定是哪个bean。因此此时会有两个bean
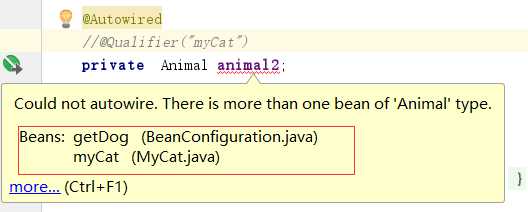
下图是用Qualifier指定是哪个bean
3)运行测试方法testHello2, 输出结果
   @Test
    public void testHello2() {
        System.out.println(helloService.hello2());
    }
结果为:

4 实现BeanDefinitionRegistryPostProcessor
1)创建Monkey类
public class Monkey extends  Animal {
    @Override
    String getName() {
        return "monkey";
    }
}
2)创建MyBeanRegister 类,并实现BeanDefinitionRegistryPostProcessor接口
@Component
public class MyBeanRegister implements BeanDefinitionRegistryPostProcessor{
    @Override
    public void postProcessBeanDefinitionRegistry(BeanDefinitionRegistry beanDefinitionRegistry) throws BeansException {
        RootBeanDefinition rootBeanDefinition = new RootBeanDefinition();
        rootBeanDefinition.setBeanClass(Monkey.class);
        beanDefinitionRegistry.registerBeanDefinition("monkey",rootBeanDefinition);
    }

    @Override
    public void postProcessBeanFactory(ConfigurableListableBeanFactory configurableListableBeanFactory) throws BeansException {

    }
}
3)修改HelloService2的Qualifier为monkey
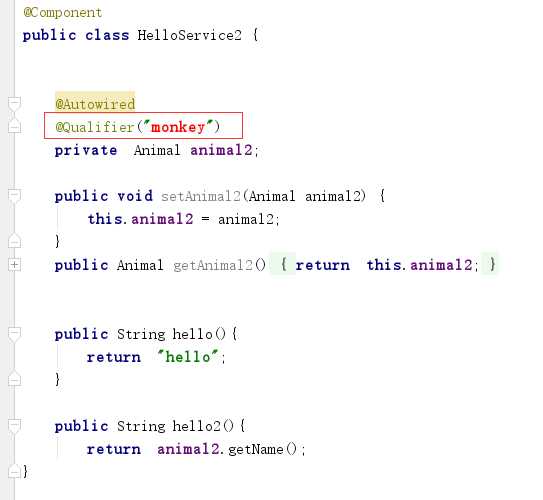
4)运行测试方法testHello2, 输出结果
   @Test
    public void testHello2() {
        System.out.println(helloService.hello2());
    }
结果为:

5、实现ImportBeanDefinitionRegistrar
1)创建Bird类
public class Bird extends  Animal {
    @Override
    String getName() {
        return "bird";
    }
}
2)创建类MyBeanImport ,实现ImportBeanDefinitionRegistrar接口
public class MyBeanImport implements ImportBeanDefinitionRegistrar {
    @Override
    public void registerBeanDefinitions(AnnotationMetadata importingClassMetadata, BeanDefinitionRegistry registry) {
        RootBeanDefinition rootBeanDefinition = new RootBeanDefinition();
        rootBeanDefinition.setBeanClass(Bird.class);
        registry.registerBeanDefinition("bird",rootBeanDefinition);

    }
}
3)修改HelloService2的Qualifier为bird
4)运行测试方法testHello2, 输出结果
   @Test
    public void testHello2() {
        System.out.println(helloService.hello2());
    }
结果为:

原文:https://www.cnblogs.com/linlf03/p/12365886.html