首先是activity中的布局
<?xml version="1.0" encoding="utf-8"?>
<androidx.constraintlayout.widget.ConstraintLayout xmlns:android="http://schemas.android.com/apk/res/android"
    xmlns:app="http://schemas.android.com/apk/res-auto"
    xmlns:tools="http://schemas.android.com/tools"
    android:layout_width="match_parent"
    android:layout_height="match_parent"
    tools:context=".MainActivity">


    <FrameLayout
        android:id="@+id/fragment"

        android:layout_width="395dp"
        android:layout_height="509dp"
        app:layout_constraintEnd_toEndOf="parent"
        app:layout_constraintHorizontal_bias="0.333"
        app:layout_constraintStart_toStartOf="parent"
        app:layout_constraintTop_toTopOf="parent">

    </FrameLayout>

    <Button
        android:id="@+id/b1"
        android:layout_width="wrap_content"
        android:layout_height="wrap_content"
        android:layout_marginStart="50dp"
        android:layout_marginBottom="12dp"
        android:text="1"
        app:layout_constraintBottom_toBottomOf="parent"
        app:layout_constraintStart_toStartOf="parent" />

    <Button
        android:id="@+id/b2"
        android:layout_width="wrap_content"
        android:layout_height="wrap_content"
        android:layout_marginEnd="64dp"
        android:layout_marginBottom="17dp"
        android:text="2"
        app:layout_constraintBottom_toBottomOf="parent"
        app:layout_constraintEnd_toEndOf="parent" />

</androidx.constraintlayout.widget.ConstraintLayout>
创建两个Fragment子类
这里以一个为例
package com.example.fragment;


import android.os.Bundle;

import androidx.annotation.NonNull;
import androidx.annotation.Nullable;
import androidx.fragment.app.Fragment;

import android.view.LayoutInflater;
import android.view.View;
import android.view.ViewGroup;

public class f1 extends Fragment {


    @Override
    public View onCreateView(@NonNull LayoutInflater inflater, @Nullable ViewGroup container,
                             @Nullable Bundle savedInstanceState) {
        return inflater.inflate(R.layout.f1_fragment2, container, false);
    }


}
其布局:
<?xml version="1.0" encoding="utf-8"?>
<androidx.constraintlayout.widget.ConstraintLayout xmlns:android="http://schemas.android.com/apk/res/android"
    xmlns:app="http://schemas.android.com/apk/res-auto"
    xmlns:tools="http://schemas.android.com/tools"
    android:id="@+id/f1"
    android:layout_width="match_parent"
    android:layout_height="match_parent"
    tools:context="f1">
    <TextView
        android:id="@+id/textView4"
        android:layout_width="182dp"
        android:layout_height="85dp"
        android:layout_marginTop="165dp"
        android:text="我是1"
        app:layout_constraintEnd_toEndOf="parent"
        app:layout_constraintStart_toStartOf="parent"
        app:layout_constraintTop_toTopOf="parent" />

</androidx.constraintlayout.widget.ConstraintLayout>
最后也是最重要的,Mainactivity内容:
package com.example.fragment;

import androidx.appcompat.app.AppCompatActivity;

import androidx.fragment.app.FragmentManager;


import androidx.fragment.app.FragmentTransaction;
import android.os.Bundle;
import android.view.View;
import android.widget.Button;


public class MainActivity extends AppCompatActivity {
    private Button b1=null;
    private Button b2=null;
   private  FragmentManager fm=null ;
    private  FragmentTransaction transaction =null ;

    private f1 f1;
    private f2 f2;
    @Override
    protected void onCreate(Bundle savedInstanceState) {
        super.onCreate(savedInstanceState);
        setContentView(R.layout.activity_main);
        b1=(Button)findViewById(R.id.b1);
        b2=(Button)findViewById(R.id.b2);
       fm = getSupportFragmentManager();


    setDefaultFragment();
    b1.setOnClickListener(new View.OnClickListener() {
        @Override
        public void onClick(View v) {
            transaction = fm.beginTransaction();
            f1=new f1();
            transaction.replace(R.id.fragment,f1);
            transaction.commit();
        }
    });
    b2.setOnClickListener(new View.OnClickListener() {
        @Override
        public void onClick(View v) {

            transaction = fm.beginTransaction();
            f2=new f2();
            transaction.replace(R.id.fragment,f2);
            transaction.commit();
        }
    });
    }

    private void setDefaultFragment()
    {
        transaction = fm.beginTransaction();
        f1=new f1();
        transaction.replace(R.id.fragment,f1);
        transaction.commit();
    }


}
注意:每个FragmentTransaction只能提交一次,因此在每次提交前都要重新为transaction赋予一个新对象;
还有关于“fm = getSupportFragmentManager();”处使用“getSupportFragmentManager();”,而不使用“fm = getFragmentManager();”的原因请参照这篇帖子https://blog.csdn.net/qq_28484355/article/details/67824228
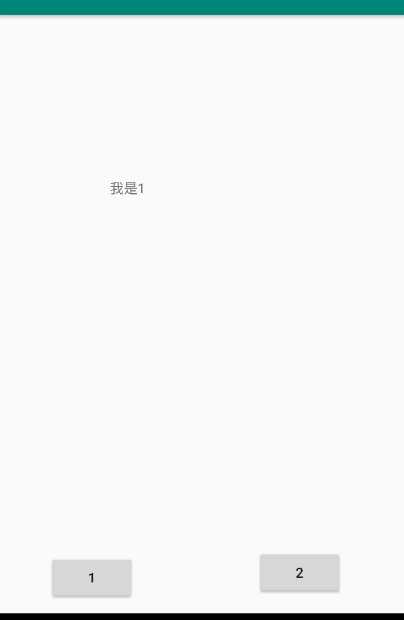
效果:
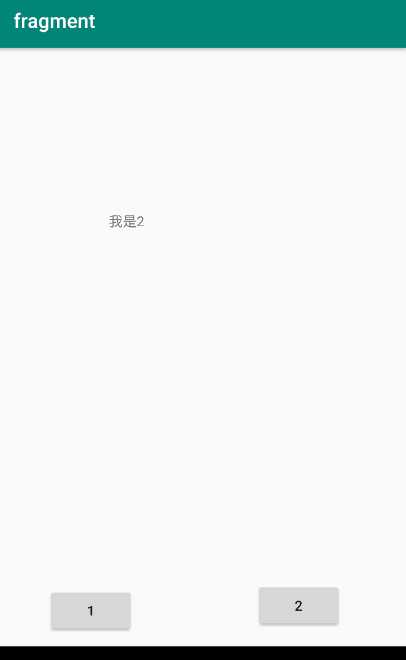
点击“2”后:
原文:https://www.cnblogs.com/liuleliu/p/12304794.html