在xml文件中加入命名空间
<beans xmlns="http://www.springframework.org/schema/beans" xmlns:xsi="http://www.w3.org/2001/XMLSchema-instance" xmlns:task="http://www.springframework.org/schema/task"
    xsi:schemaLocation="
          http://www.springframework.org/schema/beans http://www.springframework.org/schema/beans/spring-beans-4.2.xsd
          http://www.springframework.org/schema/task http://www.springframework.org/schema/task/spring-task-4.2.xsd">
</beans>
启用注解驱动
<task:annotation-driven scheduler="scheduler" executor="executor" proxy-target-class="true" />
配置线程池,若不配置多任务下会有问题
<task:scheduler id="scheduler" pool-size="10" />
spring-task.xml

<?xml version="1.0" encoding="UTF-8"?>
<beans xmlns="http://www.springframework.org/schema/beans" xmlns:xsi="http://www.w3.org/2001/XMLSchema-instance" xmlns:task="http://www.springframework.org/schema/task"
    xsi:schemaLocation="
          http://www.springframework.org/schema/beans http://www.springframework.org/schema/beans/spring-beans-4.2.xsd
          http://www.springframework.org/schema/task http://www.springframework.org/schema/task/spring-task-4.2.xsd">

    <!-- 如下实现是通过线程池执行的 -->
    <task:executor id="executor" pool-size="10" />
    <task:scheduler id="scheduler" pool-size="10" />

    <!-- 支持以@Scheduled注解的方式任务调度 -->
    <task:annotation-driven scheduler="scheduler" executor="executor" proxy-target-class="true" />

</beans>
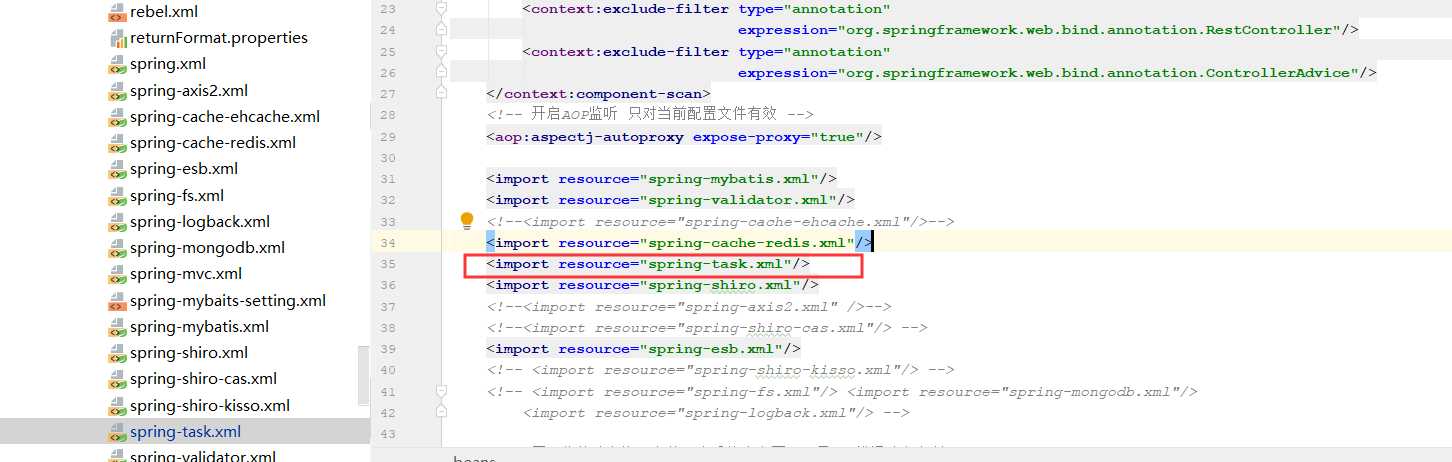
<?xml version="1.0" encoding="UTF-8"?>
<beans xmlns="http://www.springframework.org/schema/beans"
       xmlns:xsi="http://www.w3.org/2001/XMLSchema-instance" xmlns:aop="http://www.springframework.org/schema/aop"
       xmlns:context="http://www.springframework.org/schema/context"
       xsi:schemaLocation="
          http://www.springframework.org/schema/beans http://www.springframework.org/schema/beans/spring-beans-4.2.xsd
          http://www.springframework.org/schema/aop http://www.springframework.org/schema/aop/spring-aop-4.2.xsd
          http://www.springframework.org/schema/context http://www.springframework.org/schema/context/spring-context-4.2.xsd">
    <context:property-placeholder
            location="
            classpath*:resources.properties,
            classpath*:datasource.properties,
            classpath*:redis.properties,
            classpath*:mongodb.properties,
            classpath*:esb.properties,
            classpath*:cas.properties"/>

    <!-- 扫描注解Bean -->
    <context:component-scan
            base-package="com.ylzinfo.**.service,com.ylzinfo.**.task,com.ylzinfo.**.extra,com.ylzinfo.esscard.**.config">
        <context:exclude-filter type="annotation"
                                expression="org.springframework.stereotype.Controller"/>
        <context:exclude-filter type="annotation"
                                expression="org.springframework.web.bind.annotation.RestController"/>
        <context:exclude-filter type="annotation"
                                expression="org.springframework.web.bind.annotation.ControllerAdvice"/>
    </context:component-scan>
    <!-- 开启AOP监听 只对当前配置文件有效 -->
    <aop:aspectj-autoproxy expose-proxy="true"/>

    <import resource="spring-mybatis.xml"/>
    <import resource="spring-validator.xml"/>
    <!--<import resource="spring-cache-ehcache.xml"/>-->
    <import resource="spring-cache-redis.xml"/>
    <import resource="spring-task.xml"/>
    <import resource="spring-shiro.xml"/>
    <!--<import resource="spring-axis2.xml" />-->
    <!--<import resource="spring-shiro-cas.xml"/> -->
    <import resource="spring-esb.xml"/>
    <!-- <import resource="spring-shiro-kisso.xml"/> -->
    <!-- <import resource="spring-fs.xml"/> <import resource="spring-mongodb.xml"/>
        <import resource="spring-logback.xml"/> -->

    <!-- 国际化的消息资源文件(本系统中主要用于显示/错误消息定制) -->
    <bean id="messageSource"
          class="org.springframework.context.support.ReloadableResourceBundleMessageSource">
        <property name="basenames">
            <list>
                <!-- 在web环境中一定要定位到classpath 否则默认到当前web应用下找 [classpath:messages_zh_CN,
                    classpath:messages_zh, classpath:messages] -->
                <value>classpath:messages/messages</value>
                <value>classpath:messages/ValidationMessages</value>
            </list>
        </property>
        <!-- useCodeAsDefaultMessage默认为false,这样当Spring在ResourceBundle中找不到messageKey的话,
            就抛出NoSuchMessageException,把它设置为True,则找不到不会抛出异常 -->
        <property name="useCodeAsDefaultMessage" value="false"/>
        <property name="defaultEncoding" value="UTF-8"/>
        <property name="cacheSeconds" value="60"/>
    </bean>

    <!-- spring工具类 方便在非spring管理环境中获取bean -->
    <bean class="com.eva.core.util.SpringUtils"/>

</beans>
public interface ScheduledService {
    public void test();
}
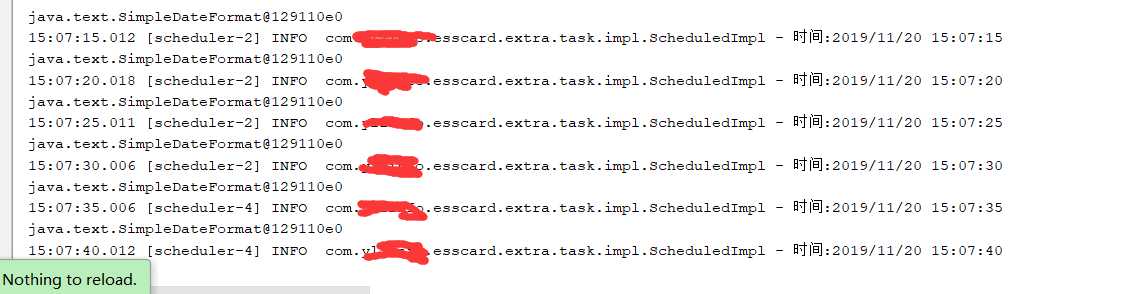
import com.esscard.extra.task.ScheduledService;
import org.slf4j.Logger;
import org.slf4j.LoggerFactory;
import org.springframework.scheduling.annotation.Scheduled;
import org.springframework.stereotype.Component;

import java.text.SimpleDateFormat;
import java.util.Date;


@Component
public class ScheduledImpl implements ScheduledService {
    private Logger logger = LoggerFactory.getLogger(ScheduledImpl.class);

    @Scheduled(cron="0/5 * *  * * ? ")
    @Override
    public void test() {
        SimpleDateFormat df = new SimpleDateFormat("yyyy/MM/dd HH:mm:ss");
        System.out.println(df);
        logger.info("时间:" + df.format(new Date()));
    }
}
该参数接收一个cron表达式,cron表达式是一个字符串,字符串以5或6个空格隔开,分开共6或7个域,每一个域代表一个含义。
[秒] [分] [小时] [日] [月] [周] [年]注:[年]不是必须的域,可以省略[年],则一共6个域
| 序号 | 说明 | 必填 | 允许填写的值 | 允许的通配符 |
|---|---|---|---|---|
| 1 | 秒 | 是 | 0-59 | , - * / |
| 2 | 分 | 是 | 0-59 | , - * / |
| 3 | 时 | 是 | 0-23 | , - * / |
| 4 | 日 | 是 | 1-31 | , - * ? / L W |
| 5 | 月 | 是 | 1-12 / JAN-DEC | , - * / |
| 6 | 周 | 是 | 1-7 or SUN-SAT | , - * ? / L # |
| 7 | 年 | 否 | 1970-2099 | , - * / |
* 表示所有值。 例如:在分的字段上设置 *,表示每一分钟都会触发。? 表示不指定值。使用的场景为不需要关心当前设置这个字段的值。例如:要在每月的10号触发一个操作,但不关心是周几,所以需要周位置的那个字段设置为”?” 具体设置为 0 0 0 10 * ?- 表示区间。例如 在小时上设置 “10-12”,表示 10,11,12点都会触发。, 表示指定多个值,例如在周字段上设置 “MON,WED,FRI” 表示周一,周三和周五触发/ 用于递增触发。如在秒上面设置”5/15” 表示从5秒开始,每增15秒触发(5,20,35,50)。 在月字段上设置’1/3’所示每月1号开始,每隔三天触发一次。L 表示最后的意思。在日字段设置上,表示当月的最后一天(依据当前月份,如果是二月还会依据是否是润年[leap]), 在周字段上表示星期六,相当于”7”或”SAT”。如果在”L”前加上数字,则表示该数据的最后一个。例如在周字段上设置”6L”这样的格式,则表示“本月最后一个星期五”W 表示离指定日期的最近那个工作日(周一至周五). 例如在日字段上置”15W”,表示离每月15号最近的那个工作日触发。如果15号正好是周六,则找最近的周五(14号)触发, 如果15号是周未,则找最近的下周一(16号)触发.如果15号正好在工作日(周一至周五),则就在该天触发。如果指定格式为 “1W”,它则表示每月1号往后最近的工作日触发。如果1号正是周六,则将在3号下周一触发。(注,”W”前只能设置具体的数字,不允许区间”-“)。# 序号(表示每月的第几个周几),例如在周字段上设置”6#3”表示在每月的第三个周六.注意如果指定”#5”,正好第五周没有周六,则不会触发该配置(用在母亲节和父亲节再合适不过了) ;小提示:’L’和 ‘W’可以一组合使用。如果在日字段上设置”LW”,则表示在本月的最后一个工作日触发;周字段的设置,若使用英文字母是不区分大小写的,即MON与mon相同。每隔5秒执行一次:*/5 * * * * ?
每隔1分钟执行一次:0 */1 * * * ?
每天23点执行一次:0 0 23 * * ?
每天凌晨1点执行一次:0 0 1 * * ?
每月1号凌晨1点执行一次:0 0 1 1 * ?
每月最后一天23点执行一次:0 0 23 L * ?
每周星期天凌晨1点实行一次:0 0 1 ? * L
在26分、29分、33分执行一次:0 26,29,33 * * * ?
每天的0点、13点、18点、21点都执行一次:0 0 0,13,18,21 * * ?
时区,接收一个java.util.TimeZone#ID。cron表达式会基于该时区解析。默认是一个空字符串,即取服务器所在地的时区。比如我们一般使用的时区Asia/Shanghai。该字段我们一般留空。
上一次执行完毕时间点之后多长时间再执行。如:
@Scheduled(fixedDelay = 5000) //上一次执行完毕时间点之后5秒再执行与 3. fixedDelay 意思相同,只是使用字符串的形式。唯一不同的是支持占位符。如:
@Scheduled(fixedDelayString = "5000") //上一次执行完毕时间点之后5秒再执行
上一次开始执行时间点之后多长时间再执行。如:
@Scheduled(fixedRate = 5000) //上一次开始执行时间点之后5秒再执行与 5. fixedRate 意思相同,只是使用字符串的形式。唯一不同的是支持占位符。
第一次延迟多长时间后再执行。如:
@Scheduled(initialDelay=1000, fixedRate=5000) //第一次延迟1秒后执行,之后按fixedRate的规则每5秒执行一次与 7. initialDelay 意思相同,只是使用字符串的形式。唯一不同的是支持占位符。
原文:https://www.cnblogs.com/hoje/p/11897966.html
