一个用于构建消息驱动的微服务的框架
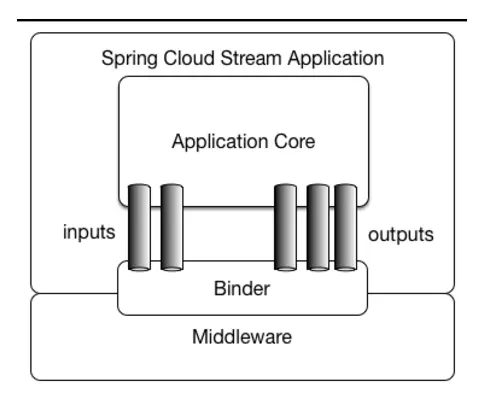
应用程序通过 inputs 或者 outputs 来与 Spring Cloud Stream 中binder 交互,通过我们配置来 binding ,而 Spring Cloud Stream 的 binder 负责与中间件交互。所以,我们只需要搞清楚如何与 Spring Cloud Stream 交互就可以方便使用消息驱动的方式
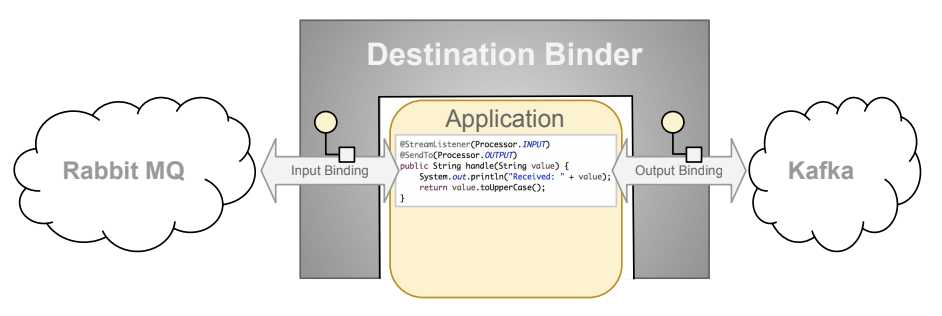
微服务集成了Stream,Stream的Destination Binder创建了两个Binding,左边的Binding连接Rabbit MQ,右边的MQ连接Kafka。
左边的Binding从Rabbit MQ处消费消息,然后经过Application处代码的处理,把处理结果传输给Kafka。【从Rabbit MQ处消费消息,然后经过处理,生产到Kafka】
<dependency>
    <groupId>com.alibaba.cloud</groupId>
    <artifactId>spring-cloud-starter-stream-rocketmq</artifactId>
</dependency>注意groupId为com.alibaba.cloud,而不是org.springframework.cloud
在启动类上添加@EnableBinding注解,其中Source用来发送消息
@SpringBootApplication
@EnableBinding(Source.class)
public class Study01Application {
    public static void main(String[] args) {
        SpringApplication.run(Study01Application.class, args);
    }
}rocketmq.binder.name-server RocketMQ控制台地址
output 表示生产者,用于绑定一个topic投递消息
bindings.output.destination 指定topic
spring:
  cloud:
    stream:
      rocketmq:
        binder:
          name-server: 127.0.0.1:9876
      bindings:
        # 生产者
        output:
          # 指定topic
destination: topic-stream注入Source接口,用来实现消息发送
MessageBuilder构建消息体
@Autowired
private Source source;

@GetMapping("test-stream")
public String testStream() {
    this.source.output()
            .send(
                    MessageBuilder
                            .withPayload("消息体")
                            .build()
            );
    return "testStream";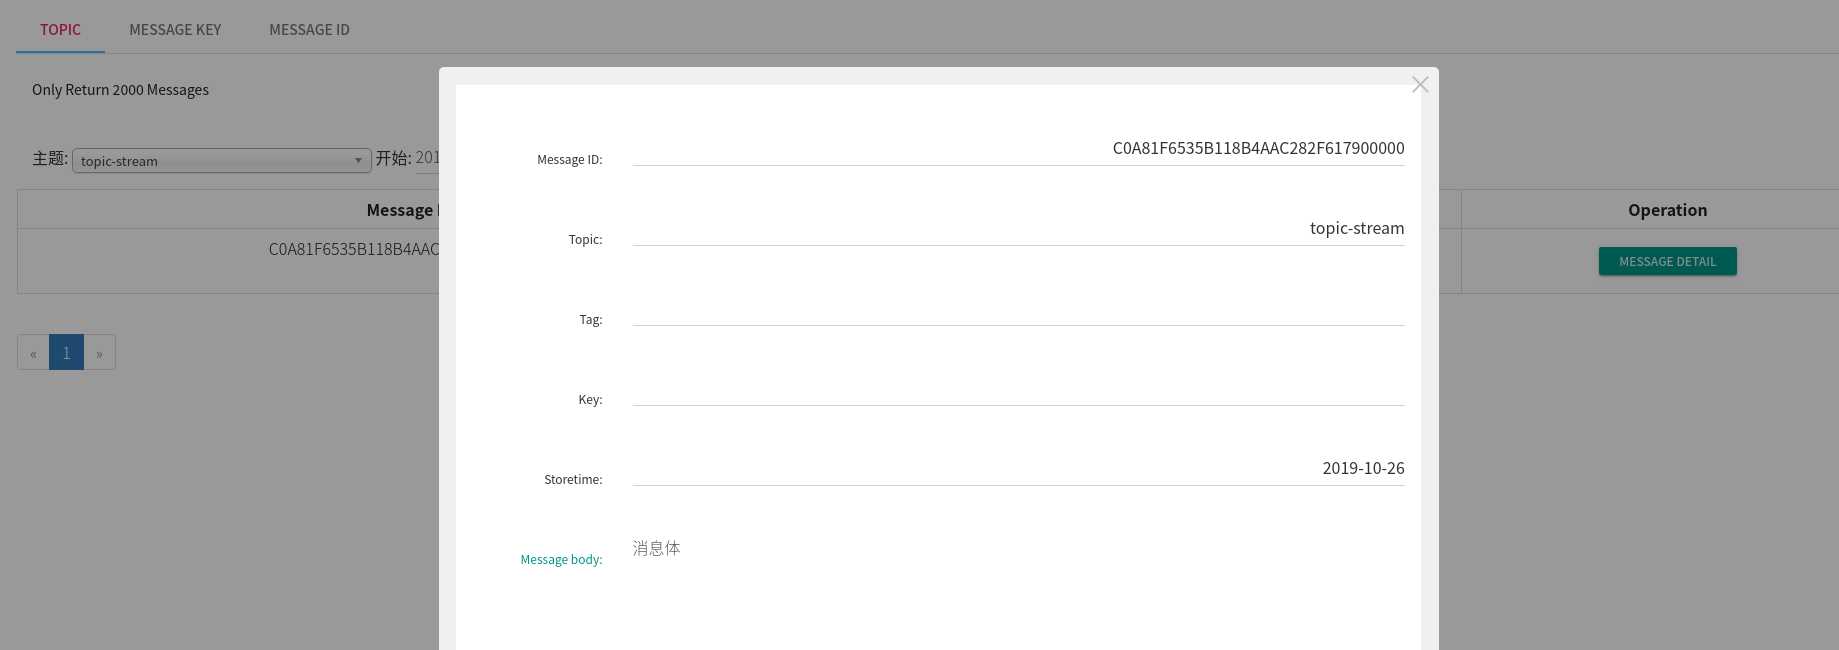
}启动项目,请求之后,可以在RocketMQ控制台-消息页面看见topic为topic-stream的消息
同生产者
@SpringBootApplication
@EnableBinding(Sink.class)
public class Study02Application {
    public static void main(String[] args) {
        SpringApplication.run(Study02Application.class, args);
    }
}input表示消费者,用于绑定一个topic消费消息
destination指定topic,要与生产者的topic相对应.在使用RocketMQ时,group必填;使用其他MQ时,可以留空
spring:
  cloud:
    stream:
      rocketmq:
        binder:
          name-server: 127.0.0.1:9876
      bindings:
        # 消费者
        input:
          # 指定topic,要与生产者的topic匹配
          destination: topic-stream
          # 根据业务指定
          # 一定要设置,否则会启动报错
          # 如果使用的是其他的MQ,可以留空
group: group-streamimport lombok.extern.slf4j.Slf4j;
import org.springframework.cloud.stream.annotation.StreamListener;
import org.springframework.cloud.stream.messaging.Sink;
import org.springframework.stereotype.Service;
@Service
@Slf4j
public class testStreamConsumer {
@StreamListener(Sink.INPUT)
public void receive(String messageBody) {
log.info("------>" + messageBody);
}
}
在以上的例子中,我们发现只可以设置一个topic,这显然满足不了实际的生产需求,所以这个时候就需要用到stream的自定义接口来实现多个“input”和“output”绑定不同的topic了。
生产者发送消息时使用的是Source接口里的output方法,而消费者接收消息时使用的是Sink接口里的input方法,并且都需要配置到启动类的@EnableBinding注解里。所以实际上我们需要自定义接口的源码与这两个接口的源码几乎一致,只是名称有所不同而已,使用上也只是将Source和Sink改为自定义的接口即可。
import org.springframework.cloud.stream.annotation.Output;
import org.springframework.messaging.MessageChannel;

/**
 * 自定义发送消息接口
 */
public interface customizeSource {
    String CUSTOMIZE_OUTPUT = "customize-output";

    @Output(CUSTOMIZE_OUTPUT)
    MessageChannel output();
}
在启动类的@EnableBinding注解上添加刚刚自定义的消息发送接口
@EnableBinding({Source.class, customizeSource.class})注意customize-output的值一定要与自定义消息发送接口中@Output注解的值相同
cloud:
stream:
rocketmq:
binder:
name-server: 127.0.0.1:9876
bindings:
# 生产者
output:
# 指定topic
destination: topic-stream
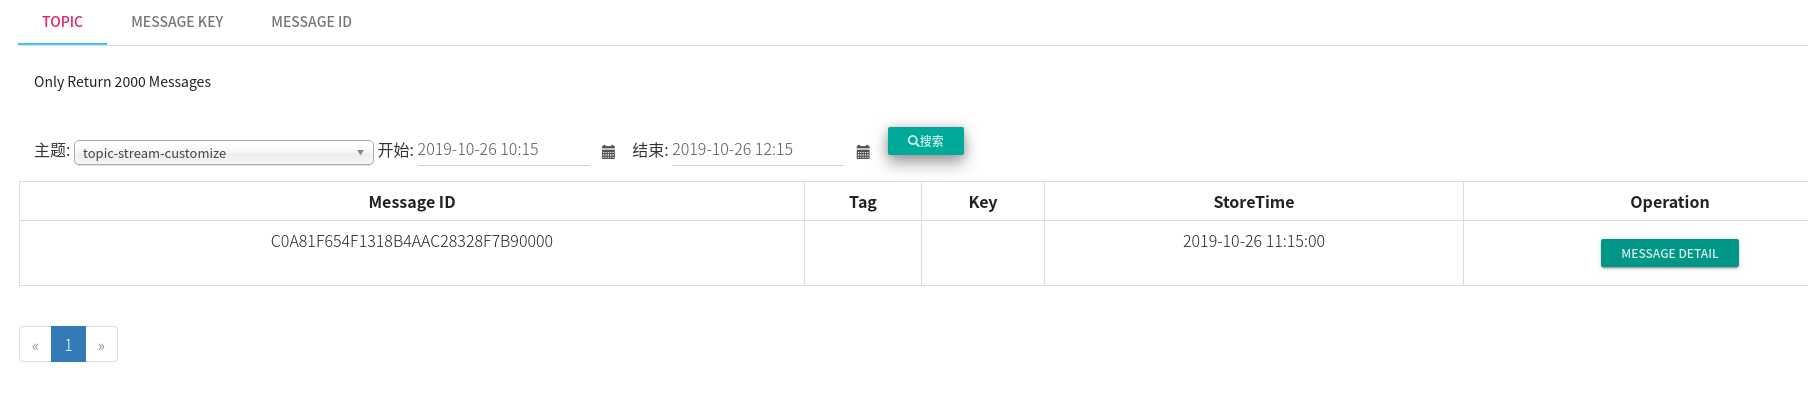
customize-output:
destination: topic-stream-customize@Autowired
private CustomizeSource customizeSource;
@GetMapping("test-stream-customize")
public String testCustomizeStream() {
customizeSource.output()
.send(
MessageBuilder
.withPayload("消息体")
.build()
);
return "testStream";
}
import org.springframework.cloud.stream.annotation.Input;
import org.springframework.messaging.SubscribableChannel;

/**
 * 自定义消费消息接口
 */
public interface CustomizeSink {
    String CUSTOMIZE_INPUT = "customize-input";

    @Input(CUSTOMIZE_INPUT)
    SubscribableChannel input();
}在启动类的@EnableBinding注解上添加刚刚自定义的消息接收接口
@EnableBinding({Sink.class, CustomizeSink.class})注意customize-input的值一定要与自定义消息发送接口中@Input注解的值相同
cloud:
    stream:
      rocketmq:
        binder:
          name-server: 127.0.0.1:9876

      bindings:
        # 消费者
        input:
          # 指定topic,要与生产者的topic匹配
          destination: topic-stream
          # 根据业务指定
          # 一定要设置,否则会启动报错
          # 如果使用的是其他的MQ,可以留空
          group: group-stream
        customize-input:
          destination: topic-stream-customize
group: group-stream-customizeimport lombok.extern.slf4j.Slf4j;
import org.springframework.cloud.stream.annotation.StreamListener;
import org.springframework.stereotype.Service;
@Service
@Slf4j
public class CustomizeStreamConsumer {
@StreamListener(CustomizeSink.CUSTOMIZE_INPUT)
public void receive(String messageBody) {
log.info("------>自定义>" + messageBody);
}
}
Spring Cloud Alibaba学习笔记(12) - 使用Spring Cloud Stream 构建消息驱动微服务
原文:https://www.cnblogs.com/fx-blog/p/11740688.html