https://jupyter.org/install.html
安装:pip install jupyterlab
启动: jupyter notebook
如果想用来测试http请求,需要安装requests
pip install requests
接下来测试一下get、post请求
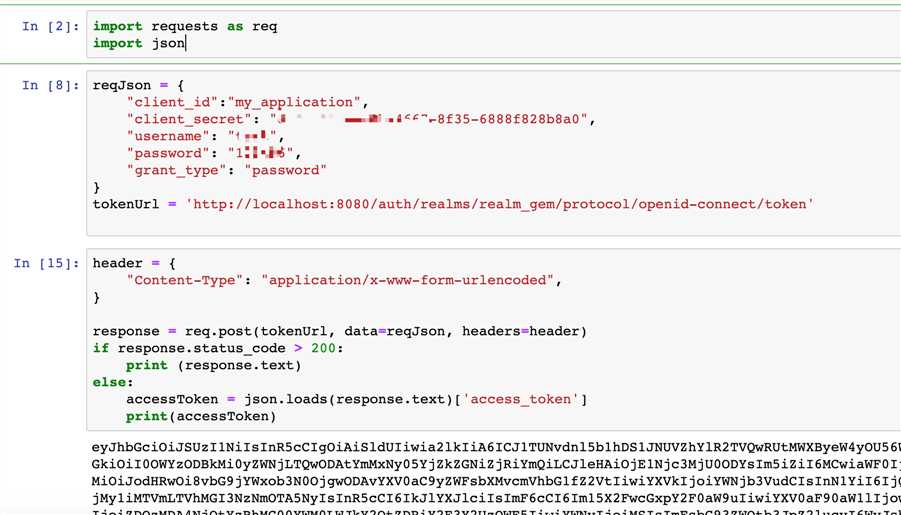
import requests as req
import json
reqJson = {
    "client_id":"my_application",
    "client_secret": "xxx-4e0b-4667-8f35-xxx",
    "username": "test",
    "password": "xxx",
    "grant_type": "password"
}
tokenUrl = ‘http://localhost:8080/auth/realms/realm_gem/protocol/openid-connect/token‘

header = {
    "Content-Type": "application/x-www-form-urlencoded",
}

response = req.post(tokenUrl, data=reqJson, headers=header)
if response.status_code > 200:
    print (response.text)
else:
    accessToken = json.loads(response.text)[‘access_token‘]
    print(accessToken)
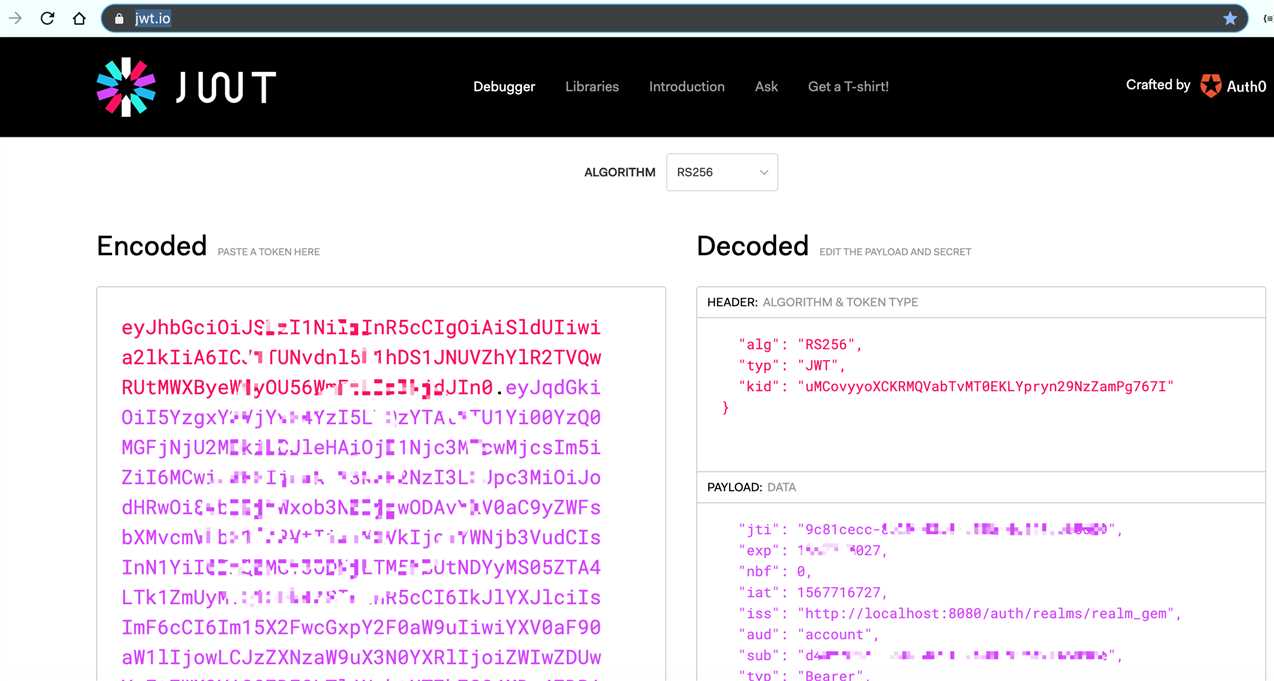
由于生成的token是标准的json web token,所以可以反编译出来加密前的内容,通过下面的网址可以反编译
根据生成的token去验证
header = {
    "Authorization": "Bearer " + accessToken
}
userinfoUrl = ‘http://localhost:8080/auth/realms/realm_gem/protocol/openid-connect/userinfo‘

response = req.get(userinfoUrl, headers=header)
print(response.text)
curl命令行
curl -d ‘client_id=xxx-jwt-service‘ -d ‘client-secret=xxx-468a-4ba6-b71a-21672d1376be‘ -d ‘username=dsds@xxx‘ -d ‘password=xxx‘ -d ‘grant_type=password‘ -X POST ‘http://localhost:8080/auth/realms/dev/protocol/openid-connect/token‘
curl -H ‘Authorization: bearer ‘ -X GET ‘http://localhost:8080/auth/realms/dev/protocol/openid-connect/userinfo‘

原文:https://www.cnblogs.com/iwangzheng/p/11474976.html