    1. 入口类命名通常以*Application结尾,前缀使用项目的名称进行命名
    2. 在入口类上添加@SpringBootApplication注解:注明当前类为入口
    3. 在main方法中使用SpringApplication.run() 方法启动应用
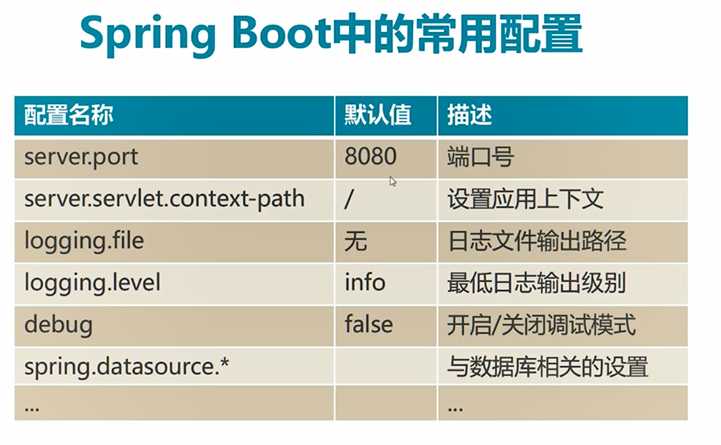
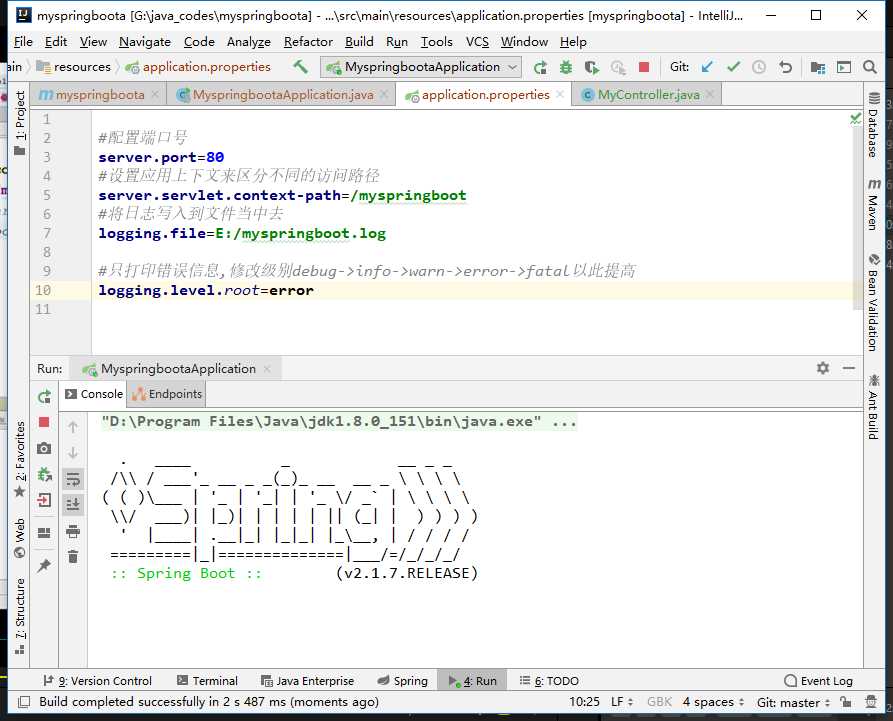
在application.properties进行修改端口号
常用配置项:
#配置端口号
server.port=80
#设置应用上下文来区分不同的访问路径
server.servlet.context-path=/myspringboot
#将日志写入到文件当中去
logging.file=E:/myspringboot.log

#只打印错误信息,修改级别debug->info->warn->error->fatal以此提高,默认是info
logging.level.root=info
debug=true
#设置数据源
spring.datasource.xa.data-source-class-name=com.mysql.jdbc.Driver
spring.datasource.url=jdbc:mysql://localhost:3306/test
spring.datasource.username=root
spring.datasource.password=root
修改级别之后不是info后可以看到没有info信息
* 属性文件:application.properties
* YAML格式:application.yml
    * 简介:json格式
    * 格式:key:(空格)value
    * 使用空格代表层级关系,以“:”结束

    #开启debug
    debug: true
    # logging.level.root
    # loggin.file
    logging:
      level:
        root: info
      file: E:/myspringboot.log
    spring:
      datasource:
        driver-class-name: com.mysql.jdbc.Driver
        url: jdbc:mysql://localhost:3306/test
        data-username: root
data-password: root通常放在yml文件中
在yml文件中书写属性
 #自定义属性
 mall:
   config:
     name: 爱美商城
     description: 这是一家化妆品特卖网站
     hot-sales: 20
     show-advert: true
在控制器中进行书写信息
     package com.imooc.myspringboota.controller;

 import org.springframework.beans.factory.annotation.Value;
 import org.springframework.stereotype.Controller;
 import org.springframework.web.bind.annotation.RequestMapping;
 import org.springframework.web.bind.annotation.ResponseBody;

 /**
  * Created by Intellij IDEA.
  * User:  陈亚萌
  * Date:  2019/9/1
  */
 @Controller
 public class MyController {
     //value注解是在启动时,自动扫描yml文件,将key值注入进来
     @Value("${mall.config.name}")
     private String name;
     @Value("${mall.config.description}")
     private String description;
     @Value("${mall.config.hot-sales}")
     private Integer hosSales;
     @Value("${mall.config.show-advert}")
     private Boolean showAdvert;

     @RequestMapping("/out")
     @ResponseBody
     public String out(){
         return "success";
     }
     @RequestMapping("/info")
     @ResponseBody
     public String info(){
         return String.format("name:%s,description:%s,hot-sales:%s,show-advert:%s",
                 name,description,hosSales,showAdvert
                 );

     }
}在dev中:
  #开启debug
  debug: true
  # logging.level.root
  # loggin.file
  logging:
   level:
    root: info
   file: E:/myspringboot.log


  spring:
   datasource:
     driver-class-name: com.mysql.jdbc.Driver
     url: jdbc:mysql://localhost:3306/test
     data-username: root
     data-password: root

  #自定义属性
  mall:
   config:
     name: 爱美商城
     description: 这是一家化妆品特卖网站
     hot-sales: 20
     show-advert: true
在prd.yml文件中:
      #开启debug
      debug: false
      # logging.level.root
      # loggin.file
      logging:
        level:
          root: info
        file: /local/user/app-prd.log


      spring:
        datasource:
          driver-class-name: com.mysql.jdbc.Driver
          url: jdbc:mysql://114.123.11.1:3307/test
          data-username: root
          data-password: root

      #自定义属性
      mall:
        config:
          name: 优美商城
          description: 这是一家化妆品特卖网站
          hot-sales: 20
          show-advert: true
      server:
        port: 80
在主配置文件中:
   #主配置文件
  #下面有俩配置文件,一个是application-dev.yml,apolication-prd.yml
  #当前环境为dev
  spring:
    profiles:
      active: prd


  #开启debug
  #debug: true
  # logging.level.root
  # loggin.file
  #logging:
  #level:
  #  root: info
  #file: E:/myspringboot.log
  #spring:
  # datasource:
  #   driver-class-name: com.mysql.jdbc.Driver
  #   url: jdbc:mysql://localhost:3306/test
  #   data-username: root
  #   data-password: root

  #自定义属性
  #mall:
  # config:
  #   name: 爱美商城
  #   description: 这是一家化妆品特卖网站
  ##   hot-sales: 20
  #  show-advert: true
其中active是指的不同配置文件的环境。
当文件是prd的时候:

当文件是dev的时候:

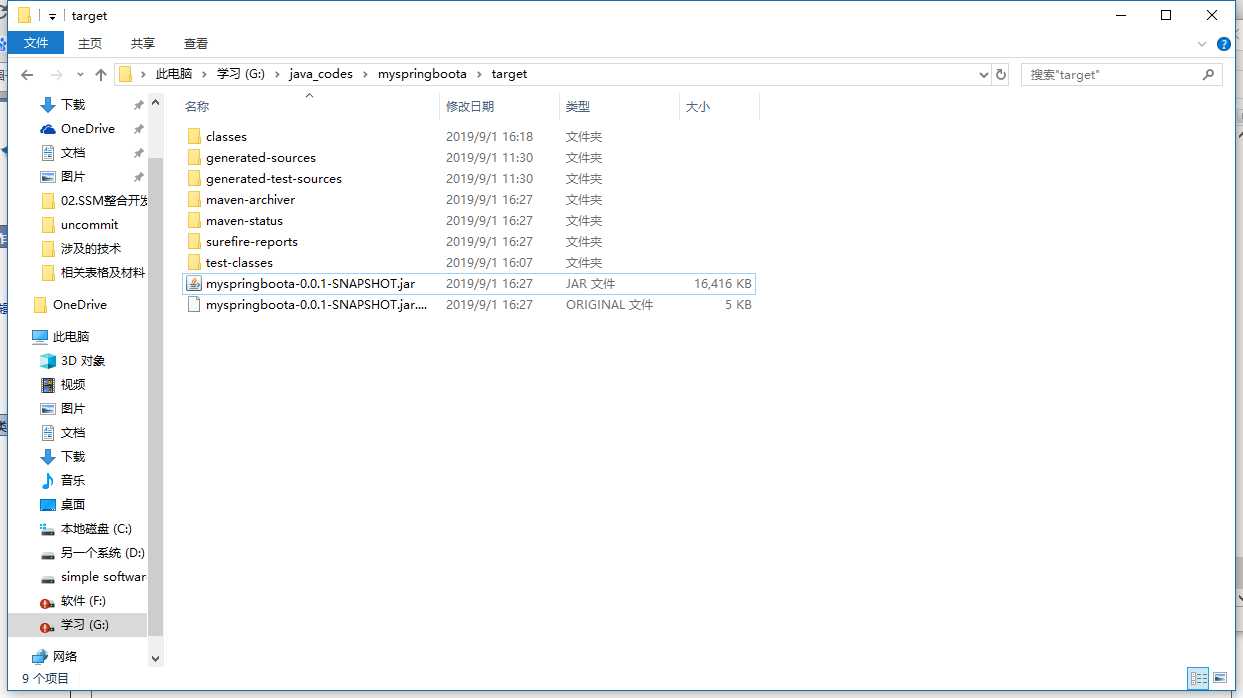
1. 利用maven的package命令,生成可独立运行的jar包
2. 利用java -jar xxx.jar命令启动springboot应用
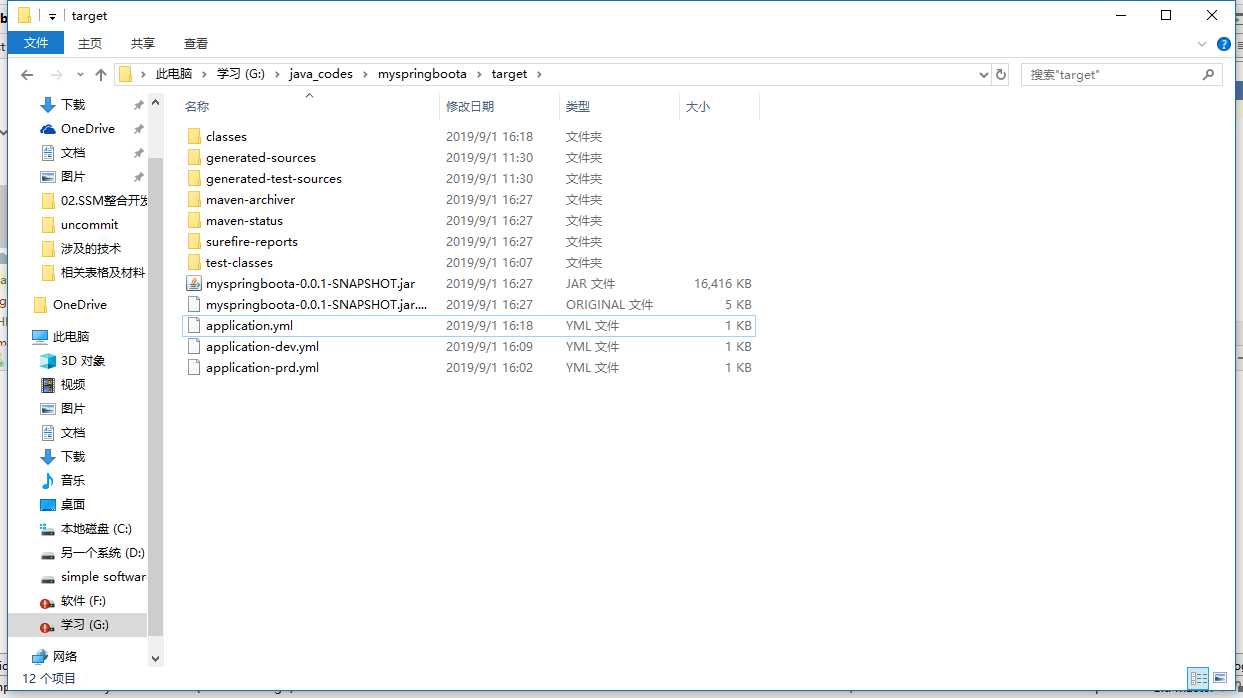
3. jar包可自动加载同目录的application配置文件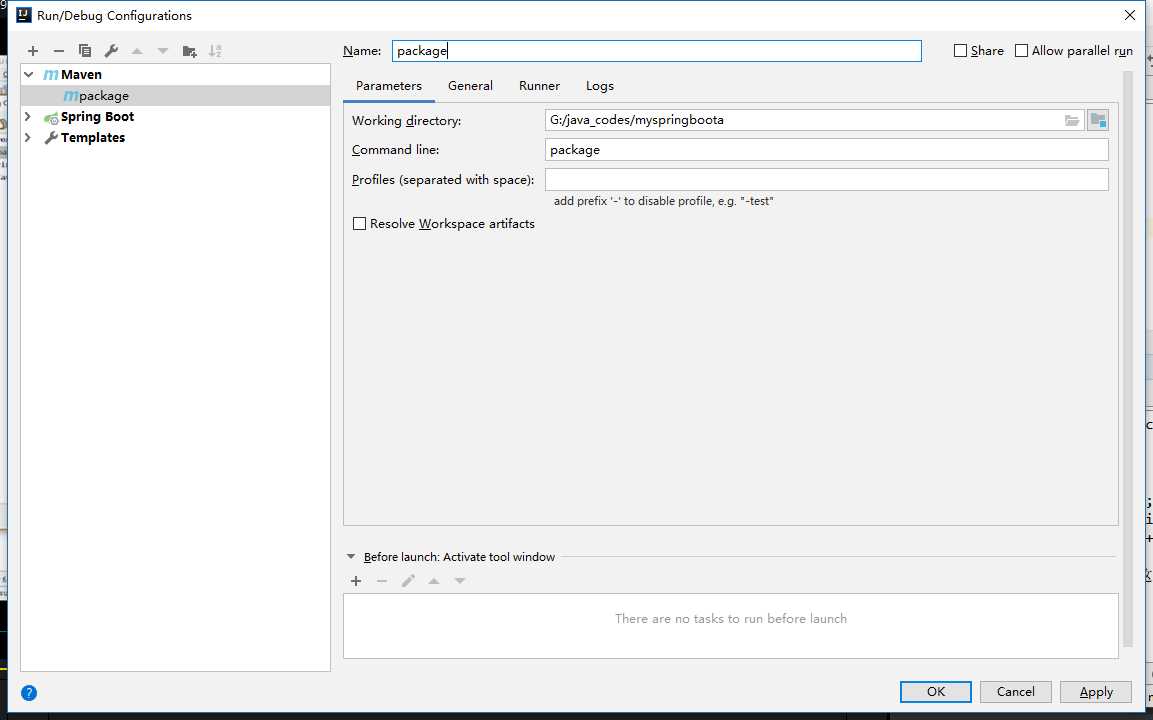

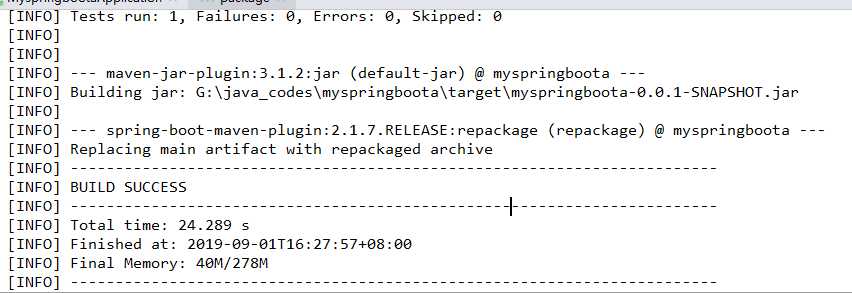

成功部署
如果想切换开发环境:
将所有的配置文件复制到同jar包一起的文件夹下:
原文:https://www.cnblogs.com/chenyameng/p/11442762.html