看完阮一峰的React教程后,就自己做了这个TodoList,自己慢慢琢磨效率差了点但是作为入门小练习还是不错的。
以下是效果图: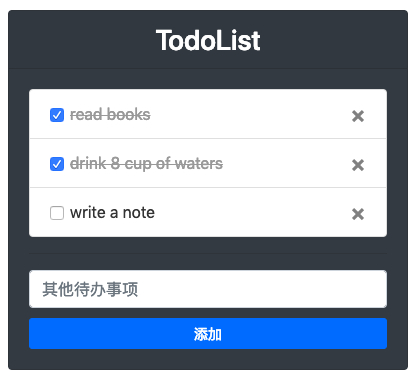
我的源码:todolist
UI:bootstrap 4
我在这里主要分了上下两部分,上部分是列表展示,下部分是添加待办,先在src目录下创建一个component文件夹用来存放组件,文件夹中可以先创建两个组件文件list.js和addItem.js。
先假设目前已经添加了部分了部分待办事项,所以我在根组件的state中模拟了一些数据:
lists: [
    { id: 0, txt: "read books", done: true },
    { id: 1, txt: "drink 8 cup of waters", done: true },
    { id: 2, txt: "write a note", done: false },
]
首先要将这些数据从根组件中同步过来,这里传值通过props就可以:
constructor(props) {
    super(props);
    this.state = {
        lists: []
    }
}
然后渲染到页面中:
<ul className="list-group">
    {
        this.props.lists.map((item, index) => {
            return (
                <li key={item.id} className="list-group-item">
                    {item.txt}
                </li>
            )
        })
    }
</ul>
这样就完成了最基本的数据展示,但我还需要对这个列表进行一些操作,比如勾选已办或者删除一些某项待办事项,如图
勾选可以用checkbox,Chekbox的勾选状态与代办事项的状态是同步的。删除可以在bootstrap图标里选用一个,所以列表应该是这样的:
render() {
    return (
        <ul className="list-group">
            {
                this.props.lists.map((item, index) => {
                    return (
                        <li key={item.id} className="list-group-item">
                            <div className="form-check">
                                <input
                                    className="form-check-input" type="checkbox" value={item.txt} id={"defaultCheck" + item.id} defaultChecked={item.done}
                                    onClick={(e) => {
                                        this.handleChangeLists(e, index);
                                    }} ></input>
                                <label className="form-check-label" htmlFor={"defaultCheck" + item.id} style={item.done ? { color: ‘#999‘, textDecoration: ‘line-through‘ } : { color: ‘#333‘, textDecoration: ‘none‘ }}>
                                    {item.txt}
                                </label>
                                <button
                                    type="button" className="close float-right" aria-label="Close"
                                    onClick={() => {
                                        this.handleDelete(index);
                                    }}>
                                    <span aria-hidden="true">×</span>
                                </button>
                            </div>
                        </li>
                    )
                })
            }
        </ul>
    )
}
以上Chekbox和删除按钮上都绑定了一个onClick事件,Checkbox需要切换事项状态,勾选即为已办,未勾选为待办,点击即切换状态:
handleChangeLists = (e, index) => {
    let currIndex = index;
    this.props.lists[currIndex].done = !this.props.lists[currIndex].done;

    this.setState({
        lists: this.props.lists
    })
}
删除按钮只需要做删除数据就可以了:
handleDelete = (index) => {
    let currIndex = index;
    this.props.lists.splice(currIndex, 1)
    this.setState({
        lists: this.props.lists
    })
}
到这里,待办列表部分就完成了。
这里也需要先从根组件同步数据。
constructor(props) {
    super(props);
    this.state = {
        lists: []
    }
}
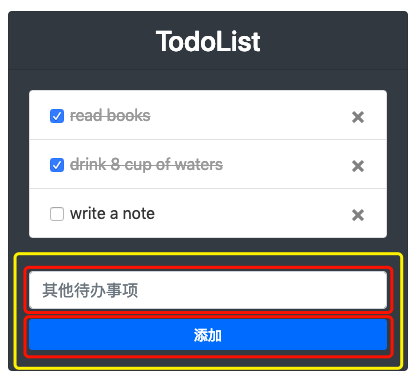
然后添加待办这里,要有一个Input输入框用来输入待办事项,和一个按钮来完成添加待办的动作
render() {
    return (
        <form action="">
            <input id="newItem" className="form-control" type="text" placeholder="其他待办事项"></input>
            <button
                type="button"
                className="card-link btn btn-primary btn-sm btn-block"
                style={{ marginTop: 10 }}
                onClick={(e) => {
                    this.handleAddItem(e);
                }}>
                添加
        </button>
        </form>
    )
}
添加按钮最主要的动作是要把input框中的value添加到数据lists中,我在handleAddItem()添加了检验,避免添加空的待办项。
handleAddItem = () => {
    let newTxt = document.getElementById("newItem");
    if (newTxt.value === "") {
        alert("不能添加空的待办项!");
        return false;
    }
    let len = this.props.lists.length>0 ? (this.props.lists[this.props.lists.length - 1].id + 1) : 0;
    let newItem = {
        id: len,
        txt: newTxt.value,
        done: false
    }
    this.props.lists.push(newItem);

    this.setState({
        lists: this.props.lists
    }, () => {
        this.props.handleFresh.bind(this, this.props.lists);
        //这里在setState后添加了一个回调函数,回调函数里调用的是父组件的事件,这里的传值是子传父
    });

    newTxt.value = "";
}
handleAddItem函数中,在setState后添加了一个回调函数,回调函数里调用的是父组件的handleFresh事件,主要用来在成功添加事项后同步父组件的数据,使新添加内容及时显示在页面上。
来自父组件的handleFresh():
handleFresh = (obj) => {
    this.setState({
        lists: obj
    })
}
到此我的TodoList就基本完成了,实例虽然小,而且还有很多待完善的地方,但还是很有成就感的 ??
---
更多文章可移步到我的github博客,谢谢!
原文:https://www.cnblogs.com/zhangjinling1993/p/todolist.html