跨域
elasticsearch-head连接es时会提示连接失败,有可能就是没有开启跨域
| http.cors.enabled | 是否支持跨域,默认为false |
| http.cors.allow-origin | 当设置允许跨域,默认为*,表示支持所有域名,如果我们只是允许某些网站能访问,那么可以使用正则表达式。比如只允许本地地址。 /https?:\/\/localhost(:[0-9]+)?/ |
| http.cors.max-age | 浏览器发送一个“预检”OPTIONS请求,以确定CORS设置。最大年龄定义多久的结果应该缓存。默认为1728000(20天) |
| http.cors.allow-methods | 允许跨域的请求方式,默认OPTIONS,HEAD,GET,POST,PUT,DELETE |
| http.cors.allow-headers | 跨域允许设置的头信息,默认为X-Requested-With,Content-Type,Content-Length |
| http.cors.allow-credentials | 是否返回设置的跨域Access-Control-Allow-Credentials头,如果设置为true,那么会返回给客户端。 |
x-pack
x-pack监控作用
功能
图形展示 xpack.graph.enabled 只使用于kibana组件
报表统计 pack.reporting.enabled 只使用于kibana组件
报警通知 xpack.watcher.enabled 只适用于elasticsearch组件
安全认证 xpack.security.enabled 适用于elk的三个组件
监控跟踪 xpack.monitoring.enabled 适用于elk的三个组件
设备资源分配 xpack.ml.enabled 适用于elasticsearch和kibana组件
#设置                     #描述
xpack.graph.enabled       #设置为false以禁用X-Pack图形功能。
xpack.ml.enabled          #设置为false以禁用X-Pack机器学习功能。
xpack.monitoring.enabled  #设置为false以禁用X-Pack监视功能。
xpack.reporting.enabled   #设置为false以禁用X-Pack报告功能。
xpack.security.enabled    #设置为false以禁用X-Pack安全功能。
xpack.watcher.enabled     #设置为false以禁用Watche
监视 数据集合
这些xpack.monitoring.collection设置控制如何从Elasticsearch节点收集数据
xpack.monitoring.collection.enabled: true 启用
xpack.monitoring.collection.interval: 30s 间隔时间、
https://segmentfault.com/a/1190000016824141?utm_source=tag-newest
https://www.elastic.co/guide/en/elasticsearch/reference/6.3/monitoring-settings.html
开启ssl
xpack.ssl.key: elasticsearch/elasticsearch.key
xpack.ssl.certificate: elasticsearch/elasticsearch.crt
xpack.ssl.certificate_authorities: ca/ca.crt
xpack.security.transport.ssl.enabled: true
ES插件
官网下载安装包
https://www.elastic.co/cn/
然后安装jdk node.js环境
https://www.cnblogs.com/wudequn/p/11147869.html
https://www.cnblogs.com/wudequn/p/11072561.html
官方文档
https://www.elastic.co/cn/blog/security-for-elasticsearch-is-now-free
https://www.elastic.co/guide/cn/index.html
https://discuss.elastic.co
https://github.com/elastic
一、IK分词
https://github.com/medcl/elasticsearch-analysis-ik/releases
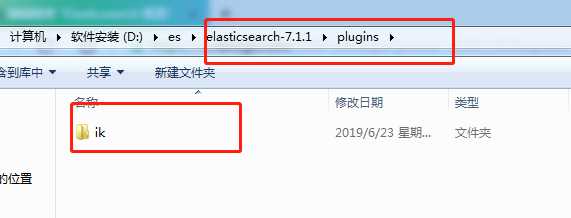
下载后,加压,文件夹重命名 ik,放在plugins目录下。
安装ES
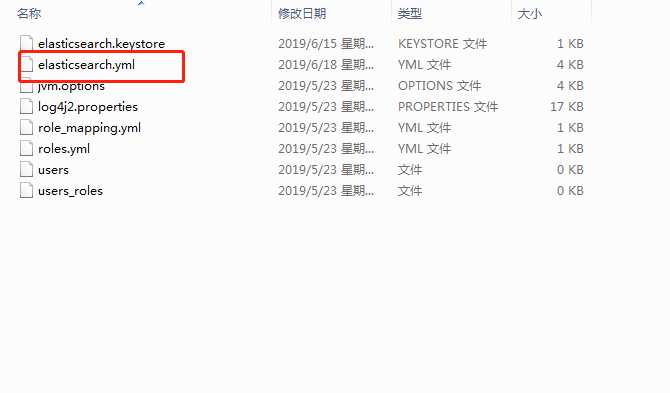
一、修改配置文件
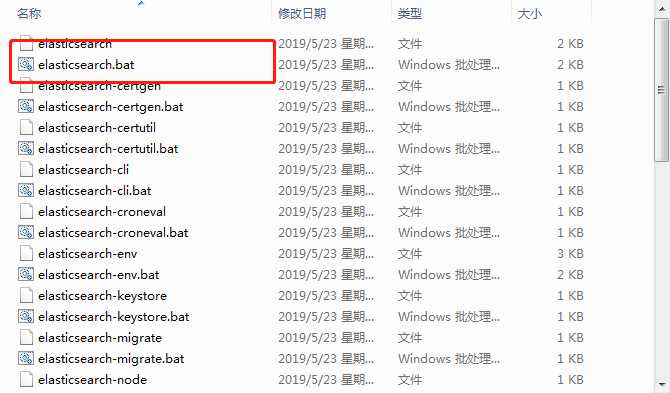
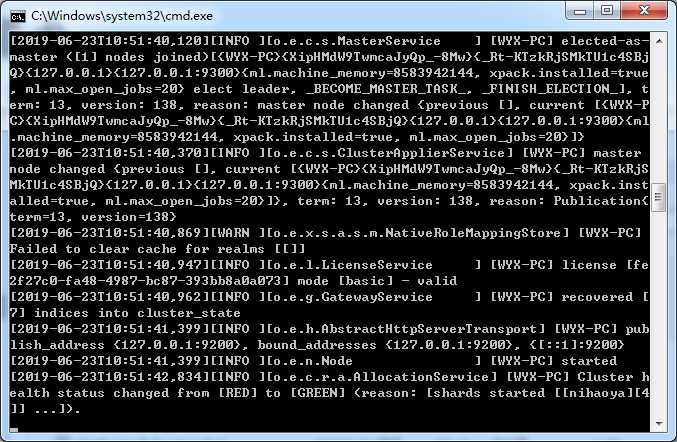
二、控制台启动ES 或者通过下面的服务启动ES
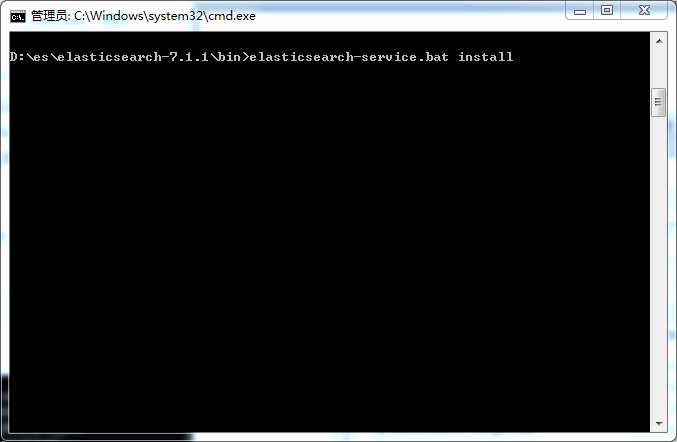
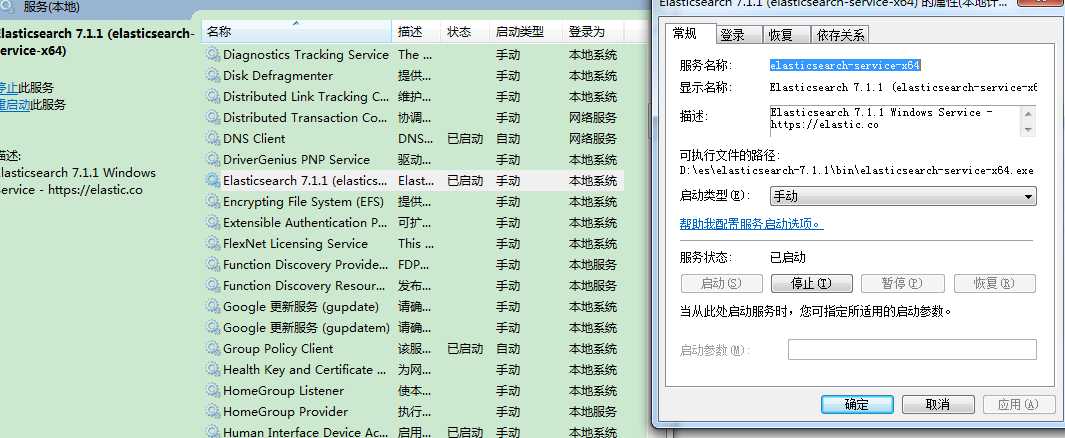
三、或者安装ES服务
或者通过nssm
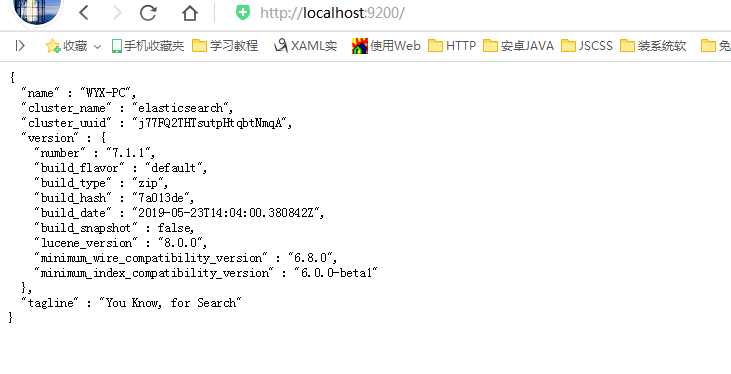
四、测试
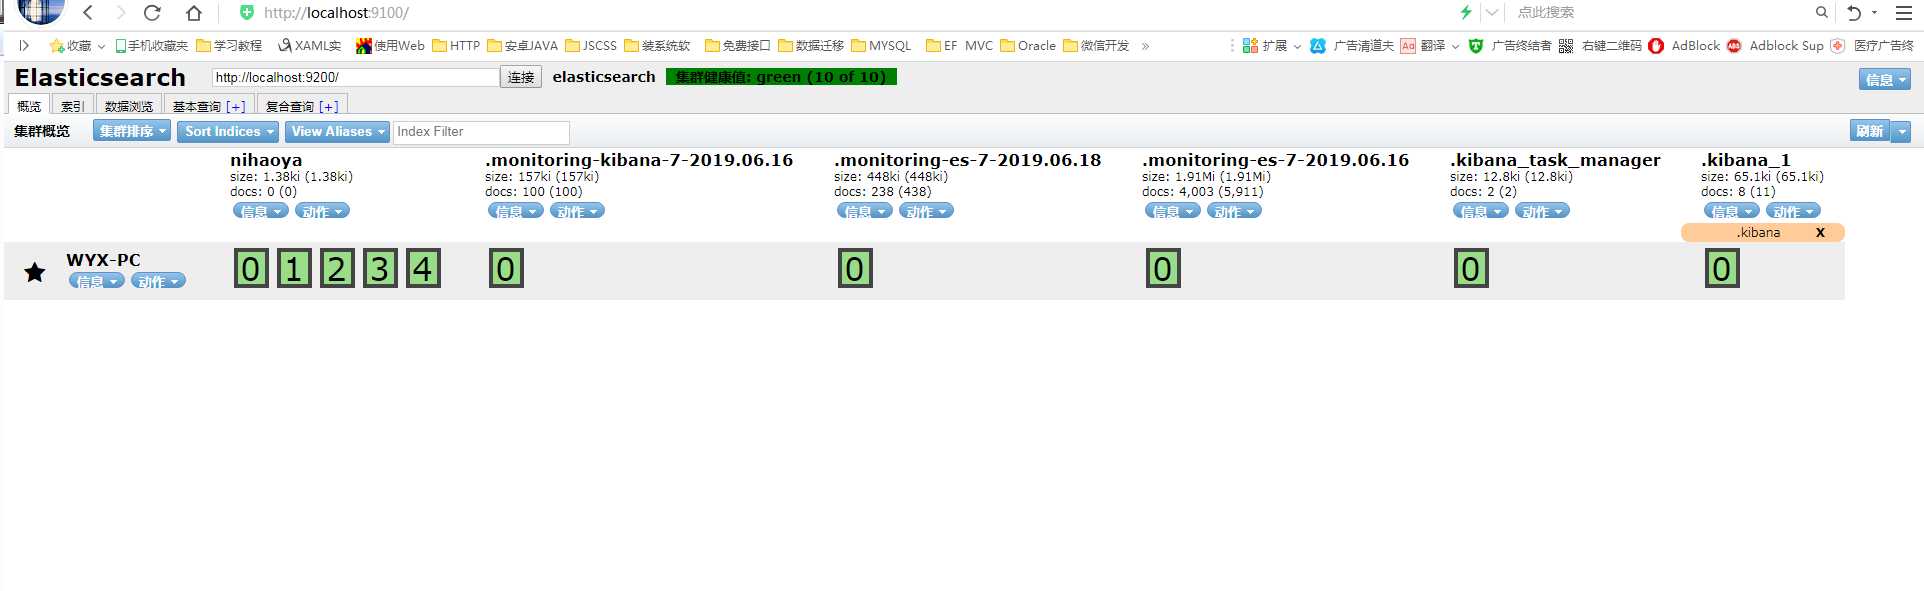
五、安装es-head
alsticsearch只是后端提供各种API,那么怎么直观的使用它呢?Elasticsearch-head将是一款专门针对于Elasticsearch的客户端工具
Elasticsearch-head安装包包,下载地址:https://github.com/mobz/elasticsearch-head
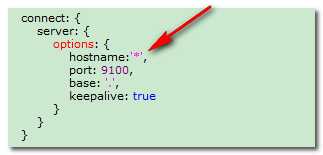
修改es-head目录下面的Gruntfile.js文件,添加hostname:’*‘
1、首先要安装node.js:安装教程
2、cmd执行 npm install -g grunt-cli 安装grunt ,安装完成后执行grunt -version查看是否安装成功,会显示安装的版本号
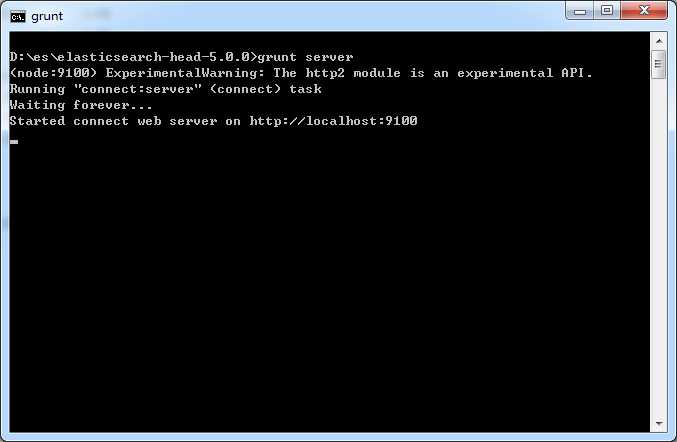
3、在es-head目录下cmd执行 grunt server 或者npm run start 运行head插件
原文:https://www.cnblogs.com/wudequn/p/11001382.html