一、概述
测试环境已经跑了很长时间的istio了,也更新到了最新的istio-1.1。性能相较之前提升很大,官方给出的测试数据说是延迟降低到了8ms,但是实际测试确实访问速度有很大的提升,但是确实还是比直接访问pod速度差异很明显,sidecar的引入使数据流向变得层数更多,导致访问性能上的一些损耗。总结下来的使用建议就是不要盲目的使用service-mesh,服务网格是解决了很多问题,但同时也带来很多新的问题。但是istio的pilot和mixer还是可以用的。具体详细的istio介绍直接参考官网:https://istio.io/docs/concepts/what-is-istio/
这里多提一下:有很多人都喜欢看别人的博客,而不喜欢看官方文档,其实官方文档应该是你学习一个服务或者说使用服务的基准,看完一遍以后然后可以找一些具有一定经验使用的的博客说明,这些人在使用过程中根据自己实际的使用经验会有一些自己的见解或使用建议(这些在官网中有的是看不到的)。如果那种copy的blog就不要浪费时间了。
二、部署
参考GitHub上的install,然后我这里根据自己的使用做了一份,只是定制了一下values文件,没有做很大的修改。
https://github.com/cuishuaigit/istio-chart
这里使用的是istio的自动注入,所以需要设置一下namespace的label:
kubectl label namespace default istio-injection=enabled
首先是部署helm,现在最新版本的helm:https://github.com/helm/helm/releases
wget https://storage.googleapis.com/kubernetes-helm/helm-v2.13.1-linux-amd64.tar.gz
创建serviceaccount
kubectl create helm-service-account.yaml
安装tiller
helm init --service-account tiller
生产使用都是TLS的:
参考https://helm.sh/docs/using_helm/#using-ssl-between-helm-and-tiller
istio的安装参考我的github的readme。
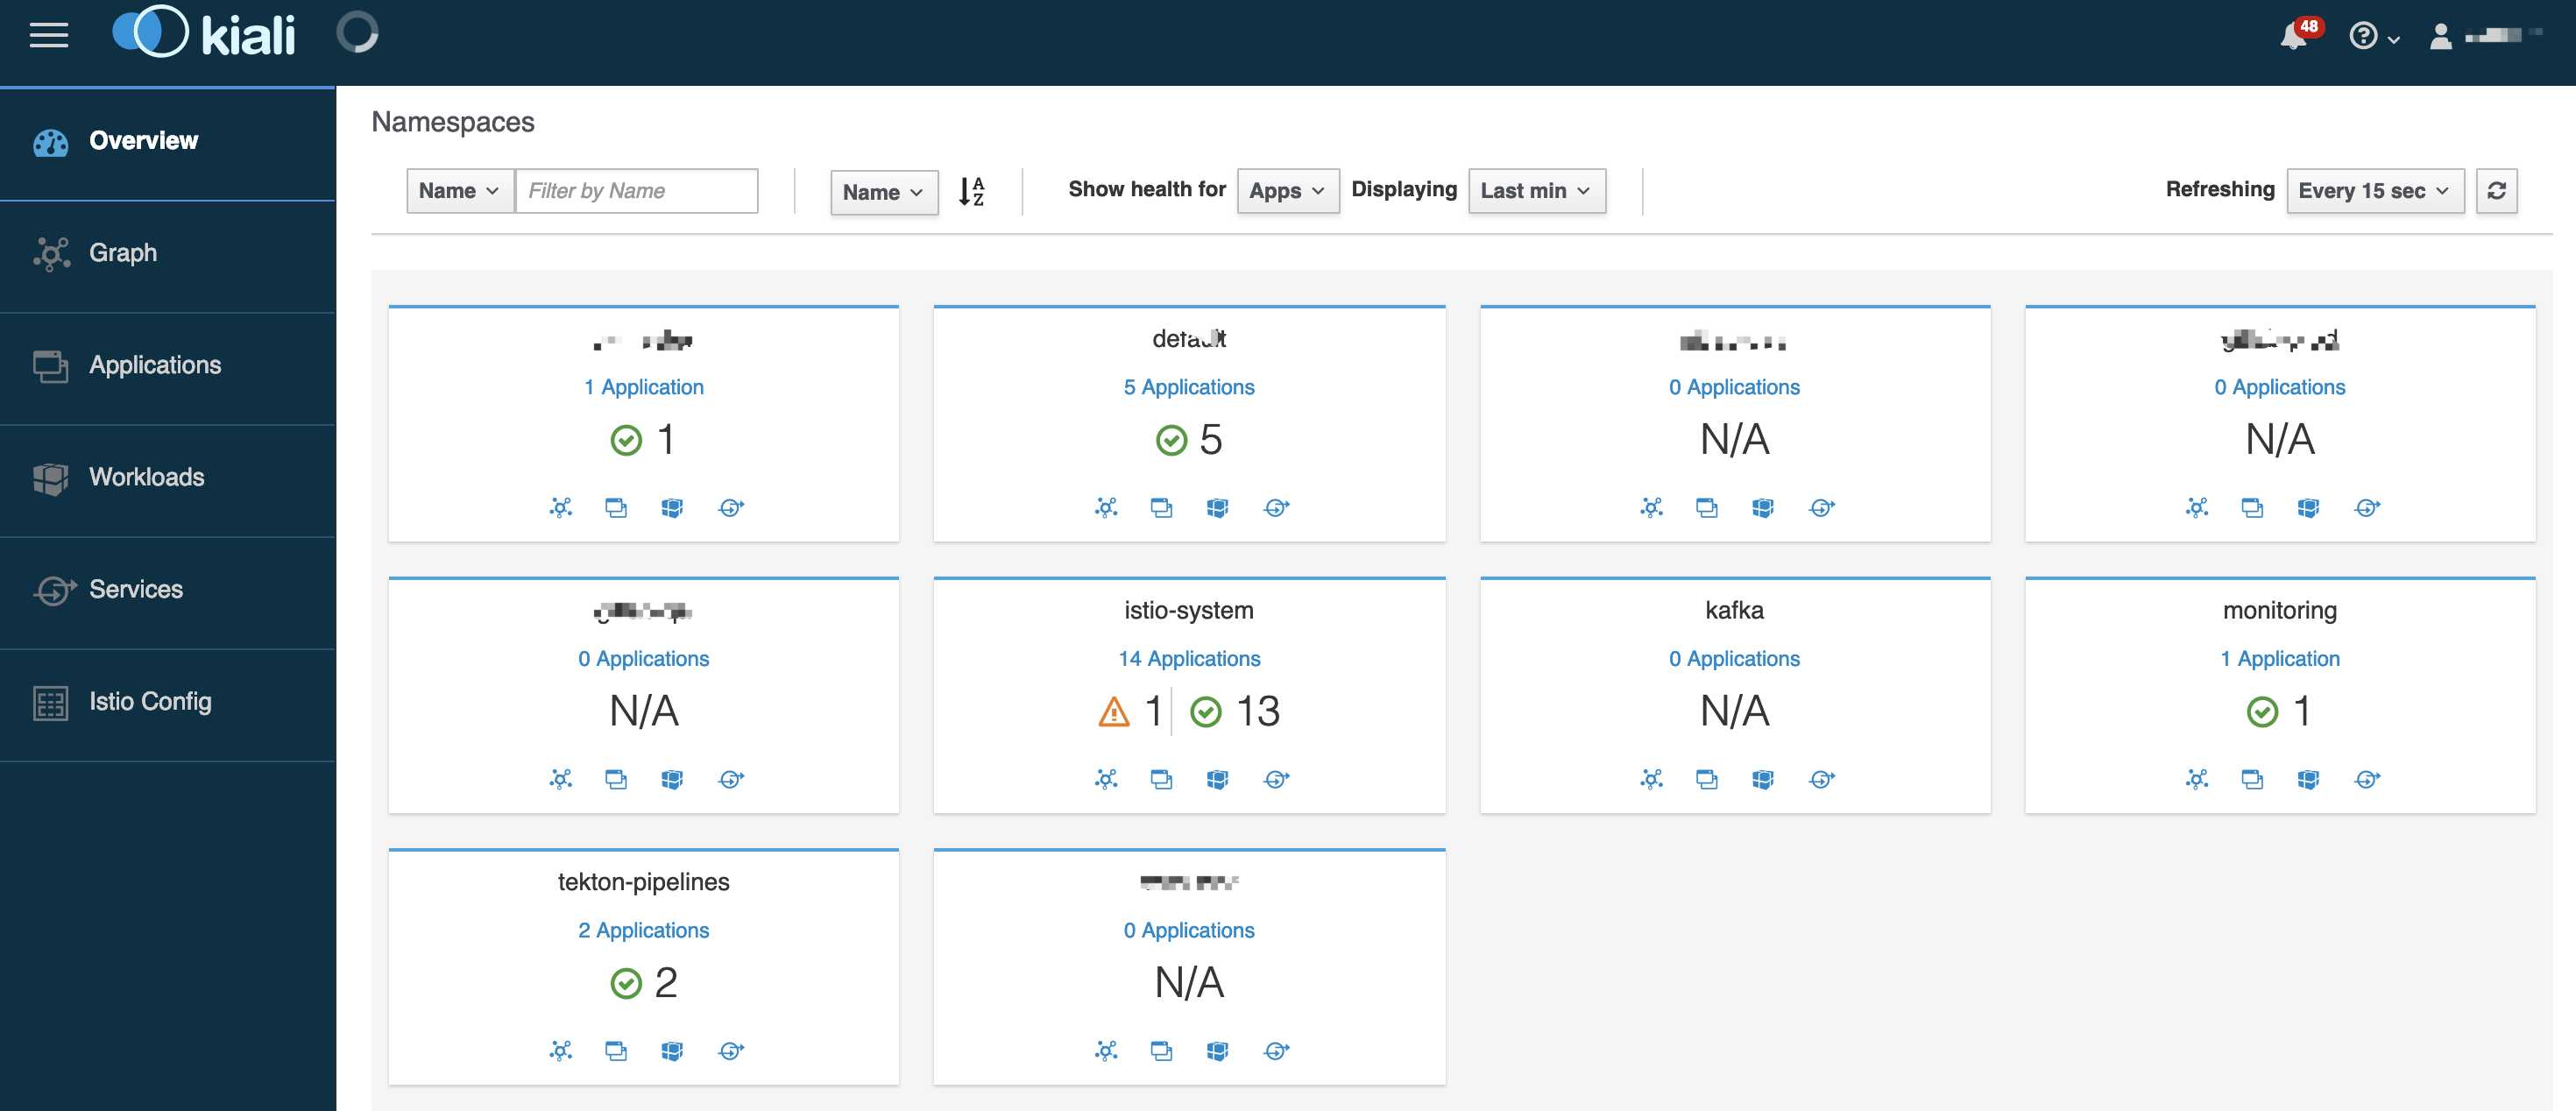
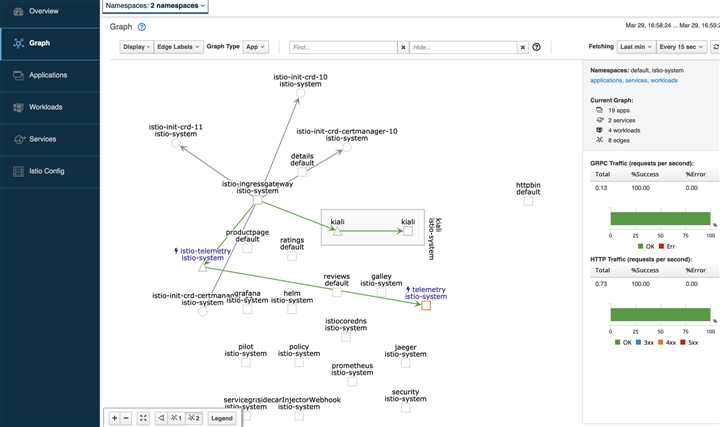
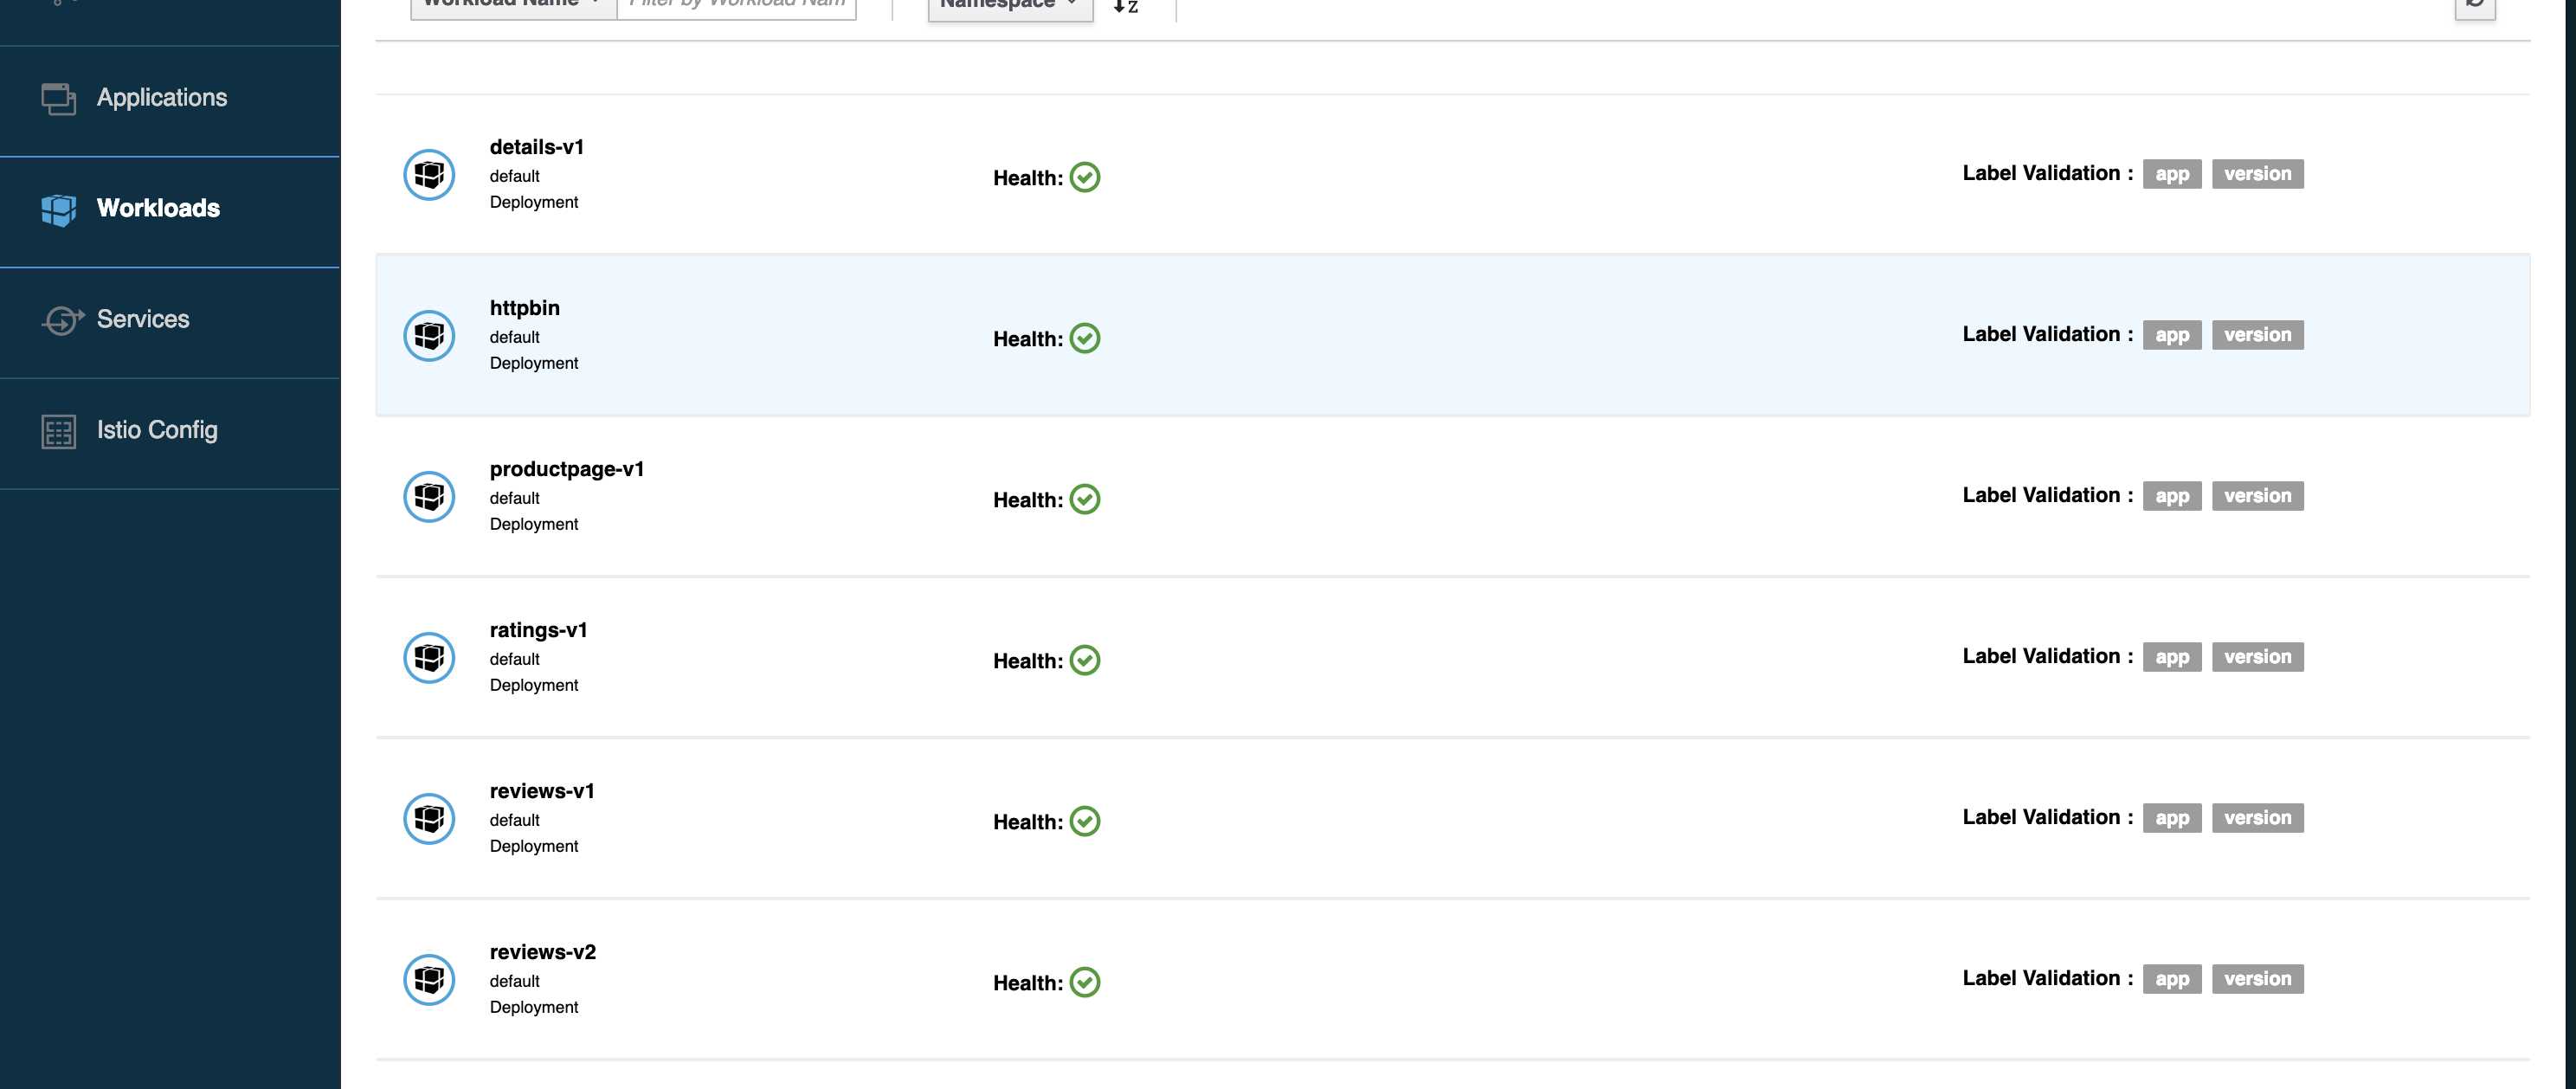
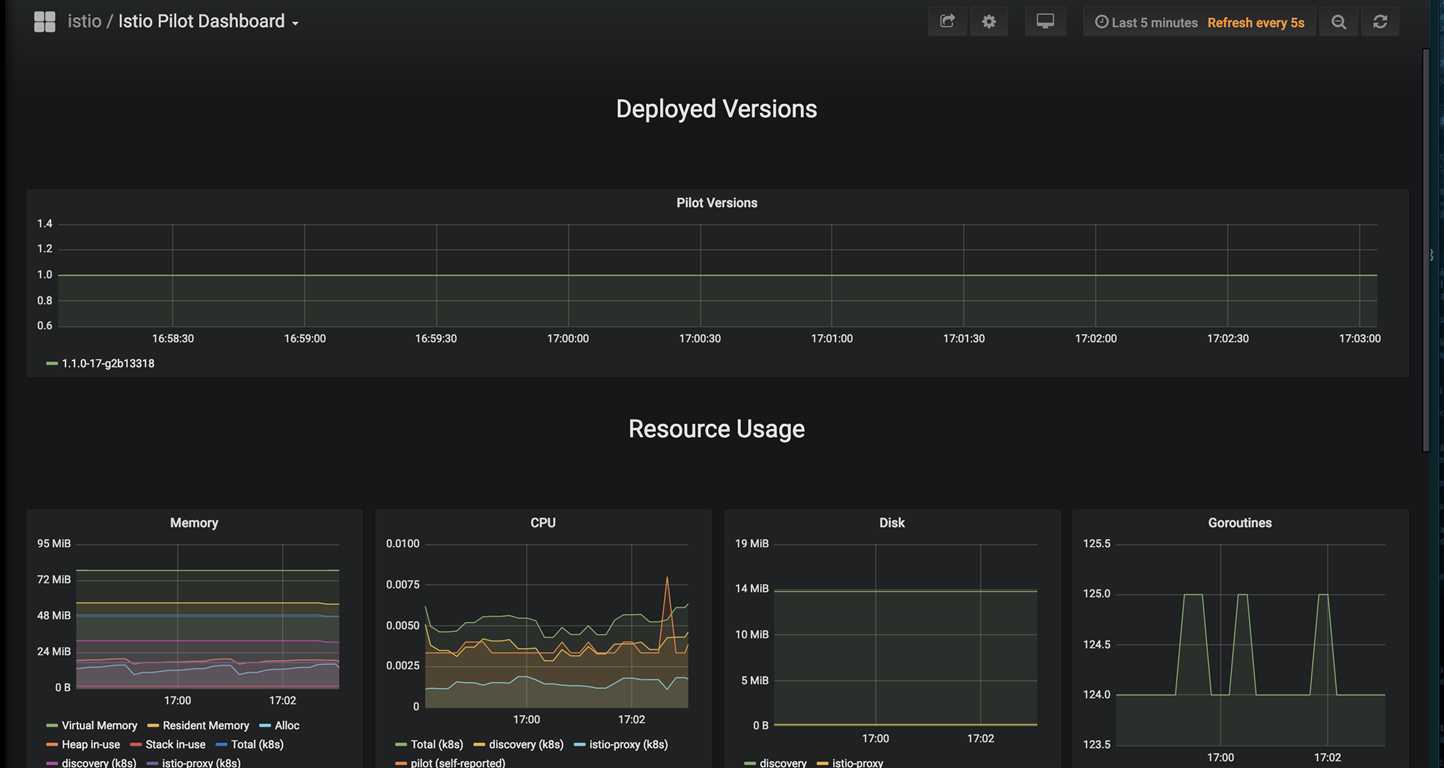
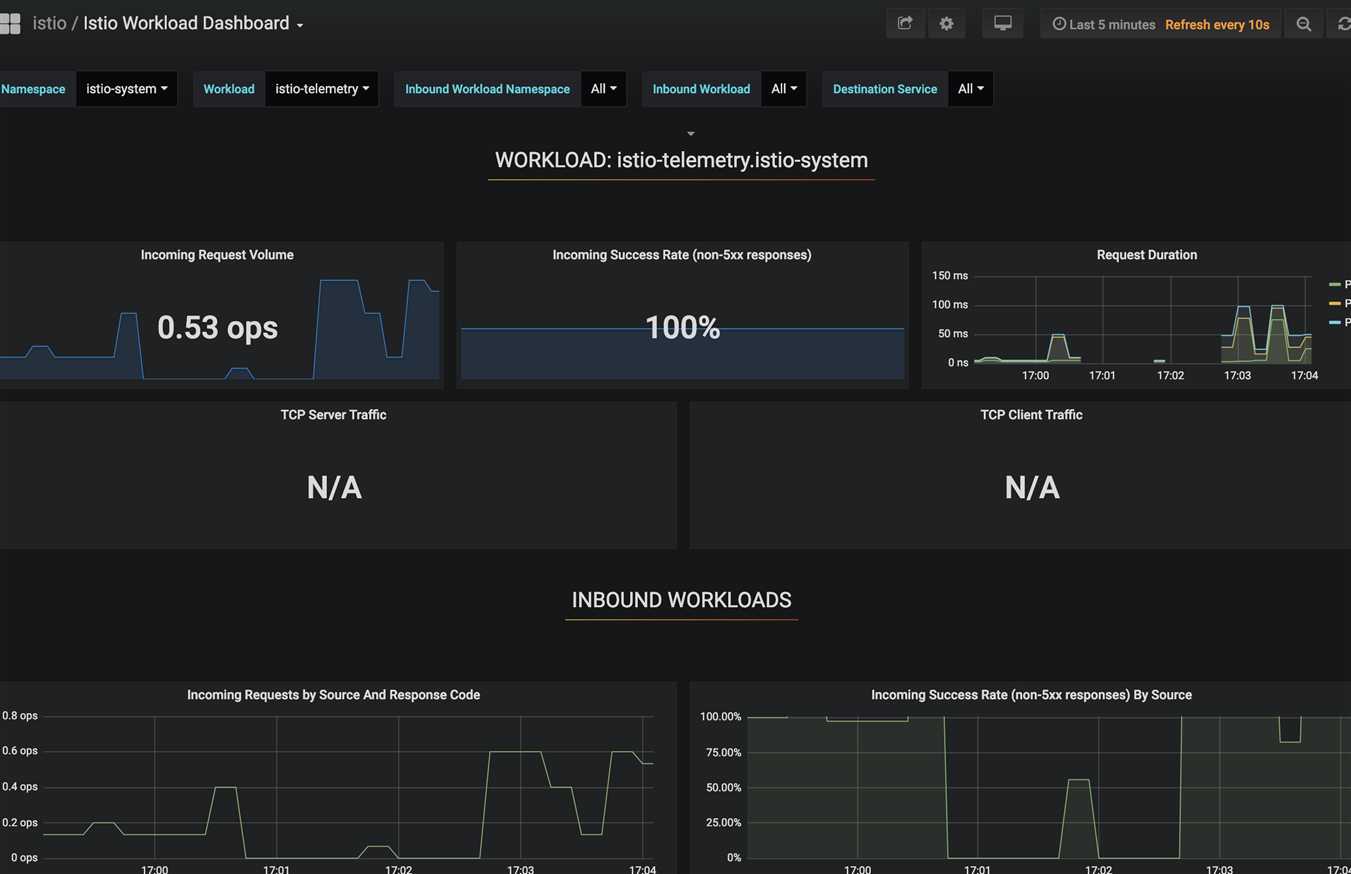
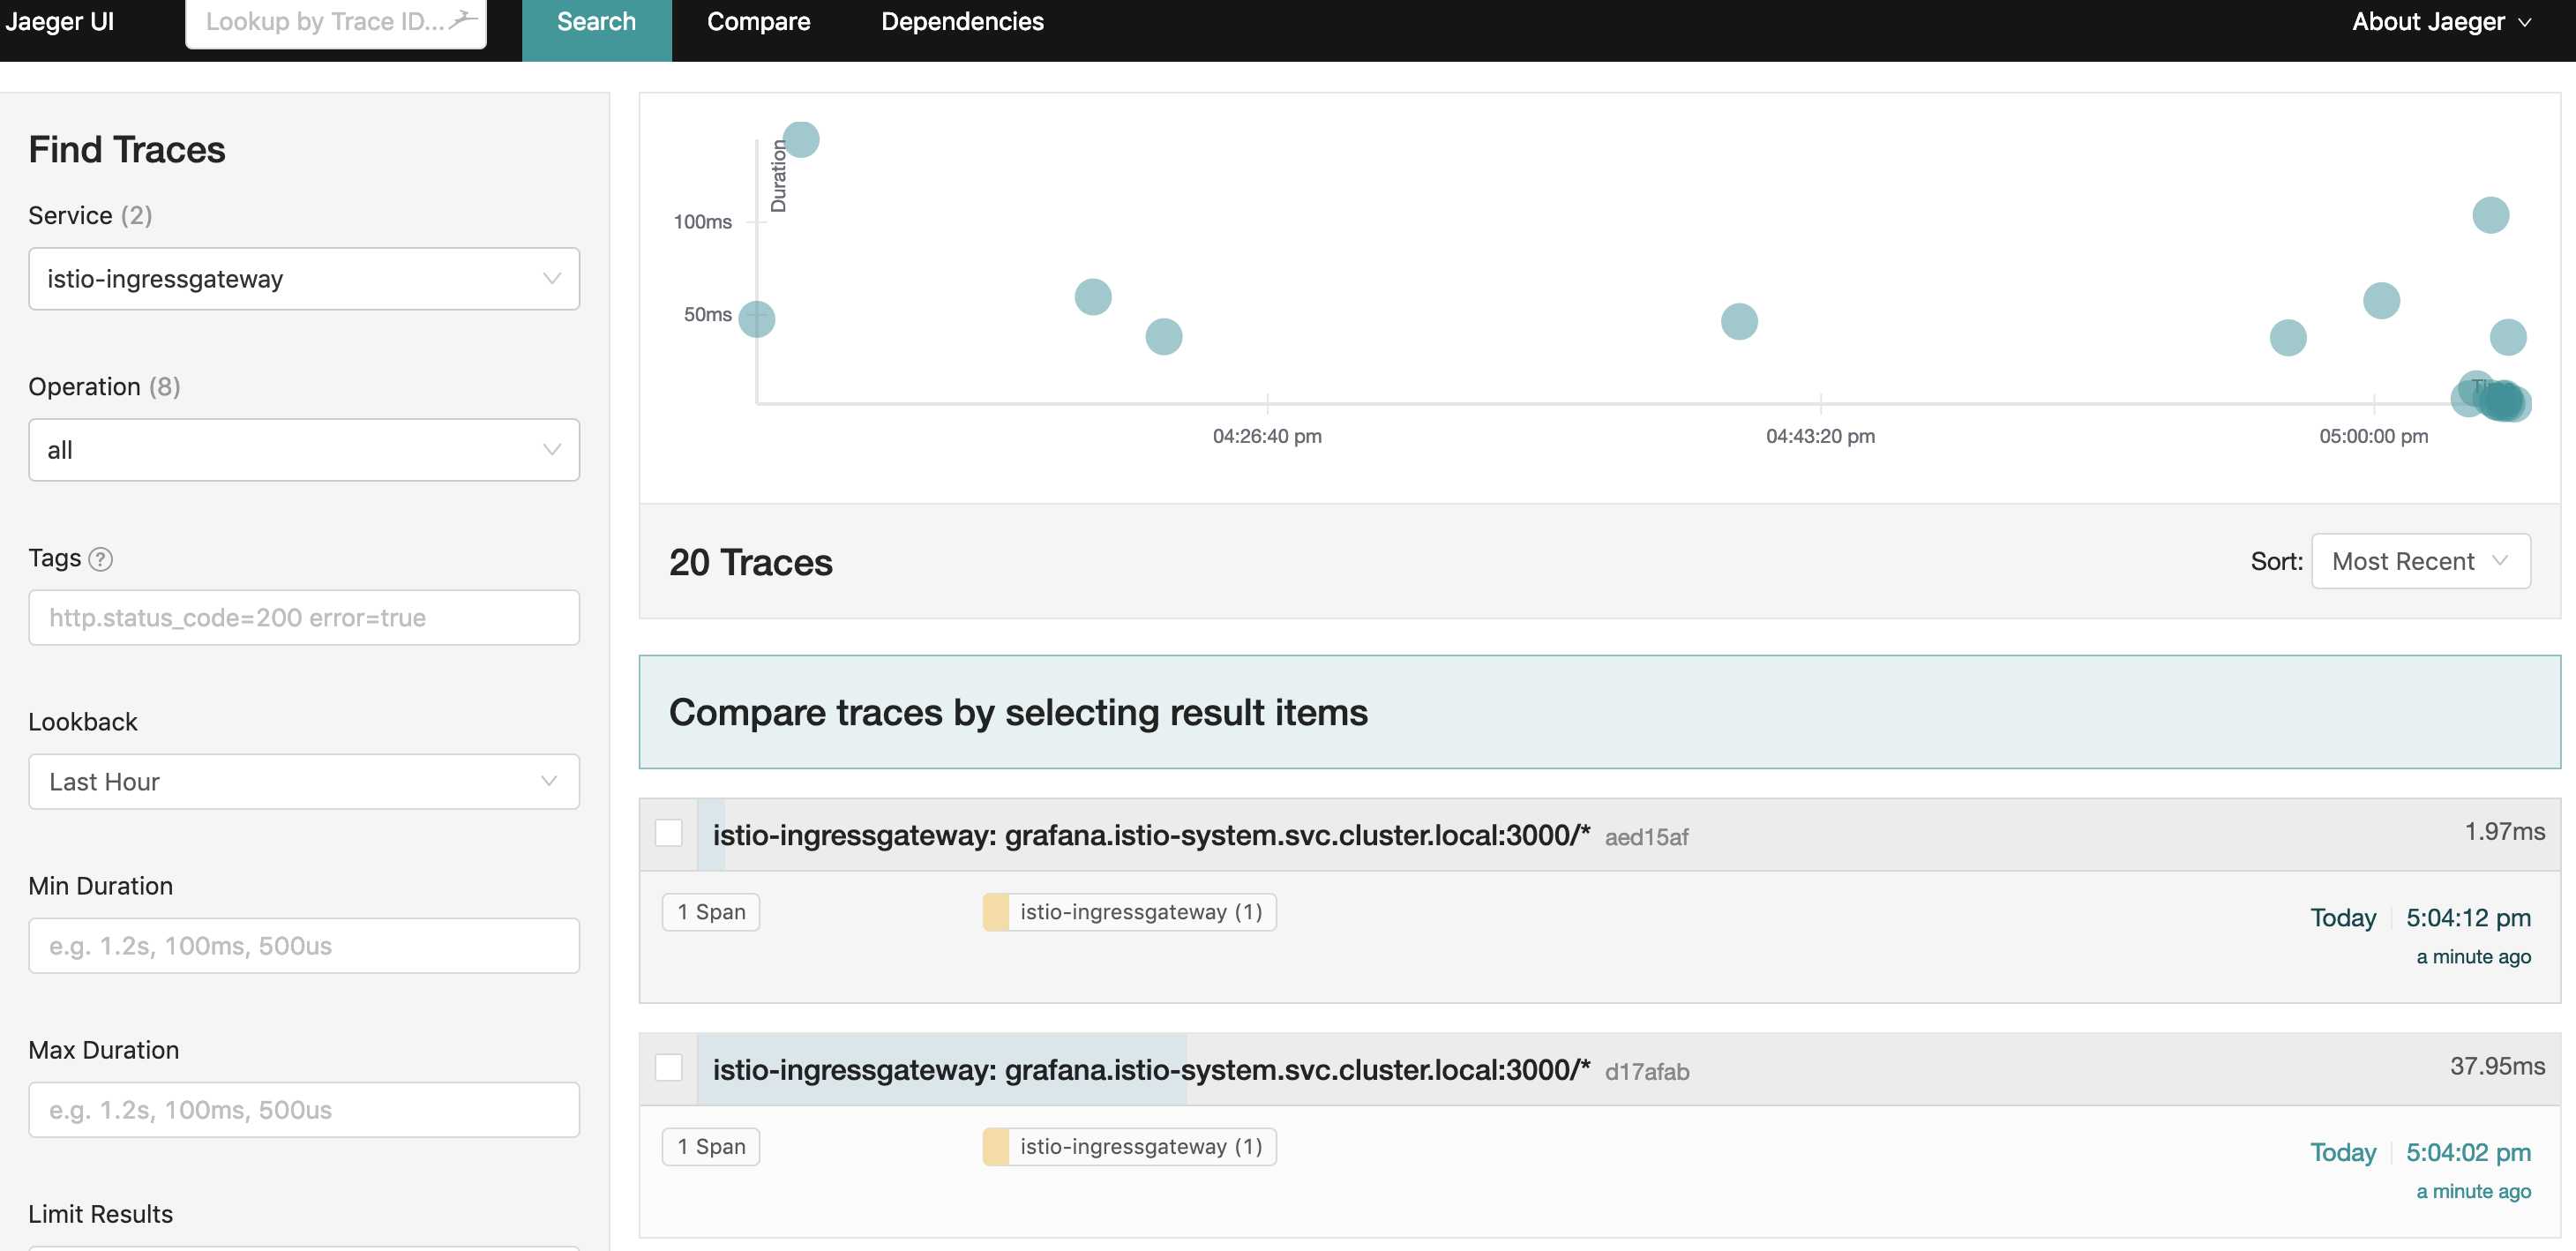
三、使用
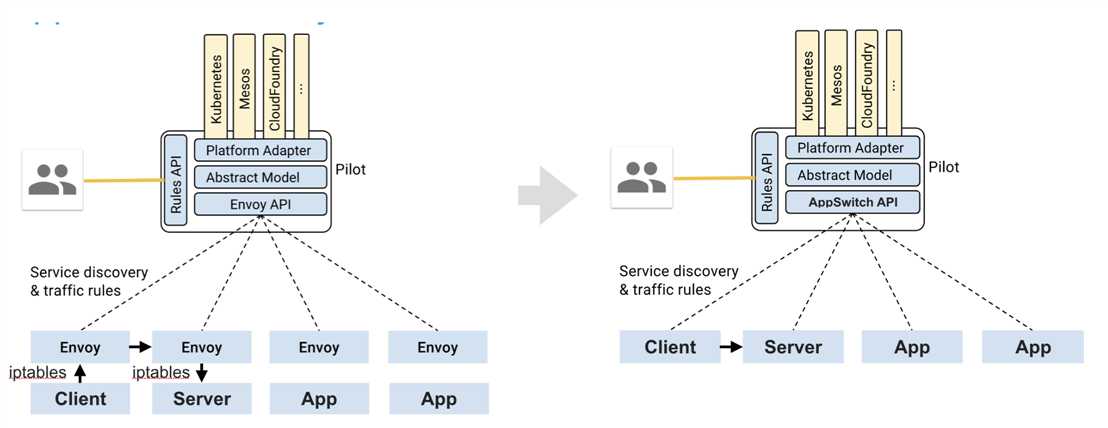
四、Appswitch
istio存在代理多层的问题,引入Appswitch可以将这些层都删减掉,引入一个说明图
参考:
http://appswitch.io/blog/kubernetes_istio_and_network_function_devirtualization_with_appswitch/
https://appswitch.readthedocs.io/en/latest/reading.html
https://appswitch.readthedocs.io/en/latest/integrations.html
https://istio.io/blog/2018/delayering-istio/
原文:https://www.cnblogs.com/cuishuai/p/10622617.html