前言
前面介绍了redis持久化和容灾备份,这篇会介绍redis主从复制和redis持久化在主从复制中的一些应用。因为本人没有那么多服务器或机器,所以这里主要介绍下如何在docker容器中搭建主从复制以及搭建过程中遇到的一些问题。关于redis的深入讲解,这边博客《深入学习Redis(3):主从复制》介绍的非常详细,有兴趣的可以学习一下。
主从复制运行的机制
关于全量重同步和部分重同步,在文章开头介绍的那篇博客中都有详细的介绍。在搭建之前,让我们先了解关于redis的几个重要的事实。
关于最后一点,一般主从复制一般会采用读写分离,master都用来接受所有的写操作,这样为了减少master的压力,就不会开启数据持久化,而是在slave中开启数据持久化。
redis主从复制在docker中搭建
redis.conf文件配置
这里需要注意的一点是,最好所有的主从redis要么没有设置密码,要么设置的密码都一样。
两个slave需要配置的是

################################# REPLICATION #################################

# Master-Slave replication. Use slaveof to make a Redis instance a copy of
# another Redis server. A few things to understand ASAP about Redis replication.
#
# 1) Redis replication is asynchronous, but you can configure a master to
#    stop accepting writes if it appears to be not connected with at least
#    a given number of slaves.
# 2) Redis slaves are able to perform a partial resynchronization with the
#    master if the replication link is lost for a relatively small amount of
#    time. You may want to configure the replication backlog size (see the next
#    sections of this file) with a sensible value depending on your needs.
# 3) Replication is automatic and does not need user intervention. After a
#    network partition slaves automatically try to reconnect to masters
#    and resynchronize with them.
#
slaveof redis 6379   # redis是master的容器名

# If the master is password protected (using the "requirepass" configuration
# directive below) it is possible to tell the slave to authenticate before
# starting the replication synchronization process, otherwise the master will
# refuse the slave request.
#
masterauth 123455

slave-read-only yes  # slave只读
三个配置文件配置好后,就可以配置docker-composer.yml文件了
version: "3.7"

networks:
  backend:
    driver: bridge

services:

### Redis ################################################
  # master
  redis:
    image: johnson19900110/redis:latest
    restart: always
    volumes:
      - ${DATA_PATH_HOST}/redis/master:/data
      - ./redis/config/redis-master.conf:/usr/local/etc/redis/redis.conf
    ports:
      - 6379:6379
    networks:
      - backend

  # slave 1
  redis-slave1:
    image: johnson19900110/redis:latest
    restart: always
    volumes:
      - ${DATA_PATH_HOST}/redis/slave1:/data
      - ./redis/config/redis-slave1.conf:/usr/local/etc/redis/redis.conf
    ports:
      - 6380:6379
    networks:
      - backend
    depends_on:
      - redis

  # slave 2
  redis-slave2:
    image: johnson19900110/redis:latest
    restart: always
    volumes:
      - ${DATA_PATH_HOST}/redis/slave2:/data
      - ./redis/config/redis-slave2.conf:/usr/local/etc/redis/redis.conf
    ports:
      - 6381:6379
    networks:
      - backend
    depends_on:
      - redis
      - redis-slave1
然后就可以启动redis容器了
docker-composer up -d redis-slave2
这时候3个redis就已经启动起来了

这是我们进入master容器。在redis-cli命令下执行 info replication ,就可以看到如下信息。
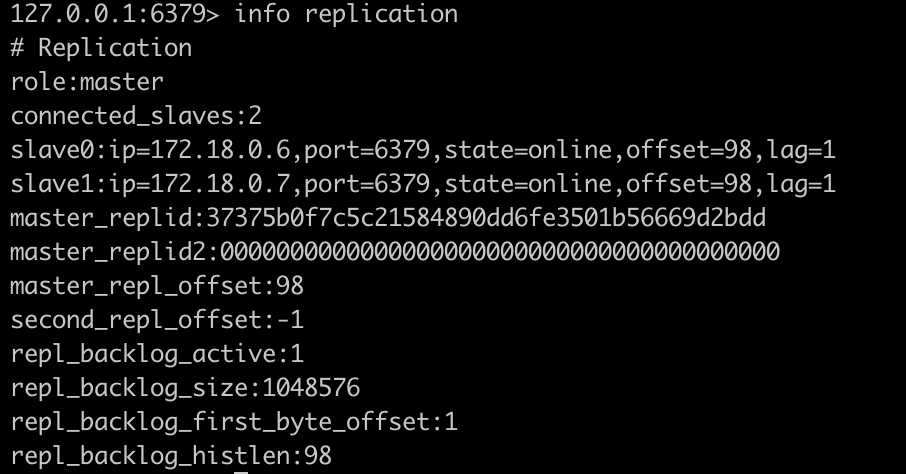
从上面信息可以看到,这个是master角色,有两个从slave,并且可以看到slave的状态和同步的offset。然后再进入slave容器,可以看到。
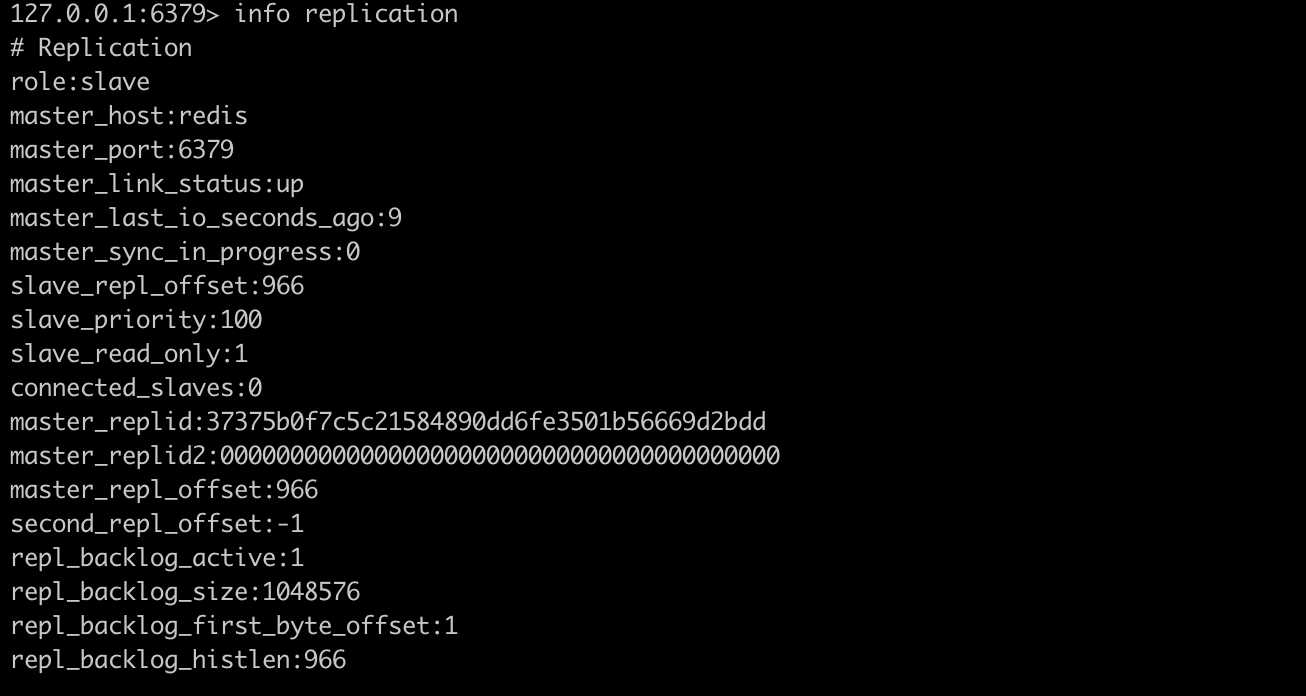
可以看到它的角色是slave和一些master的信息。因为我们设置了slave是只读模式。所以当我们想在slave下进行写入操作时会报错。

所以只能去master里进行写操作。

这时我们可以去slave看下slave是否复制成功。

这就表明我们这次redis的主从复制在docker中搭建成功了。
notice:这里还要重申一遍的是,1、如果你的redis设置了密码,那么所有的都设置成一样。2、如果你的rendis设置了密码,那么master配置文件中的masterauth 这一项一定要配置。不然在后面搭建redis哨兵模式的时候,肯定会有一些你意想不到我的问题。
作者:JohnsonChung
原文:https://www.cnblogs.com/hao987/p/10177358.html