用gulp-css-spriter很简单。
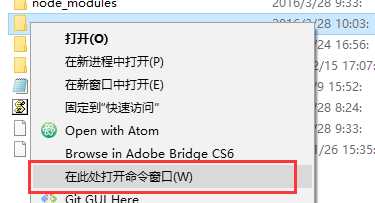
第一步: 在某个文件夹用shitf+鼠标右键
第二步: npm install gulp-css-spriter
https://www.npmjs.com/package/gulp-css-spriter (官网gulp插件)
第三步:在gulpfile.js 文件
|
1
2
3
4
5
6
7
8
9
10
11
12
13
14
|
var gulp = require(‘gulp‘);var spriter = require(‘gulp-css-spriter‘);gulp.task(‘css‘, function() { return gulp.src(‘./css/recharge.css‘)//比如recharge.css这个样式里面什么都不用改,是你想要合并的图就要引用这个样式。 很重要 注意(recharge.css)这个是我的项目。别傻到家抄我一样的。 .pipe(spriter({ // The path and file name of where we will save the sprite sheet ‘spriteSheet‘: ‘./dist/images/spritesheet.png‘, //这是雪碧图自动合成的图。 很重要 // Because we don‘t know where you will end up saving the CSS file at this point in the pipe, // we need a litle help identifying where it will be. ‘pathToSpriteSheetFromCSS‘: ‘../images/spritesheet.png‘ //这是在css引用的图片路径,很重要 })) .pipe(gulp.dest(‘./dist/css‘)); //最后生成出来}); |
第四步:打开生成的dist/css
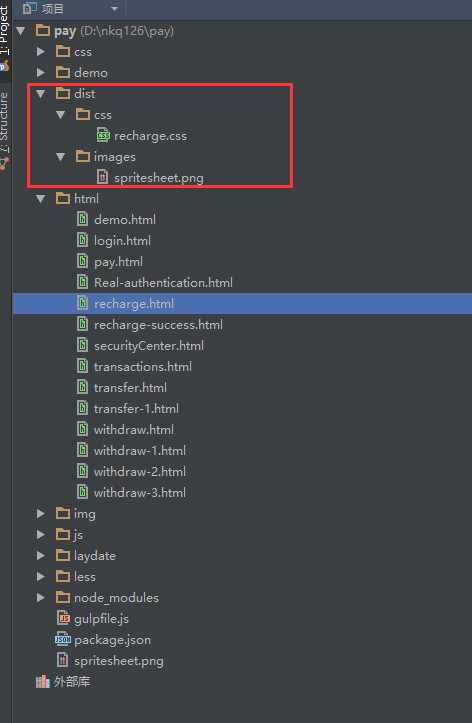

这是合并之后的雪碧图
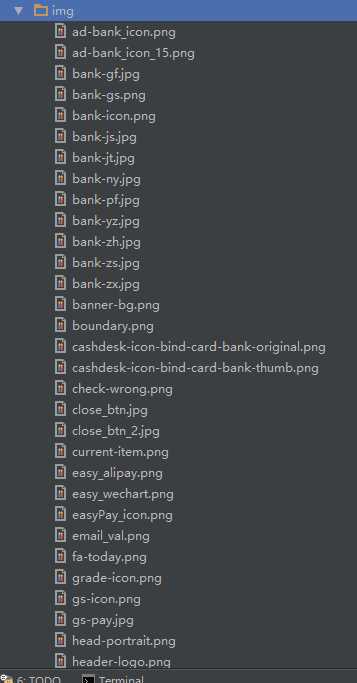
这是之前的所有图。 被我用并成上上面的雪碧图。很爽吧?
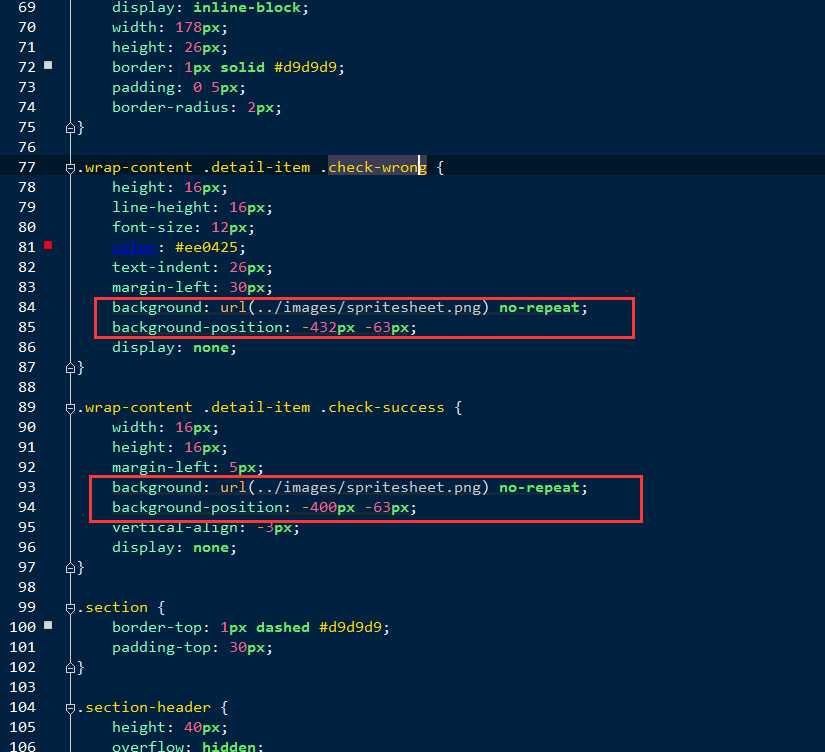
再看看生成后的css, 突然多出了什么。请看我红标注。多了定位。之前是没有这个定位。
注( 使用gulp-css-spriter之前要安装node.js和gulp工具)
把所有的小图标一起做成雪碧图吧 请用gulp-css-spriter.
原文:https://www.cnblogs.com/catgatp/p/9595407.html