| 解释 | 命令 |
|---|---|
| 安装 | yum install httpd |
| 启动 | service httpd start |
| 停止 | service httpd stop |
启动完成后
ps -ef | grep httpdsudo netstat -anpl | grep ‘http‘,此时端口也在监听,那为什么访问不成功呢?sudo service firewalld stop,然后再从新输入ip地址,你就会看见如图所示:
虚拟主机配置
进入:cd /etc/httpd/,然后到cd conf目录,打开vim httpd.conf文件,这是一些配置文件,此时若权限不够记得提权
在这个配置文件中/virtual这个到关键字,配置一个虚拟主机,就在这个下面写
<VirtualHost *:80>
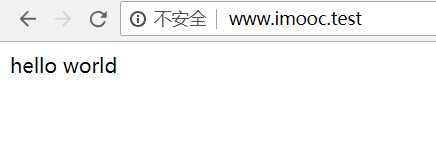
ServerName www.imooc.test
DocumentRoot /data/www
<Directory "/data/www">
Options Indexes FollowSymLinks
AllowOverride None
Require all granted
</Directory>
</VirtualHost>sudo mkdir -p /data/www,到这个www文件夹下,创建一个index.html文件,随便写一些内容,保存退出,重启服务器,此时在本机Win地址栏出入ServerName,此时你会发现访问不成功,为什么呢,因为这个域名是虚拟的,要进行配置,c:\Windows\System32\Drivers\etc,找host文件,在最后添加就可以了,例如192.168.2.1 www.imooc.test,其中这个ip是虚拟机的ip,这个地方有个坑,详情看这个https://jingyan.baidu.com/article/624e7459b194f134e8ba5a8e.html若访问不成功,执行这个命令sudo setenforce 0,这个命令主要设置宽松模式
在这个 /etc/httpd目录下有一个logs目录,记录的日志,进入到这个目录中,有两个文件,access_log、error_log,分别记录这访问和异常的日志,打开tail -f error_log在这里你会看到一些错误的信息记录
伪静态操作
到cd /etc/httpd/modules会看到所有的模块的类
到cd /etc/httpd/conf.modules.d,这个是模块的配置
然后进入cd /etc/httpd/conf,打开vim httpd.conf文件,找到/LoadModule这个关键字,
在这个关键字下面添加LoadModule rewrite_module modules/mod_rewrite.so,
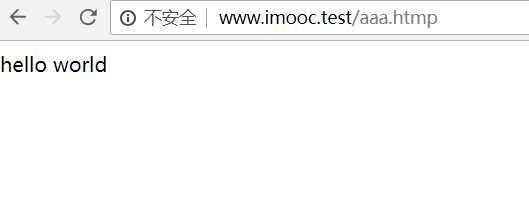
此时在配置虚拟主机的代码中添加,重启一下服务器,也就是说,只要访问地址后缀名是.htmp,那么就转到index.html
<VirtualHost *:80>
   ServerName www.imooc.test
   DocumentRoot /data/www
   <Directory "/data/www">
       Options Indexes FollowSymLinks
       AllowOverride None
       Require all granted
       # 添加一下代码
       <IfModule mod_rewrite.c>
           RewriteEngine On
           RewriteRule ^(.*).htmp$ index.html
       </IfModule>
   </Directory>
</VirtualHost>
| 解释 | 命令 |
|---|---|
| 安装 | yum install nginx |
| 启动 | service nginx start |
| 停止 | service nginx stop |
| 重载 | service nginx reload |
要注意的是安装的时候需要添加一个CentOS7 Nginx yum资源库
rpm -Uvh http://nginx.org/packages/centos/7/noarch/RPMS/nginx-release-centos-7-0.el7.ngx.noarch.rpm,然后再安装yum install nginx
启动成功后
ps -ef | grep nginx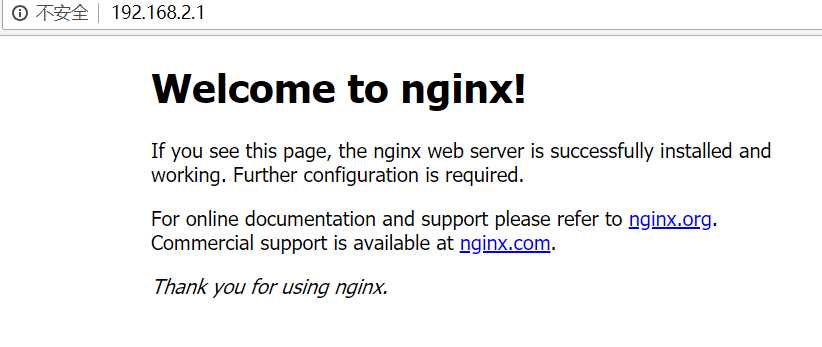
配置虚拟主机
cd /etc/nginx/,打开vim nginx.conf文件,这是一些配置文件,cd /etc/nginx/conf.d/,会有一个默认文件default.conf,在这里可以看到nginx默认的根目录,打开 vim /usr/share/nginx/html/index.html,这个就是nginx的欢迎界面server{
listen 80;
server_name www.imooc.test;
root /data/www;
index index.html index.htm;
}server{
listen 80;
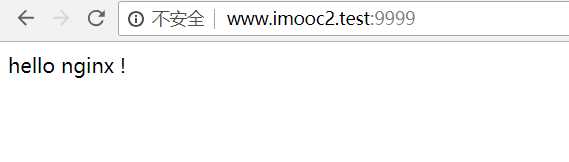
listen 9999;
server_name www.imooc.test www.imooc2.test;
root /data/www;
index index.html index.htm;
}
伪静态
server{
    listen  80;
    server_name  www.imooc.test;
    root /data/www;
    index  index.html  index.htm;
    location / {
        rewrite ^(.*)\.htmp$ /index.html;
    }
}
日志的格式化
tail -f /var/log/nginx/access.log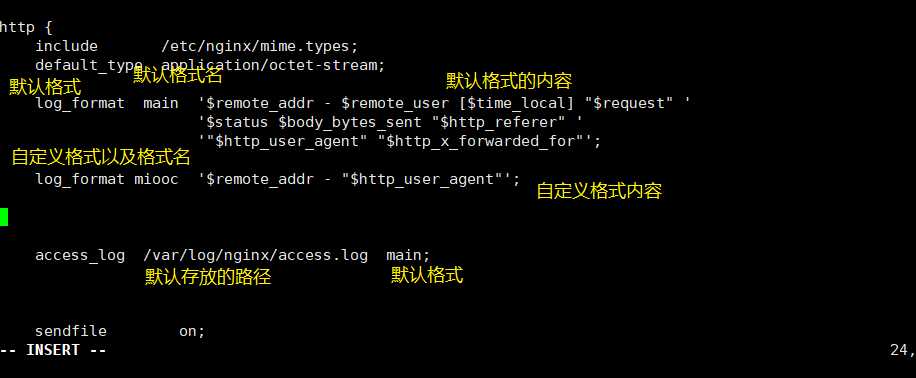
也可以在虚拟主机中指定日志的位置,这样方便管理,记得从重载服务器
server{
    listen  80;
    server_name  www.imooc.test;
    root /data/www;
    index  index.html  index.htm;
    # 指定日志关键字 存放的路径 日志格式的名字,就是上面自定义的
    access_log /var/log/nginx/access_imooc.log imooc;
    location / {
        rewrite ^(.*)\.htmp$ /index.html
    }
}
反向代理
进入到cd /etc/nginx/conf.d,vim imooc.conf文件,如
# 这个访问的实际ip地址,方便下面引用
upstream imooc_hosts {
    server 118.89.106.129:80;
}
server {
    listen    80;
    server_name  www.imooc.test;
        root   /data/nginx;
        index  index.html index.htm;
    location / {
       # 实际ip地址对应的Host
        proxy_set_header Host www.54php.cn;
        # 这个就是引用上面的方便管理
        proxy_pass http://imooc_hosts;
    }
} 重载服务器,访问www.imooc.test这个网址,实际上就会访问到www.54php.cn,此时前者就是作为一个代理
负载均衡
若这个时候,再imooc_hosts里添加一条网址,那么在第一次访问www.imooc.test这个网址,就到到第一条对应的网址,第二访问,就回到第二条对应的网址,第三次还是第一条对应的网址,......
若不想这样循环,想让一个服务器访问的次数多一点,那么,在后面添加一个关键字就可以了,如下,这样第一个网址被访问的次数就是第二个网址的五倍
 server 118.89.106.129:80 weight=5;
 server 101.132.110.127:80 weight=1;
调试功能
server {
    listen    80;
    # 添加下面的内容
    add_header Content-Type "text/plain;charset=utf-8";
    return 200 "$http_host $remote_addr";
    server_name  www.imooc.test;
    root   /data/nginx;
    index  index.html index.htm;
}
?
?
原文:https://www.cnblogs.com/mengd/p/9432316.html