Vue+Vue--Router结合开发
在实际开发中,用 Vue.js + vue-router 创建单页应用,是非常简单的。
在使用 Vue.js 时,我们就已经把组件组合成一个应用了,当你要把 vue-router 加进来,只需要配置组件和路由映射,然后告诉 vue-router 在哪里渲染它们。
一、Vue-Router
-
基本使用
<!DOCTYPE html>
<html lang="en">
<head>
	<meta charset="UTF-8">
	<title>Document</title>
</head>
<body>
<div id="app">
</div>

<template id="h5">
	<div>
		<h2>HTML5学院</h2>
		<p>掌握面向未来的神技!</p>
	</div>
</template>
<template id="java">
	<div>
		<h2>Java学院</h2>
		<p>都是Java是世界上最好的语言!</p>
	</div>
</template>
<template id="python">
	<div>
		<h2>Python学院</h2>
		<p>现在好火热呀!</p>
	</div>
</template>

<script_top src="js/vue.js"></script_top>
<script_top src="js/vue-router.js"></script_top>
<script_top>

	// 1.创建组件
	const Html5 = Vue.extend({
		template = "#h5"
	});
	const Java = Vue.extend({
		template = "#java"
	});
	const Python = Vue.extend({
		template = "#python"
	});
	// 2.定义路由
	const routes = [
		{path:‘/h5‘, component: Html5},
		{path:‘/java‘, component: Java},
		{path:‘/python‘, component: Python},
	];
	// 3.创建路由实例
	const router = new VueRouter({
		routes
	});
	// 4.创建Vue的实例,开挂载
	new Vue({
		router
	}).$mount(‘#app‘)
</script_top>
</body>
</html>
1.一级路由:
<!DOCTYPE html>
<html lang="en">
<head>
	<meta charset="UTF-8">
	<title>Document</title>
</head>
<link rel="stylesheet" href="./bootstrap-3.3.7-dist/css/bootstrap.css">
<script_top src="./bootstrap-3.3.7-dist/js/jquery.min.js"></script_top>
<script_top src="./bootstrap-3.3.7-dist/js/bootstrap.js"></script_top>
<body style="background:#ccc;">
<div id="app">
    <div class="row">
    	<div class="col-xs-8 col-xs-offset-2">
    		<div class="page-header">
				<h1>IT贝贝教育</h1>
			</div>
    	</div>
    </div>
	<div class="row">
		<!--左边列表-->
		<div class="col-xs-2 col-xs-offset-2">
			<div class="list-group">
				<!-- 使用 router-link 组件来导航. -->
				<!-- 通过传入 `to` 属性指定链接. -->
				<!-- <router-link> 默认会被渲染成一个 `<a>` 标签 -->
				<router-link class="list-group-item" to="/h5">Html5学院</router-link>
				<router-link class="list-group-item" to="/java">Java学院</router-link>
				<router-link class="list-group-item" to="/python">Python学院</router-link>
			</div>
		</div>
		<!--右边内容-->
		<div class="col-xs-6">
			<div class="panel">
				<div class="panel-body">
					<!-- 路由出口 -->
					<!-- 路由匹配到的组件将渲染在这里 -->
					<router-view></router-view>
				</div>
			</div>
		</div>
	</div>
</div>

<template id="h5">
	<div>
		<h2>HTML5学院</h2>
		<p>掌握面向未来的神技!</p>
	</div>
</template>
<template id="java">
	<div>
		<h2>Java学院</h2>
		<p>都是Java是世界上最好的语言!</p>
	</div>
</template>
<template id="python">
	<div>
		<h2>Python学院</h2>
		<p>现在好火热呀!</p>
	</div>
</template>

<script_top src="js/vue.js"></script_top>
<script_top src="js/vue-router.js"></script_top>
<script_top>

	// 1.创建组件
	const Html5 = Vue.extend({
		template:"#h5"
	});
	const Java = Vue.extend({
		template:"#java"
	});
	const Python = Vue.extend({
		template:"#python"
	});
	// 2.定义路由
	const routes = [
		{path:‘/h5‘, component: Html5},
		{path:‘/java‘, component: Java},
		{path:‘/python‘, component: Python},
		//配置跟路由
		{path:‘/‘,redirect:‘/h5‘}
	];
	// 3.创建路由实例
	const router = new VueRouter({
		routes
	});
	// 4.创建Vue的实例,开挂载
	new Vue({
		router
	}).$mount(‘#app‘)
</script_top>
</body>
</html>
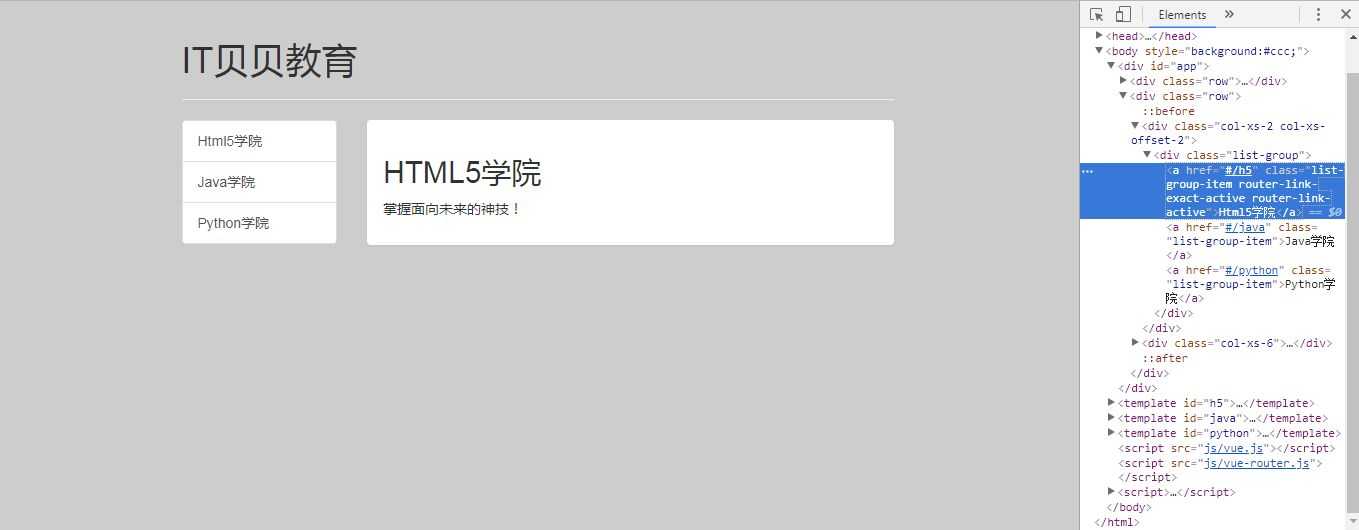
运行结果:
原文:https://www.cnblogs.com/yimiflh/p/9280627.html
踩
(0)
赞
(0)
举报
评论 一句话评论(0)