大家都知道条形码(Barcode)是一种可以由机器识别的特殊编码,在生产、生活中也常常会见到并使用它。条形码的类型和种类很多感兴趣的朋友可以详细了解一下。其中Code 39 可以说是一种最为常见并广泛使用的字符与数字结合的编码类型,本篇也将利用它制作一个带有条形码的员工卡应用程序。
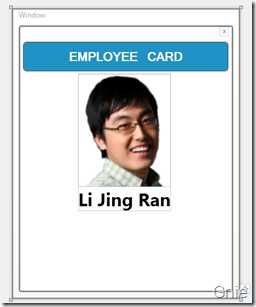
在公司内部员工卡是员工身份唯一的识别工具,同时也是考勤及门禁系统的主要信息来源。首先在WPF 中设计一个简单的员工卡样式,具备员工卡标识、员工相片、员工姓名等。
<Border CornerRadius="3" BorderBrush="Gray" BorderThickness="2" Background="White"
        MouseLeftButtonDown="Border_MouseLeftButtonDown">
    <Canvas x:Name="mainCanvas">
        <Grid x:Name="closeBtn" Canvas.Left="330" Canvas.Top="0"
              MouseLeftButtonDown="Close_MouseLeftButtonDown">
            <Ellipse Height="15" Width="15" HorizontalAlignment="Center">
                <Ellipse.Fill>
                    <SolidColorBrush x:Name="ellipseColor"/>
                </Ellipse.Fill>
            </Ellipse>
            <TextBlock Text="x" Margin="2,-2,2,2" HorizontalAlignment="Center">
                <TextBlock.Foreground>
                    <SolidColorBrush x:Name="textColor" Color="Gray"/>
                </TextBlock.Foreground>
            </TextBlock>
        </Grid>

        <Border BorderBrush="#FF54545C" Canvas.Top="25" CornerRadius="5"
                Height="49" Width="339" Background="#FF2192C4" Canvas.Left="5">
            <TextBlock Text="EMPLOYEE   CARD" Foreground="White" FontSize="20"
                       VerticalAlignment="Center" HorizontalAlignment="Center"
                       FontWeight="Black" FontFamily="Microsoft Sans Serif"/>
        </Border>
        <Grid Canvas.Left="96" Canvas.Top="78">
            <Grid.RowDefinitions>
                <RowDefinition />
                <RowDefinition />
            </Grid.RowDefinitions>
            <Image Source="Images/cardpic.png" Grid.Row="0"/>
            <TextBlock Text="Li Jing Ran" FontSize="30" FontWeight="Black"
                       Grid.Row="1" HorizontalAlignment="Center"/>
        </Grid>
    </Canvas>
</Border>
代码内容比较简单,其中需要提一下的是x:Name 为closeBtn 的<Grid>,可以看到它包含了一个<Ellipse>和<Textblock>,它们的颜色填充方式看上去做的很复杂。其实是为了实现一个动态效果:当鼠标移动到关闭图标上时,其<Ellipse>和<Textblock>会改变颜色(如下图对比)。
![]()
![]()
该效果代码如下,通过Window.Resources 设置一个ColorAnimation Storyboard,再通过MouseEnter、MouseLeave 来触发Storyboard 动画效果。
<Window.Resources>
    <Storyboard x:Key="flashClose">
        <ColorAnimation Storyboard.TargetName="ellipseColor"
                        Storyboard.TargetProperty="Color"
                        From="White" To="Gray" Duration="0:0:0.1"/>
        <ColorAnimation Storyboard.TargetName="textColor"
                        Storyboard.TargetProperty="Color"
                        From="Gray" To="White" Duration="0:0:0.1"/>
    </Storyboard>
</Window.Resources>
<Window.Triggers>
    <EventTrigger SourceName="closeBtn" RoutedEvent="Grid.MouseEnter">
        <BeginStoryboard x:Name="showClosBtn" Storyboard="{StaticResource flashClose}"/>
    </EventTrigger>
    <EventTrigger SourceName="closeBtn" RoutedEvent="Grid.MouseLeave">
        <StopStoryboard BeginStoryboardName="showClosBtn"/>
    </EventTrigger>
</Window.Triggers>
 完成上面的界面设计,最后只需在员工卡下放的空白处添加员工编号条形码即可。首先在项目中加入Barcode 和Code39 类,我们要通过这两个类完成条形码的绘制工作。打开C#程序,编写如下代码。
  通过Barcodes 类创建一个新的条形码,定义BarcodeType 为"Code39",编码Data 为“10001”,如果需要校验则将CheckDigit 设为"Yes"。其中thinWidth、thickWidth 用于定义黑白条码的宽窄度。
Barcodes bb = new Barcodes();
bb.BarcodeType = Barcodes.BarcodeEnum.Code39;
bb.Data = "10001";
bb.CheckDigit = Barcodes.YesNoEnum.Yes;
bb.encode();

int thinWidth;
int thickWidth;

thinWidth = 2;
thickWidth = 3 * thinWidth;

string outputString = bb.EncodedData;
string humanText = bb.HumanText;
根据编码(EncodedData)的长度利用Rectangle 类逐一绘制黑、白条码,t 表示窄码,w 表示宽码。
int len = outputString.Length;
int currentPos = 50;
int currentTop = 340;
int currentColor = 0;
for (int i = 0; i < len; i++)
{
    Rectangle rect = new Rectangle();
    rect.Height = 80;
    if (currentColor == 0)
    {
        currentColor =  1;
        rect.Fill = new SolidColorBrush(Colors.Black);
    }
    else
    {
        currentColor = 0;
        rect.Fill = new SolidColorBrush(Colors.White);
    }
    Canvas.SetLeft(rect, currentPos);
    Canvas.SetTop(rect, currentTop);

    if (outputString[i] == ‘t‘)
    {
        rect.Width = thinWidth;
        currentPos += thinWidth;
    }
    else if (outputString[i] == ‘w‘)
    {
        rect.Width = thickWidth;
        currentPos += thickWidth;
    }
    mainCanvas.Children.Add(rect);
}
最后在条形码下方添加一行可读码,方便员工认读条形码内容,也就是将“10001”员工编号显示出来。
TextBlock tb = new TextBlock();
tb.Text = humanText;
tb.FontSize = 25;
tb.FontFamily = new FontFamily("Consolas");
Rect rx = new Rect(0, 0, 0, 0);
tb.Arrange(rx);
Canvas.SetLeft(tb, 120);
Canvas.SetTop(tb, currentTop + 80);
mainCanvas.Children.Add(tb);原文:http://www.cnblogs.com/sjqq/p/6635913.html