一、关于给控件添加ID属性
<?xml version="1.0" encoding="utf-8"?>
<RelativeLayout xmlns:android="http://schemas.android.com/apk/res/android"
    android:layout_width="fill_parent"
    android:layout_height="fill_parent"
    android:orientation="vertical" >
    <include
        android:id="@+id/top"
        android:layout_width="match_parent"
        android:layout_height="wrap_content"
        android:layout_alignParentTop="true"
        layout="@layout/top" />
    <Button
        android:id="@+id/wifi_test_bnt"
        style="@style/CommonButtonStyle"
        android:layout_width="match_parent"
        android:layout_height="wrap_content"
        android:layout_below="@+id/top"
        android:text="@string/wifi_setting" />
    <!-- WIFI测试项的提示 -->
    <TextView
        android:id="@+id/tv_hint"
        android:layout_width="wrap_content"
        android:layout_height="wrap_content"
        android:layout_alignParentStart="true"
        android:layout_below="@+id/wifi_test_bnt"
        android:text="@string/global_test_str"
        android:visibility="gone" />
    <ListView
        android:id="@+id/wifi_listview"
        android:layout_width="fill_parent"
        android:layout_height="wrap_content"
        android:layout_above="@+id/bottom"
        android:layout_below="@id/wifi_test_bnt"
        android:text="@string/hello" >
    </ListView>
    <include
        android:id="@+id/bottom"
        android:layout_width="match_parent"
        android:layout_height="wrap_content"
        android:layout_alignParentBottom="true"
        layout="@layout/bottom" />
</RelativeLayout>
如上所述,实际布局效果如下:
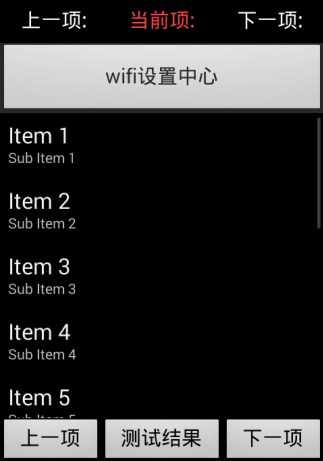
实际上为底部布局添加ID属性,是在定义其之前的位置。也即是说,在定义ListView时,为底部布局添加了ID属性。
其一使用了 android:layout_above="@+id/bottom";其二使用了 android:id="@id/bottom"
原文:http://www.cnblogs.com/CVstyle/p/6399244.html