本文为转载,学习研究
Creating Hello, World! with Visual Studio
Chapter 1, “.NET Application Architectures,” explains how to write a “Hello,
World!” C# program using the csc Compiler for .NET 4.6 and using dotnet tools
for .NET Core 1.0. You can also create it with Visual Studio 2015, which is done in
this chapter.
NOTE In the first chapters of this book, Visual Studio is used as a code editor
and compiler without employing all the other features of Visual Studio.
Chapter 17, “Visual Studio 2015,” covers more about all the other options and
features offered by Visual Studio.
Creating a Solution
First, create a solution file within Visual Studio. A solution enables you to group
multiple projects and to open all the projects of a solution together.
You can create an empty solution by selecting File???New Project and then
selecting Installed???Templates???Other Project Types???Visual Studio Solutions.
Select the Blank Solution template (see Figure 2.1). With the New Project dialog,
you can define the name of the solution as well as the directory where the solution
should be stored. You can also define whether the solution should be added to a
Git repository for source control management.
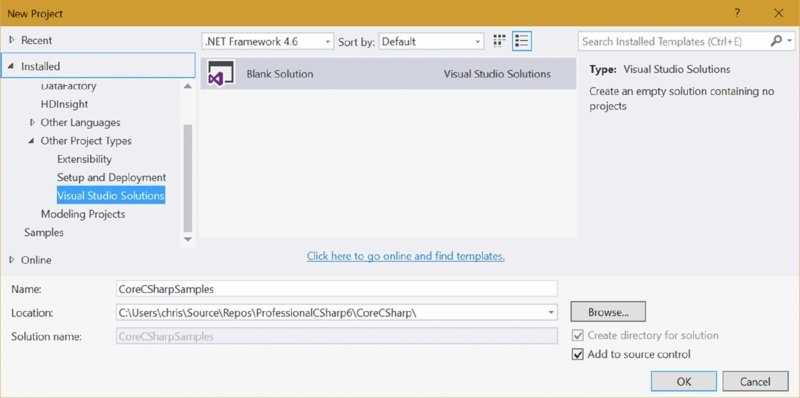
Figure 2.1
After creating the solution, you see the content of the solution within the Solution
Explorer (see Figure 2.2). Currently, there’s only a solution file without any
content.
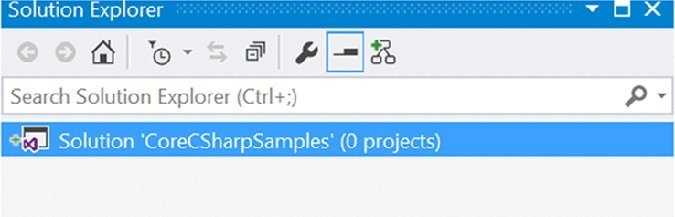
Figure 2.2
Creating a New Project
Now add a new project to create the Hello, World! app. Right-click the solution in
Solution Explorer, or use the Menu button on the keyboard to open the context
menu (refer to Figure 2.2), and open the application context menu and select Add?
??New Project to open the Add New Project dialog. Alternatively, you can select
File???Add???New Project. In the Add New Project dialog, select the Console
Application (Package) template to create a console application targeting .NET
Core. You can find this project type in the tree within Installed???Templates???
Visual C#???Web (see Figure 2.3). Set the name of the application to
HelloWorldApp.
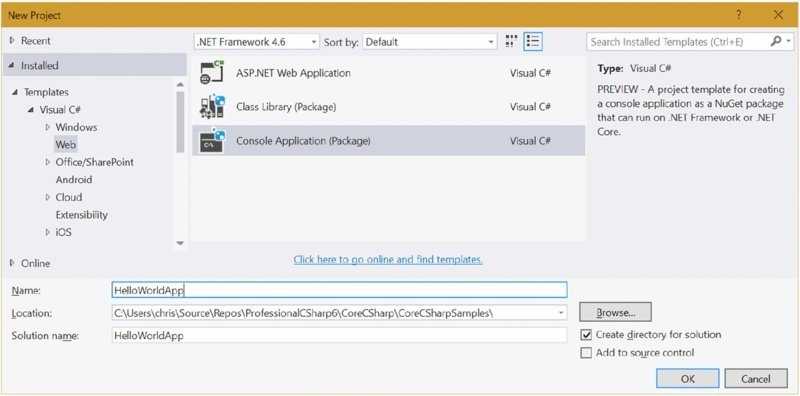
Figure 2.3
NOTE To open the context menu of an application, you have different
options: right-click while selecting the item where the context menu should
be opened (or left-click if you are left-handed), or select the item and press
the menu key on the keyboard (usually located between the Alt and Ctrl keys
on the right side). If your keyboard doesn’t have a menu key, press Shift +
F10. Lastly, if you have a touch pad, you can make a two-finger touch.
The Solution Explorer is no longer empty. It now shows the project and all the
files belonging to the project (see Figure 2.4).
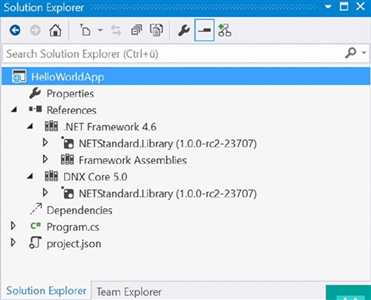
Figure 2.4
In Chapter 1, the project file was created by the dotnet tool, now it is created from
a Visual Studio template. Two Frameworks—.NET 4.6 and .NET Core 1.0 are
specified. With both frameworks, the NetStandard.Library 1.0 is referenced (code
file HelloWorldApp/project.json):
{
"version":"1.0.0-*",
"description":"",
"authors": ["" ],
"tags": ["" ],
"projectUrl":"",
"licenseUrl":"",
"dependencies": {
"NETStandard.Library":"1.0.0-*"
},
"frameworks": {
"net46": { },
"netstandardapp1.5": {
"dependencies": { },
"imports":"dnxcore50"
}
},
"runtimes": {
"win7-x64": { },
"win10-x64": { }
}
}
The generated C# source file Program.cs contains a Main method within the
Program class that itself is defined within the namespace HelloWorldApp (code file
HelloWorldApp/Program.cs):
using System;
using System.Collections.Generic;
using System.Linq;
using System.Threading.Tasks;
namespace HelloWorldApp
{
class Program
{
static void Main(string[] args)
{
}
}
}
Change this to the Hello, World! app. You need to open the namespace for using
the WriteLine method of the Console class, and you need to invoke the WriteLine
method. You also change the namespace for the Program class. The Program class is
now defined within the namespace Wrox.HelloWorldApp (code file
HelloWorldApp/Program.cs):
using static System.Console;
namespace Wrox.HelloWorldApp
{
class Program
{
static void Main()
{
WriteLine("Hello, World!");
}
}
}
Select the project in Solution Explorer and use the context menu to open
Properties (or View???Property Pages) to open the project configuration (see
Figure 2.5). On the Application tab, you can select the name of the application, the
default namespace (this is only used for new items added), and the version of the
.NET Core version that should be used for the solution. In case you select a version
that is different from your default selection, a global.json file is created that
contains this configuration setting.
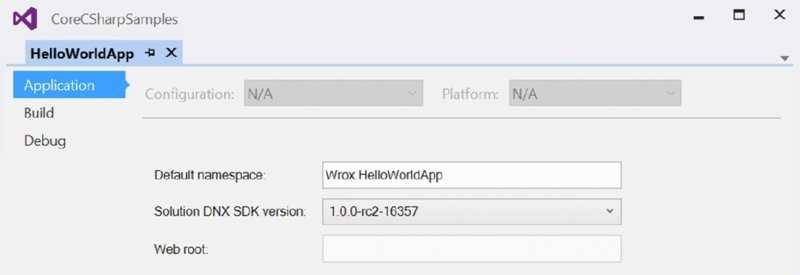
Figure 2.5
Compiling and Running the Program
The Build menu offers different options for building the program. You can either
use Build???Build Solution to build all projects of the solution, or you can build a
single project with Build???Build HelloWorldApp. Also have a look at the other
options available with the Build menu.
To generate persistent files, you can check the Produce Outputs on Build option
on the Build tab in the project properties (see Figure 2.6).
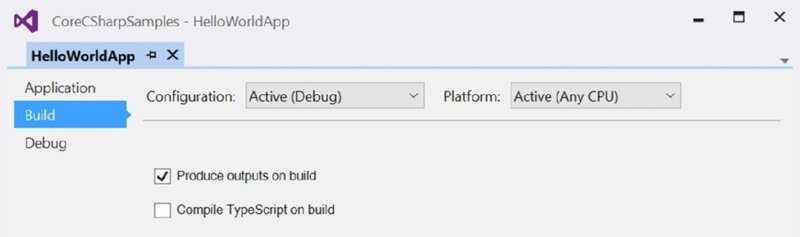
Figure 2.6
After building the program with the Produce Outputs on Build option selected,
you can see in File Explorer the directory artifacts that contains subdirectories
for all the supported .NET Framework versions listed with the binaries.
You can run the application from within Visual Studio by using Debug???Start
Without Debugging. This starts the app as shown in Figure 2.7.
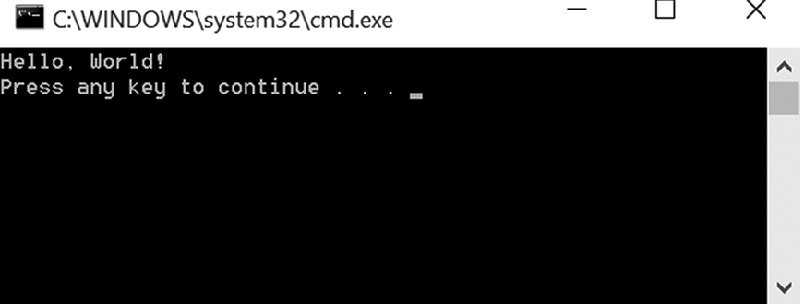
Figure 2.7
NOTE Be sure to not start the app with Debug???Start Debugging; if you do
you will not see the output of the app because the console window
immediately closes after the app completes. You can use this method to run
the app either with setting breakpoints and debugging into the app, or by
adding aReadLine method before the end of the Main method.
You can use the Debug tab in the project properties to configure the runtime
version that should be used while running the app (see Figure 2.8).
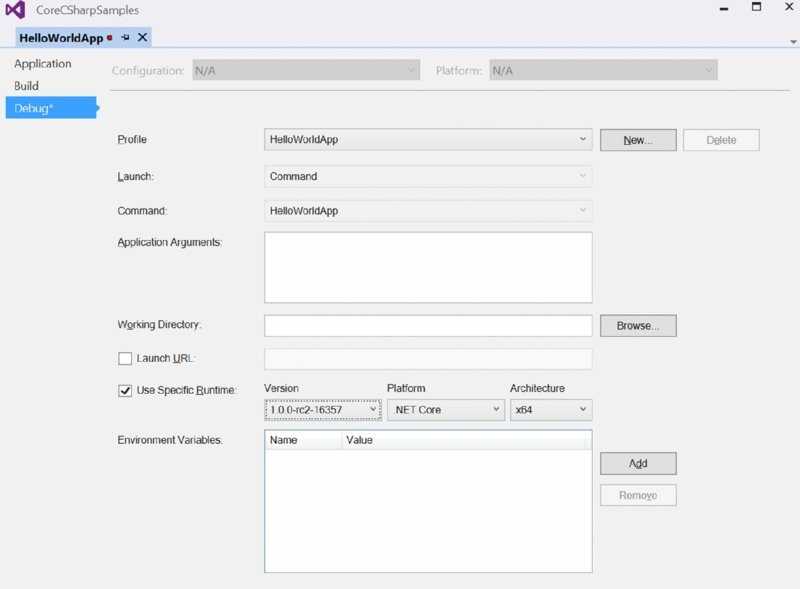
Figure 2.8
TIP When you have multiple projects in the same solution, you can define
what project should run by selecting the project in Solution Explorer and
opening the context menu. In the context menu click Set as Startup Project
(or Project ? Set as Startup Project). Alternatively, you can select the
solution in the Solution Explorer, and select Set Startup Projects to open the
property page for the solution where you can select what should be the
startup project. You can also define multiple projects to start.
Taking a Closer Look at the Code
Now let’s concentrate on the C# source code. First, I have a few general comments
about C# syntax. In C#, as in other C-style languages, statements end in a
semicolon (;) and can continue over multiple lines without needing a continuation
character. Statements can be joined into blocks using curly braces ({}). Single-line
comments begin with two forward slash characters (//), and multiline comments
begin with a slash and an asterisk (/*) and end with the same combination
reversed (*/). In these aspects, C# is identical to C++ and Java but different from
Visual Basic. It is the semicolons and curly braces that give C# code such a
different visual appearance from Visual Basic code. If your background is
predominantly Visual Basic, take extra care to remember the semicolon at the end
of every statement. Omitting this is usually the biggest single cause of compilation
errors among developers who are new to C-style languages. Another thing to
remember is that C# is case sensitive. That means the variables named myVar and
MyVar are two different variables.
The first few lines in the previous code example are related to namespaces
(mentioned later in this chapter), which is a way to group associated classes. The
namespace keyword declares the namespace with which your class should be
associated. All code within the braces that follow it is regarded as being within
that namespace. The using declaration specifies a namespace that the compiler
should look at to find any classes that are referenced in your code but aren’t
defined in the current namespace. This serves the same purpose as the import
statement in Java and the using namespace statement in C++.
using static System.Console;
namespace Wrox
{
The reason for the presence of the using static declaration in the Program.cs file
is that you are going to use a library class: System.Console. The using static
System.Console declaration enables you to refer to the static members of this class
and omit the namespace and class names. Just declaring using System; instead,
you need to add the class name for calling the WriteLine method:
using System;
// etc.
Console.WriteLine("Hello World!");
Omitting the complete using declaration, you need to add the namespace name
invoking the WriteLine method:
System.Console.WriteLine("Hello World!");
The standard System namespace is where the most commonly used .NET types
reside. It is important to realize that everything you do in C# depends on .NET
base classes. In this case, you are using the Console class within the System
namespace to write to the console window. C# has no built-in keywords of its own
for input or output; it is completely reliant on the .NET classes.
NOTE Because almost every sample in this and the next chapters makes use
of static members of theConsole class, we will assume that a using static
System.Console; statement is present in the file for all code snippets.
Within the source code, a class called Program is declared. However, because it has
been placed in a namespace called Wrox.HelloWorldApp, the fully qualified name of
this class is Wrox.HelloWorldApp.Program:
namespace Wrox.HelloWorldApp
{
class Program
{
All C# code must be contained within a class. The class declaration consists of the
class keyword, followed by the class name and a pair of curly braces. All code
associated with the class should be placed between these braces.
The class Program contains a method called Main. Every C# executable (such as
console applications, Windows applications, Windows services, and web
applications) must have an entry point—the Main method (note the capital M).
static void Main()
{
The method is called when the program is started. This method must return either
nothing (void) or an integer (int). Note the format of method definitions in C#:
[modifiers] return_type MethodName([parameters])
{
// Method body. NB. This code block is pseudo-code.
}
Here, the first square brackets represent certain optional keywords. Modifiers are
used to specify certain features of the method you are defining, such as from
where the method can be called. In this case the Main method doesn’t have a
public access modifier applied. You can do this in case you need a unit test for the
Main method. The runtime doesn’t need the public access modifier applied, and it
still can invoke the method. The static modifier is required as the runtime invokes
the method without creating an instance of the class. The return type is set to void,
and in the example parameters are not included.
Finally, we come to the code statement themselves:
WriteLine("Hello World!");
In this case, you simply call the WriteLine method of the System.Console class to
write a line of text to the console window. WriteLine is a static method, so you
don’t need to instantiate a Console object before calling it.
Now that you have had a taste of basic C# syntax, you are ready for more detail.
Because it is virtually impossible to write any nontrivial program without
variables, we start by looking at variables in C#.
Professional C# 6 and .NET Core 1.0 - Creating Hello, World! with Visual Studio
原文:http://www.cnblogs.com/EasyInvoice/p/6368140.html