克隆虚拟机后,查看该虚拟机所分配的MAC地址。
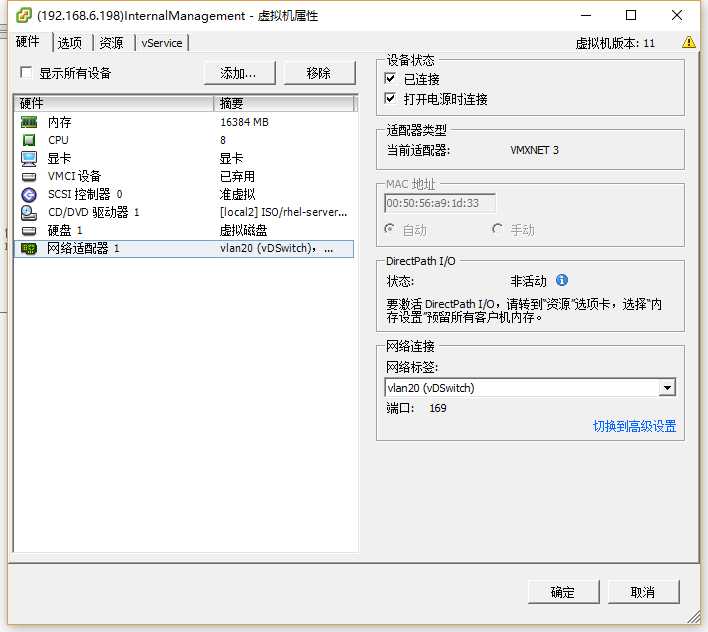
打开控制台,进入linux界面。
打开/etc/udev/rules.d/70-persistent-net.rules内容如下面例子所示:# vi /etc/udev/rules.d/70-persistent-net.rules# This file was automatically generated by the /lib/udev/write_net_rules# program, run by the persistent-net-generator.rules rules file.## You can modify it, as long as you keep each rule on a single# line, and change only the value of the NAME= key.# PCI device 0x1022:0x2000 (pcnet32)SUBSYSTEM=="net", ACTION=="add", DRIVERS=="?*", ATTR{address}=="00:0c:29:8f:89:97", ATTR{type}=="1", KERNEL=="eth*", NAME="eth0"# PCI device 0x1022:0x2000 (pcnet32)SUBSYSTEM=="net", ACTION=="add", DRIVERS=="?*", ATTR{address}=="00:0c:29:50:bd:17", ATTR{type}=="1", KERNEL=="eth*", NAME="eth1"打开/etc/sysconfig/network-scripts/ifcfg-eth0# vi /etc/sysconfig/network-scripts/ifcfg-eth0将 DEVICE="eth0" 改成 DEVICE="eth1" ,将 HWADDR="00:0c:29:8f:89:97" 改成上面的MAC地址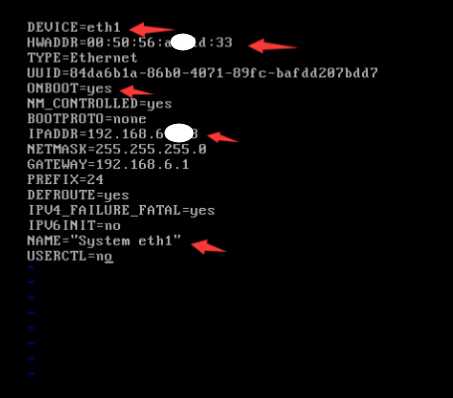
最后,重启网络 # service network restart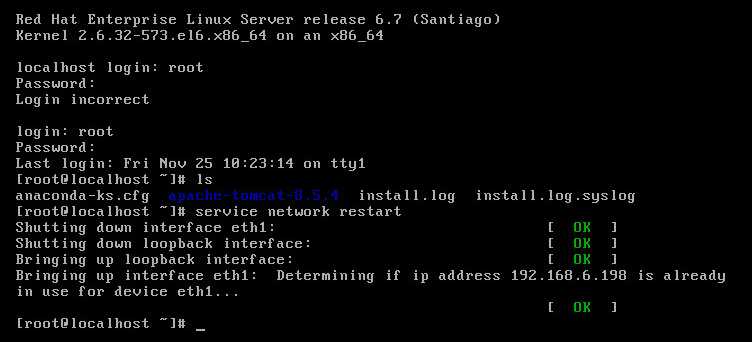
VMWare vSphere Client 克隆虚拟机 更改IP
原文:http://www.cnblogs.com/platycoden/p/6102589.html