Tomc
tomcat简介:Tomcat 服务器是一个免费的开放源代码的Web 应用服务器,属于轻量级应用服务器,在中小型系统和并发访问用户不是很多的场合下被普遍使用,是开发和调试JSP 程序的首选。对于一个初学者来说,可以这样认为,当在一台机器上配置好Apache 服务器,可利用它响应HTML(标准通用标记语言下的一个应用)页面的访问请求。实际上Tomcat 部分是Apache 服务器的扩展,但它是独立运行的,所以当你运行tomcat 时,它实际上作为一个与Apache 独立的进程单独运行的
实验环境:
server1:172.25.45.1
server2:172.25.45.2
iptables off and selinux disabled
安装tomcat
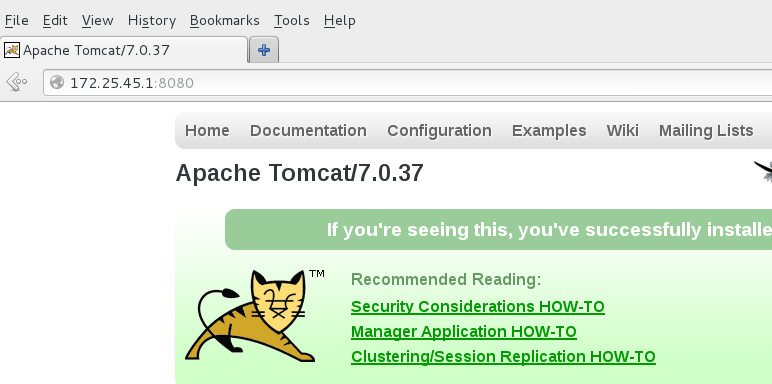
所需要的软件包: apache-tomcat-7.0.37.tar.gz
1 | tar zxf apache-tomcat-7.0.37.tar.gz -C /usr/local/lnmp/ |
1 2 3 4 | cd /usr/local/lnmp/ln -s apache-tomcat-7.0.37/ tomcatcd tomcat/bin/startup.sh |
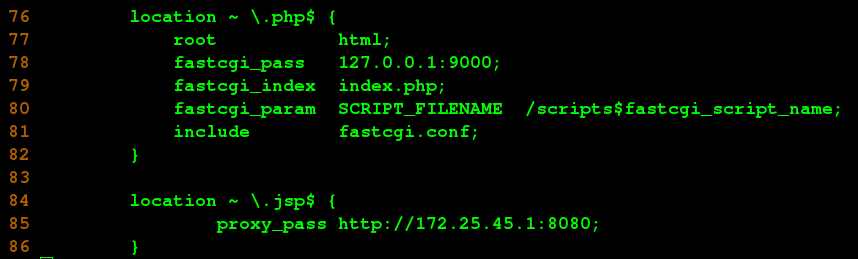
1 | vim /usr/local/lnmp/nginx/conf/nginx.conf |
在location ~ \.php$之后,添上以下内容(82行之后)
location ~ \.jsp$ {
proxy_pass http://172.25.45.1:8080;
}
1 | nginx -s reload |
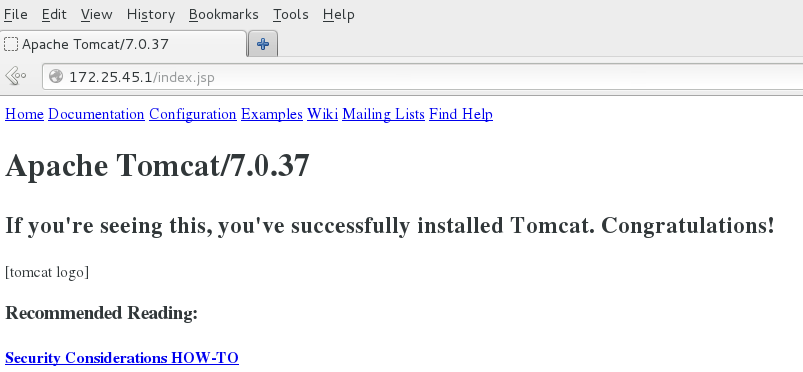
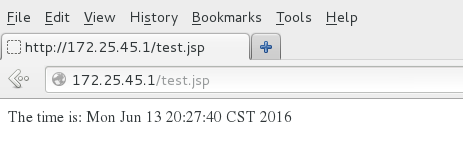
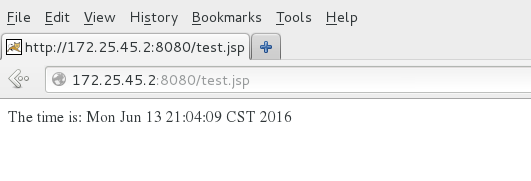
1 2 | cd /usr/local/lnmp/tomcat/webapps/ROOTvim test.jsp |
The time is:<%=new java.util.Date()%>
2.tomcat 集群
再启动一个虚拟机server2,把配置好的java-jdk和tomcat复制到启动的server2中
【server1】
1 2 3 | scp -r /usr/local/java/ root@172.25.45.2:/usr/local/scp -r /usr/local/lnmp/tomcat/ root@172.25.45.2:/usr/local/scp /etc/profile root@172.25.45.2:/etc/ |
【server2】
1 2 3 4 | source /etc/profileecho $PATHcd /usr/local/tomcatbin/startup.sh |
访问server2的tomcat
3.rr论寻
【server1】
1 | vim /usr/local/lnmp/nginx/conf/nginx.conf |
16 http {
17 upstream westos{
18 server 172.25.45.1:8080;
19 server 172.25.45.2:8080;
20 }
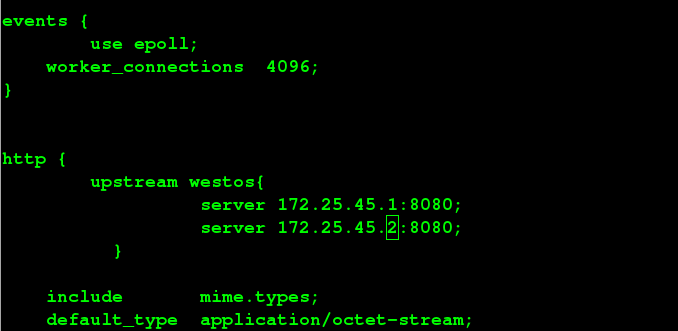
修改server后的端口值为8080
81 location ~ \.jsp$ {
82 proxy_pass http://westos;
83 }

将proxy_pass改为http://westos
1 2 | nginx -tnginx -s reload |
1 2 | cd /usr/local/lnmp/tomcat/webapps/ROOTvim test.jsp |
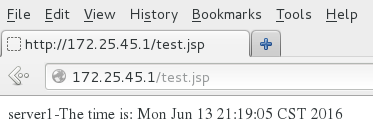
在内容最前面加上server1-
【server2】
1 | cd /usr/local/tomcat/webapps/ROOT |
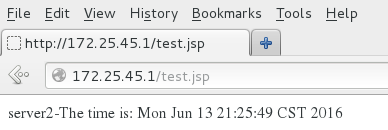
对server2的test.jsp也进行修改,在内容最前面加上server2-
访问172.25.45.1/test.jsp
页面显示会在server1-The time与The time之间切换
关闭server1的tomcat,只显示server2的/usr/local/lnmp/tomcat/webapps/ROOT/test.jsp 内容
4.ip_hash
1 | vim /usr/local/lnmp/nginx/conf/nginx.conf |
在17行upstream westos段下添上ip_hash;
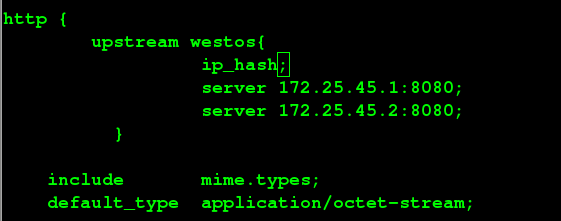
同一个ip访问的是同一台服务器
1 | ./shutdown.sh |
关闭一台后访问另外一台
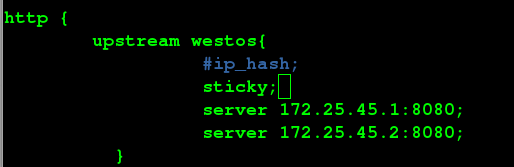
5.sticky模式
从新编译1.8版本的nginx
1 2 | tar zxf nginx-1.8.0.tar.gz tar zxf nginx-sticky-module-1.0.tar.gz |
1 2 3 4 | ./configure \ --prefix=/usr/local/lnmp/nginx \--with-http_ssl_module --with-http_stub_status_module \--add-module=/mnt/nginx-sticky-module-1.0 |
1 2 | or./configure --prefix=/usr/local/lnmp/nginx --with-http_ssl_module --with-http_stub_status_module --add-module=/root/nginx-sticky-module-1.0 |
1 | vim /usr/local/lnmp/nginx/conf/nginx.conf |
在17行upstream westos段下注释掉ip_hash添上sticky
1 | vim /usr/local/lnmp/tomcat/webapps/ROOT/test.jsp |
<%@ page contentType="text/html; charset=GBK" %>
<%@ page import="java.util.*" %>
<html><head><title>Cluster App Test</title></head>
<body>
Server Info:
<%
out.println(request.getLocalAddr() + " : " + request.getLocalPort()+"<br>");%>
<%
out.println("<br> ID " + session.getId()+"<br>");
String dataName = request.getParameter("dataName");
if (dataName != null && dataName.length() > 0) {
String dataValue = request.getParameter("dataValue");
session.setAttribute(dataName, dataValue);
}
out.print("<b>Session list</b>");
Enumeration e = session.getAttributeNames();
while (e.hasMoreElements()) {
String name = (String)e.nextElement();
String value = session.getAttribute(name).toString();
out.println( name + " = " + value+"<br>");
System.out.println( name + " = " + value);
}
%>
<form action="test.jsp" method="POST">
name:<input type=text size=20 name="dataName">
<br>
key:<input type=text size=20 name="dataValue">
<br>
<input type=submit>
</form>
</body>
</html>
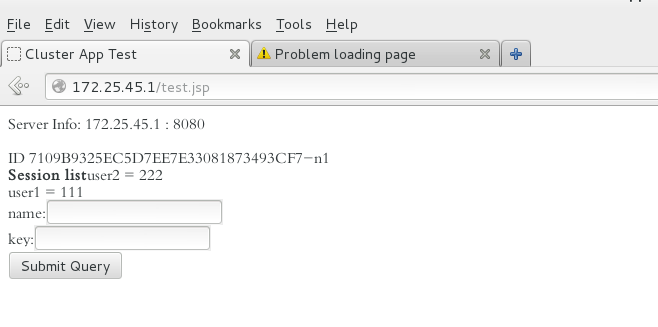
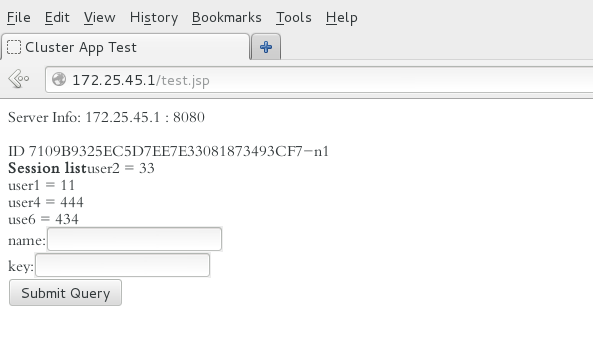
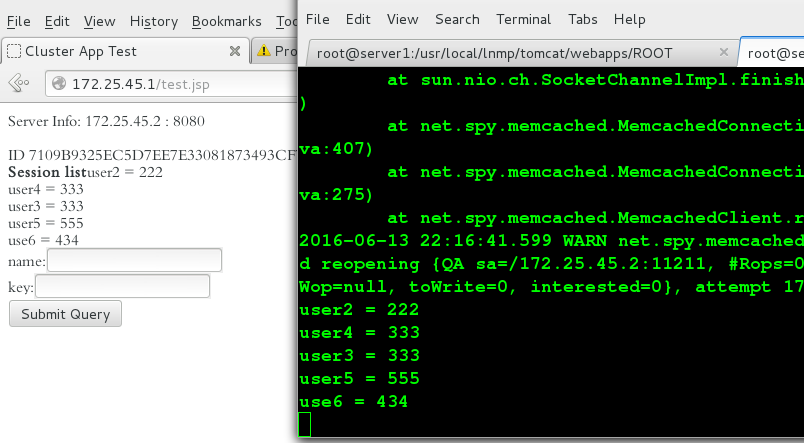
sticky 模式当用户访问,只要访问主机tomcat不挂,就一直访问同一个
1 | vim /usr/local/lnmp/nginx/conf/nginx.conf |
注释掉sticky
1 2 | nginx -tnginx -s reload |

【server1】
1 | vim /usr/local/lnmp/nginx/conf/nginx.conf |
取消sticky的注释
1 2 | nginx -tnginx -s reload |
【server2】
1 2 | cd /usr/local/tomcat/logs tail -f catalina.out |
1 2 | cd /usr/local/tomcatbin/shutdown.sh |
本文出自 “huangguanhua” 博客,转载请与作者联系!
原文:http://hgh1882928.blog.51cto.com/11827742/1844406