Android平台有三种网络接口可以使用,他们分别是:java.net.*(标准Java接口)、Org.apache接口和Android.net.*(Android网络接口)。下面分别介绍这些接口的功能和作用。
1.标准Java接口
java.net.*提供与联网有关的类,包括流、数据包套接字(socket)、Internet协议、常见Http处理等。比如:创建URL,以及URLConnection/HttpURLConnection对象、设置链接参数、链接到服务器、向服务器写数据、从服务器读取数据等通信。这些在Java网络编程中均有涉及,我们看一个简单的socket编程,实现服务器回发客户端信息。
服务端:
- public class Server implements Runnable{
- @Override
- public void run() {
- Socket socket = null;
- try {
- ServerSocket server = new ServerSocket(18888);
-
- while(true){
- System.out.println("start...");
-
- socket = server.accept();
- System.out.println("accept...");
-
- BufferedReader in = new BufferedReader(new InputStreamReader(socket.getInputStream()));
- String message = in.readLine();
-
- PrintWriter out = new PrintWriter(new BufferedWriter(new OutputStreamWriter(socket.getOutputStream())),true);
- out.println("Server:" + message);
-
- in.close();
- out.close();
- }
- } catch (IOException e) {
- e.printStackTrace();
- }finally{
- if (null != socket){
- try {
- socket.close();
- } catch (IOException e) {
- e.printStackTrace();
- }
- }
- }
-
- }
-
- public static void main(String[] args){
- Thread server = new Thread(new Server());
- server.start();
- }
- }
客户端,MainActivity
- public class MainActivity extends Activity {
- private EditText editText;
- private Button button;
-
- @Override
- public void onCreate(Bundle savedInstanceState) {
- super.onCreate(savedInstanceState);
- setContentView(R.layout.main);
-
- editText = (EditText)findViewById(R.id.editText1);
- button = (Button)findViewById(R.id.button1);
-
- button.setOnClickListener(new OnClickListener() {
- @Override
- public void onClick(View v) {
- Socket socket = null;
- String message = editText.getText().toString()+ "\r\n" ;
- try {
-
- socket = new Socket("<span style="font-weight: bold;">10.0.2.2</span>",18888);
- PrintWriter out = new PrintWriter(new BufferedWriter(new OutputStreamWriter
- (socket.getOutputStream())),true);
-
- out.println(message);
-
-
- BufferedReader in = new BufferedReader(new InputStreamReader(socket.getInputStream()));
- String msg = in.readLine();
- if (null != msg){
- editText.setText(msg);
- System.out.println(msg);
- }
- else{
- editText.setText("data error");
- }
- out.close();
- in.close();
- } catch (UnknownHostException e) {
- e.printStackTrace();
- } catch (IOException e) {
- e.printStackTrace();
- }
- finally{
- try {
- if (null != socket){
- socket.close();
- }
- } catch (IOException e) {
- e.printStackTrace();
- }
- }
- }
- });
- }
- }
布局文件:
- <?xml version="1.0" encoding="utf-8"?>
- <LinearLayout xmlns:android="http://schemas.android.com/apk/res/android"
- android:orientation="vertical" android:layout_width="fill_parent"
- android:layout_height="fill_parent">
- <TextView android:layout_width="fill_parent"
- android:layout_height="wrap_content" android:text="@string/hello" />
- <EditText android:layout_width="match_parent" android:id="@+id/editText1"
- android:layout_height="wrap_content"
- android:hint="input the message and click the send button"
- ></EditText>
- <Button android:text="send" android:id="@+id/button1"
- android:layout_width="fill_parent" android:layout_height="wrap_content"></Button>
- </LinearLayout>
启动服务器:
- javac com/test/socket/Server.java
- java com.test.socket.Server
运行客户端程序:
结果如图:


注意:服务器与客户端无法链接的可能原因有:
没有加访问网络的权限:<uses-permission android:name="android.permission.INTERNET"></uses-permission>
IP地址要使用:10.0.2.2
模拟器不能配置代理。
2。Apache接口
对于大部分应用程序而言JDK本身提供的网络功能已远远不够,这时就需要Android提供的Apache HttpClient了。它是一个开源项目,功能更加完善,为客户端的Http编程提供高效、最新、功能丰富的工具包支持。
下面我们以一个简单例子来看看如何使用HttpClient在Android客户端访问Web。
首先,要在你的机器上搭建一个web应用myapp,只有很简单的一个http.jsp
内容如下:
- <%@page language="java" import="java.util.*" pageEncoding="utf-8"%>
- <html>
- <head>
- <title>
- Http Test
- </title>
- </head>
- <body>
- <%
- String type = request.getParameter("parameter");
- String result = new String(type.getBytes("iso-8859-1"),"utf-8");
- out.println("<h1>" + result + "</h1>");
- %>
- </body>
- </html>
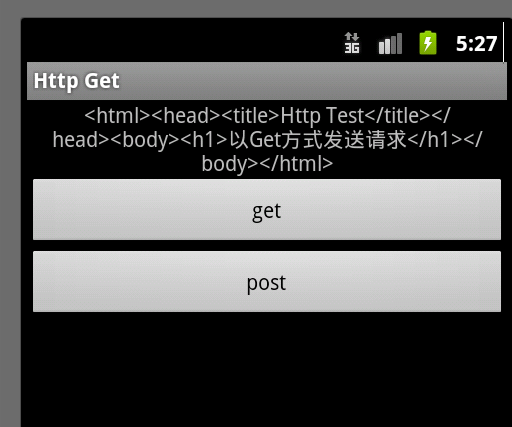
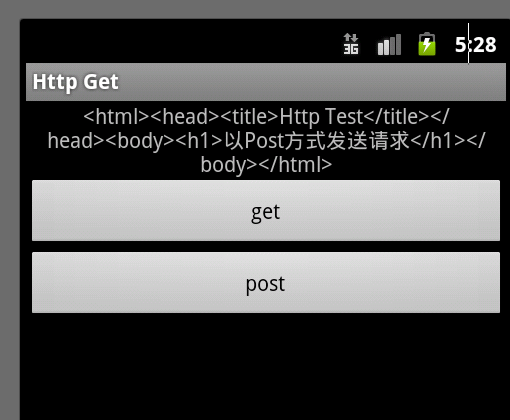
然后实现Android客户端,分别以post、get方式去访问myapp,代码如下:
布局文件:
- <?xml version="1.0" encoding="utf-8"?>
- <LinearLayout xmlns:android="http://schemas.android.com/apk/res/android"
- android:orientation="vertical"
- android:layout_width="fill_parent"
- android:layout_height="fill_parent"
- >
- <TextView
- android:gravity="center"
- android:id="@+id/textView"
- android:layout_width="fill_parent"
- android:layout_height="wrap_content"
- android:text="@string/hello"
- />
- <Button android:text="get" android:id="@+id/get" android:layout_width="match_parent" android:layout_height="wrap_content"></Button>
- <Button android:text="post" android:id="@+id/post" android:layout_width="match_parent" android:layout_height="wrap_content"></Button>
- </LinearLayout>
资源文件:
strings.xml
- <?xml version="1.0" encoding="utf-8"?>
- <resources>
- <string name="hello">通过按钮选择不同方式访问网页</string>
- <string name="app_name">Http Get</string>
- </resources>
主Activity:
运行结果如下:
3.android.net编程:
常常使用此包下的类进行Android特有的网络编程,如:访问WiFi,访问Android联网信息,邮件等功能。这里不详细讲。
Android的三种网络通信方式
原文:http://www.cnblogs.com/wanghuaijun/p/5441806.html