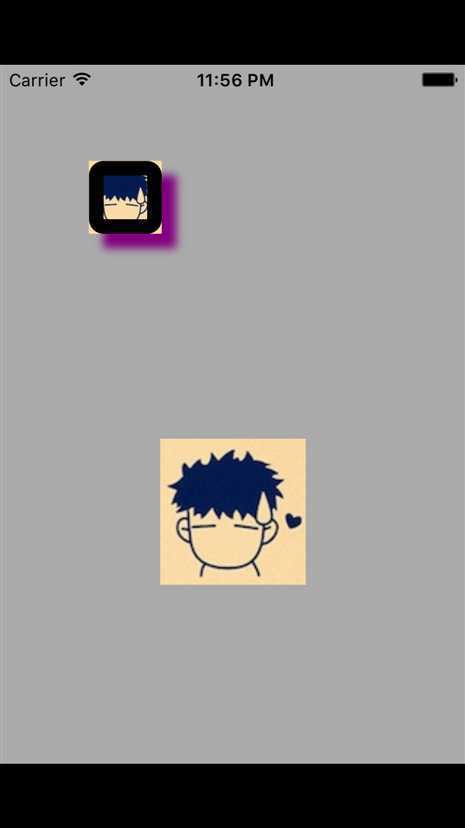
 1     /**/
 2     // 设置layer边框
 3     self.customView.layer.borderWidth = 10;
 4     // 设置layer边框颜色
 5     self.customView.layer.borderColor =[UIColor blackColor].CGColor;
 6     // 设置layer的圆角(设置主图层的圆角)
 7     self.customView.layer.cornerRadius = 10;
 8     self.customView.layer.bounds = CGRectMake(50, 50, 50, 50);
 9
10     // 设置超出主图层的部分剪切掉
11     //    self.customView.clipsToBounds = YES;
12     //    self.customView.layer.masksToBounds = YES;
13
14     // 设置的image不是展示在主图层上的, 是展示在子图层上的
15     self.customView.layer.contents = (id)[UIImage imageNamed:@"me"].CGImage;
16
17     // 设置阴影颜色
18     self.customView.layer.shadowColor = [UIColor purpleColor].CGColor;
19     // 设置阴影偏移位
20     // 如果为正数, 代表往右边偏移
21     self.customView.layer.shadowOffset = CGSizeMake(10, 10);
22     // 设置阴影透明的 0~1 1完全不透明 0 完全透明
23     self.customView.layer.shadowOpacity = 1;
原文:http://www.cnblogs.com/PJHome/p/5154397.html