这个问题的背景是,用户通过浏览器上传文件或Excel数据到系统中,页面需要时时显示后台处理进度,以增强用户的体验。
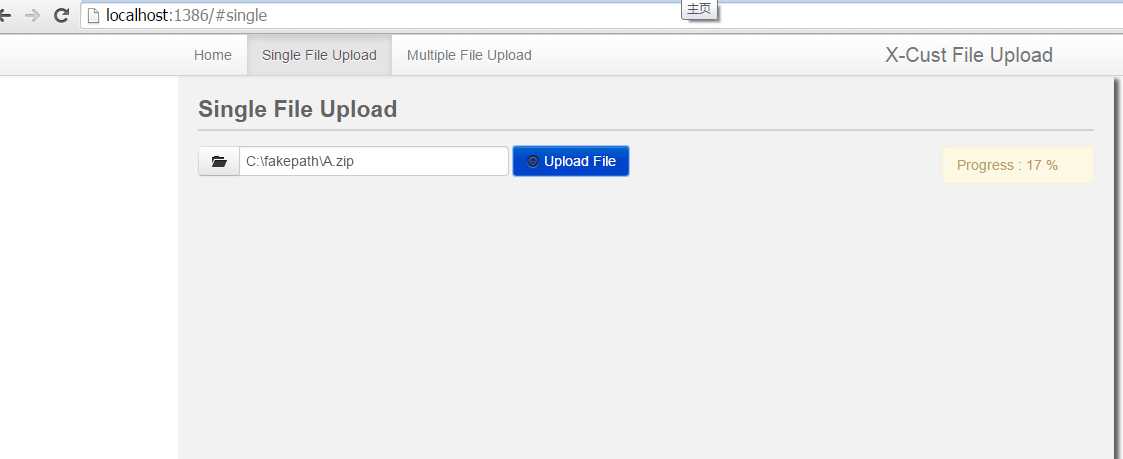
在GitHub上找到一个一个项目,基本实现了这个功能,具体效果如下图
代码实现过程大概如下:
第一步 :定义一个HomeController类,用来处理浏览器的上传文件和进度情况
 1 public class HomeController : Controller
 2     {
 3         //
 4         // GET: /Home/
 5
 6         public ActionResult Index()
 7         {
 8             return View();
 9         }
10
11         public ActionResult Homepage()
12         {
13             return View();
14         }
15
16         [HttpPost]
17         public ActionResult GetUniqueIdentifier()
18         {
19             return Json(Guid.NewGuid().ToString());
20         }
21
22         [HttpPost]
23         public ActionResult SingleFileUpload()
24         {
25             return View();
26         }
27
28         [HttpPost]
29         public ActionResult MultipleFileUpload()
30         {
31             return View();
32         }
33
34         [HttpPost]
35         public ActionResult DoUploadSingleFile(HttpPostedFileBase berkas, string guid)
36         {
37             bool result = false;
38             string filePath = Server.MapPath("~/Temporary/") + berkas.FileName;
39
40             int fileLength = berkas.ContentLength;
41             HttpContext.Cache[guid + "_total"] = fileLength;
42             byte[] fileContent = new byte[fileLength];
43             int bufferLength = 5 * 1024;
44             byte[] buffer = new byte[bufferLength];
45             int bytesRead = 0;
46
47             FileStream outputFileStream = new FileStream(filePath, FileMode.Create, FileAccess.ReadWrite);
48             using (Stream inputFileStream = berkas.InputStream)
49             {
50                 while ((bytesRead = inputFileStream.Read(buffer, 0, buffer.Length)) > 0)
51                 {
52                     outputFileStream.Write(buffer, 0, bytesRead);
53                     outputFileStream.Flush();
54
55                     HttpContext.Cache[guid + "_current"] = Convert.ToInt32(HttpContext.Cache[guid + "_current"]) + bytesRead;
56                     Debug.WriteLine(HttpContext.Cache[guid + "_current"].ToString());
57                     Thread.Sleep(50);
58                 }
59
60                 inputFileStream.Close();
61                 inputFileStream.Dispose();
62             }
63
64             outputFileStream.Close();
65             outputFileStream.Dispose();
66             result = true;
67
68             return Json(result);
69         }
70
71         [HttpPost]
72         public ActionResult TrackProgress(string guid)
73         {
74             try
75             {
76                 double paramCurrentFileSize = Convert.ToDouble(HttpContext.Cache[guid + "_current"]);
77                 double paramTotalFileSize = Convert.ToDouble(HttpContext.Cache[guid + "_total"]);
78                 int uploadProgress = Convert.ToInt32(paramCurrentFileSize * 100 / paramTotalFileSize);
79
80                 return Json(uploadProgress);
81             }
82             catch (Exception)
83             {
84                 return Json(0);
85             }
86         }
87     }
DoUploadSingleFile方法用来将用户传来的文件保存到Temporary目录下,将文件的总大小和已经写入的文件数量分别放到Cache中,以便接下来读取这两个数据。
TrackProgress方法就是讲DoUploadSingleFile方法总保存的两个数读出并计算比例。
第二步,Web页面,主要存放三部分,主要是上传组件和进度显示,通过JS绑定了按钮和上传送事件。
@using X_Cust_File_Upload.Helpers

@{
    Layout = null;
    ViewBag.Title = "SingleFileUpload";
}


@*@PageHelper.Script("angular-js/js/angular.js", false)
@PageHelper.Script("underscore-js/js/underscore.js", false)*@
@PageHelper.Script("single-file-upload.js", true)

<div class="title">
    Single File Upload
</div>

<div class="content">
    <form method="post" enctype="multipart/form-data" id="form_upload" name="form_upload" style="display: none;">
        <input type="file" name="berkas" id="berkas" />
    </form>

    <div class="control-group">
        <div class="input-prepend">
            <button class="btn" id="buttonSelectFile"><i class="icon icon-folder-open"></i></button>
            <input type="text" name="berkas_name" id="berkas_name" class="span3 uneditable-input" placeholder="Select File to Upload" />
        </div>

        <button class="btn btn-primary" id="buttonUploadFile"><i class="icon icon-upload"></i> Upload File</button>

        <div id="notification-area" class="alert info pull-right notification-area">
        </div>
    </div>
</div>


<script type="text/javascript">
    $(document).ready(function () {
        $("#buttonSelectFile").on("click", function (event) {
            $("#berkas").trigger("click");
        });

        $("#berkas").on("change", function (event) {
            $("#berkas_name").val($("#berkas").val());
        });

        $("#buttonUploadFile").on("click", function (event) {
            var notificationArea = new NotificationArea($("#notification-area"));

            var fileUpload = new FileUpload();
            fileUpload.uploadSingleFile($("#form_upload"), "87shd-09ld2-9sdkl-09dlp-02kdm", "@Url.Content("~/Home/DoUploadSingleFile")", notificationArea, "@Url.Content("~/Home/TrackProgress")");
        });
    });
</script>
第三步,主要是ajax上传事件,即single-file-upload.js文件,在上传数据的时候,开启一个定时器,每个1s向TrackProgress方法发送一次请求,获取已经上传的进度。
function NotificationArea($container) {
    this.showProgressNotification = function ($progress, $isVisible) {
        $container.html("<span>Progress : " + $progress + " %</span>");

        if ($isVisible == false) {
            $container.fadeIn();
        }
    };

    this.showErrorNotification = function () {
        $container.removeAttr("class");
        $container.addClass("alert error pull-right");
        $container.html("<span>Upload error.</span>");
    };

    this.showSuccessNotification = function () {
        $container.removeAttr("class");
        $container.addClass("alert info pull-right");
        $container.html("<span>Uploaded successfully.</span>");
    };
}

function FileUpload() {
    this.guid = "";
    this.onUploadProgress = false;
    this.notificationObject = null;
    this.trackUrl = "";

    this.uploadSingleFile = function ($form, $guid, $url, $notificationObject, $trackUrl) {
        if ($form != null) {
            this.guid = $guid;
            //this.notificationObject = $notificationObject;
            this.trackUrl = $trackUrl;
            var trackTimer = setInterval(function () {
                trackUploadProgress($trackUrl, $notificationObject, $guid);
            }, 1000);

            $form.ajaxSubmit({
                url: $url,
                data: {
                    guid: $guid
                },
                beforeSend: function () {
                    $notificationObject.showProgressNotification(0, false);
                },
                success: function (data) {
                    console.log("sukses");

                    if (data == true) {
                        clearTimeout(trackTimer);
                        $notificationObject.showSuccessNotification();
                    }
                    else {
                        $notificationObject.showErrorNotification();
                    }
                },
                error: function (xhr, ajaxOptions, error) {
                    $notificationObject.showErrorNotification();
                },
                complete: function () {
                    clearTimeout(trackTimer);
                }
            });
        }
    };
}

function trackUploadProgress($url, $notificationObject, $guid) {
    console.log("Upload progress");

    $.ajax({
        url: $url,
        type: "post",
        data: {
            guid: $guid
        },
        success: function (data) {
            $notificationObject.showProgressNotification(data, true);
        }
    });
}
到此,主要功能已经完成,上传文件可以看到大致的进度。
但是我将这个功能集成到自己的系统时候遇见了一个很奇怪的问题:进度一直不提示,直到数据上传成功了,提示显示100%。这个问题的原因还不确定,请院子里的大牛帮忙分析下。
在原有的系统上增加权限验证功能,如果用户没有登录系统是不能上传数据的,但也就是这个功能,造成了上面的问题。我的做法如下:
第四步,增加AuthorizeAttribute认证子类,主要功能是用来判断用户是否登录系统,如果没有登录,跳转到登录页面,让用户登录。
public class CustomAuthorizeAttribute : AuthorizeAttribute
    {
        public override void OnAuthorization(AuthorizationContext filterContext)
        {
            base.OnAuthorization(filterContext);
        }

        protected override bool AuthorizeCore(HttpContextBase httpContext)
        {

            if (httpContext == null)
            {
                throw new ArgumentNullException("httpContext");
            }
            if (!httpContext.User.Identity.IsAuthenticated)//未登录的话 跳转到登录界面
                return false;
            return true;
        }

        protected override void HandleUnauthorizedRequest(AuthorizationContext filterContext)
        {
            filterContext.Result = new RedirectResult("/Auth/LogOn");
        }
    }
第五步,用户登录成功后,跳转到上传页面,这个工程使用ajax登录,JS代码如下:
$.ajax({
                type: "POST",
                url: "LogOn",
                data: { name: $("#UserName").val(), pwd: $("#Password").val(), vlidateCode: $.trim($("#ValidateCode").val())},
                dataType: "json",
                success: function (data) {
                    if(data.isSuccess)
                    {
                        window.location = data.url;
                    }
                    else
                    {
                        alert(data.message);
                        changeCheckCode();
                    }
                    $("#Loading").hide();
                }
            });
后台登录过程为AuthorController类,主要设置用户已经登录标志,

1 [HttpPost]
2         public JsonResult LogOn(string name, string pwd, string vlidateCode)
3         {
4                 FormsAuthentication.SetAuthCookie(name, false);
5                 var json = new { isSuccess = true, url = "../Home" };
6                 return Json(json);
7         }
第六步,在HomeController类上添加认证属性
  [CustomAuthorize(Roles="T1")]
    public class HomeController : Controller
    {
        ........
    }
原作者程序地址:http://files.cnblogs.com/files/crazyguo/x-cust-file-upload-master.zip
我增加后的程序:http://files.cnblogs.com/files/crazyguo/My.7z
原文:http://www.cnblogs.com/crazyguo/p/4878345.html
